How to Sort by Date in Excel (in a Quick and Convenient Way)
Today we’ll be talking about how to sort by date in Excel. We’ll go through a quick and convenient way how to sort dates in a table starting with the oldest or the latest one.
Well, here we go!
Would you rather watch this tutorial? Click the play button below!
How to Format the Column Containing the Dates as ‘Date’
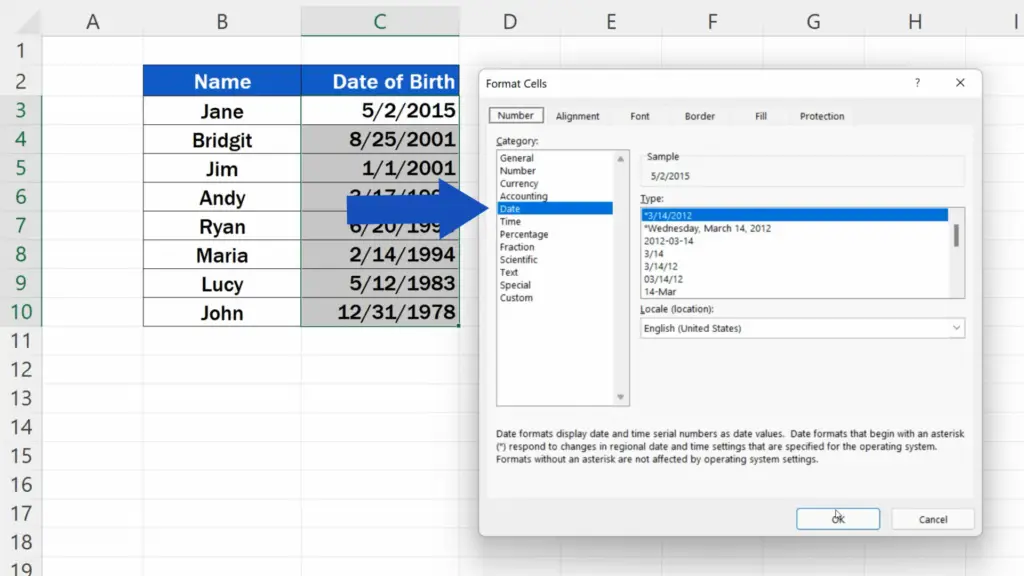
To sort by date in Excel, first we need to make sure that the column containing the dates has been formatted as ‘Date’.
How to Sort by Date in Excel – ‘Oldest to Newest’
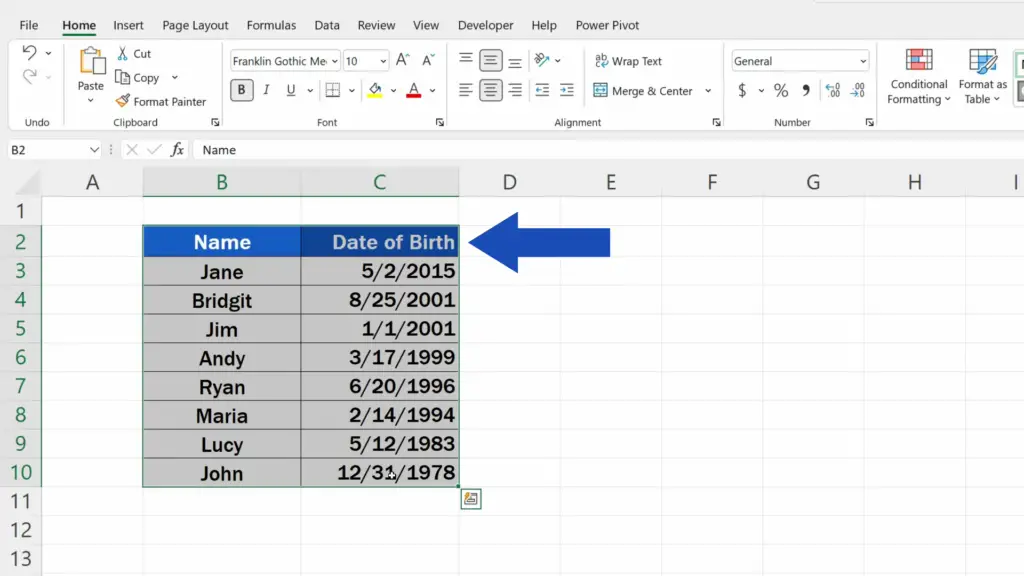
Then we select the whole area which we want to sort, header including.
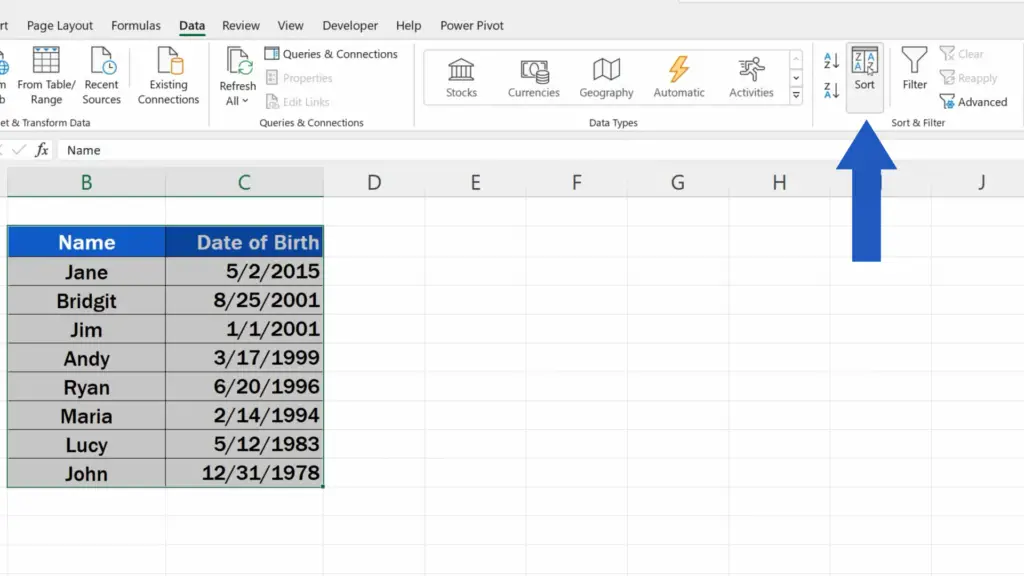
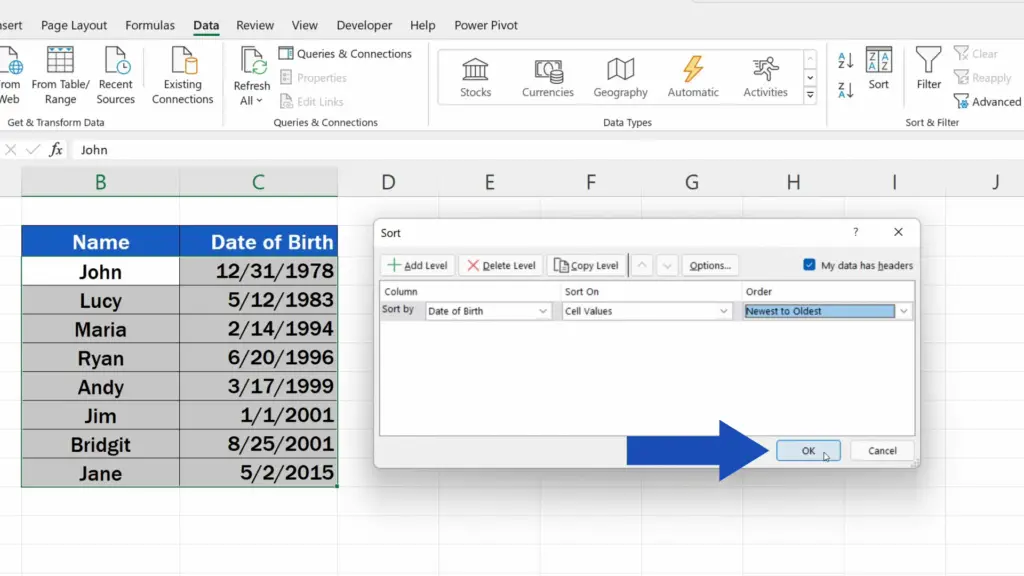
Once we’ve selected the area, we go to the Data tab and click on ‘Sort’.
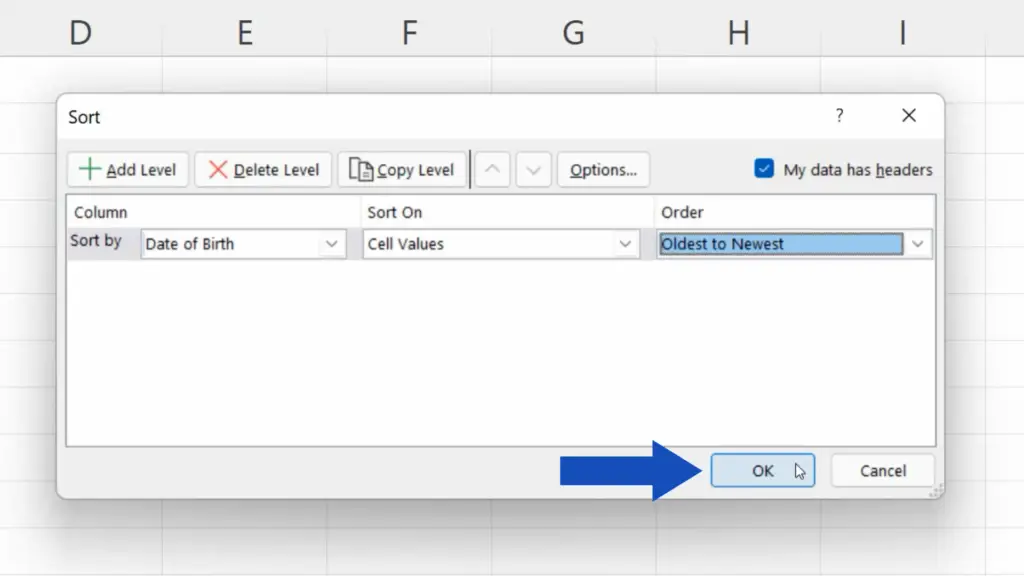
A pop-up window appears where we can set necessary details.
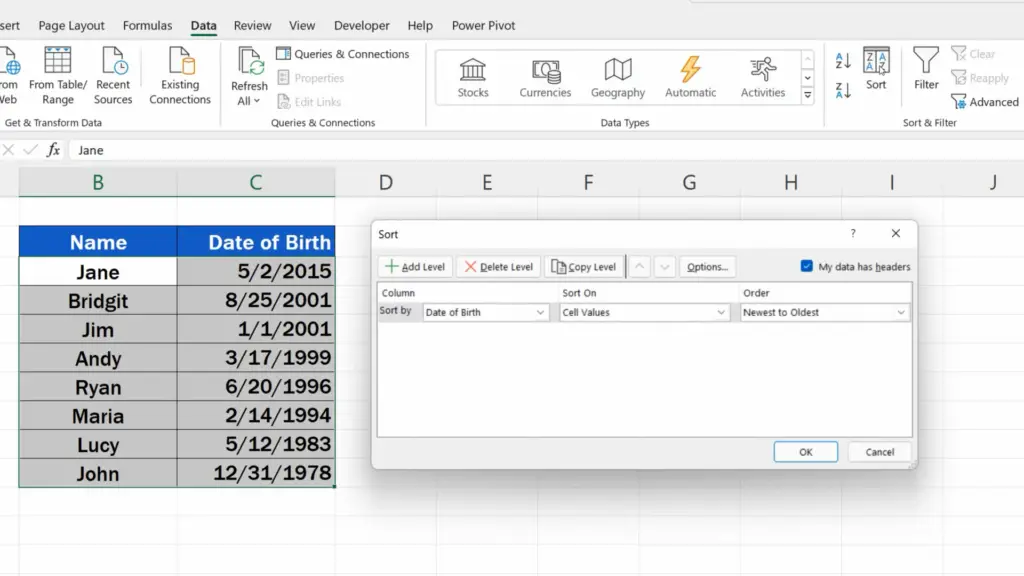
Since we’ve included the header, we’ll keep the option ‘My data has headers’ selected.
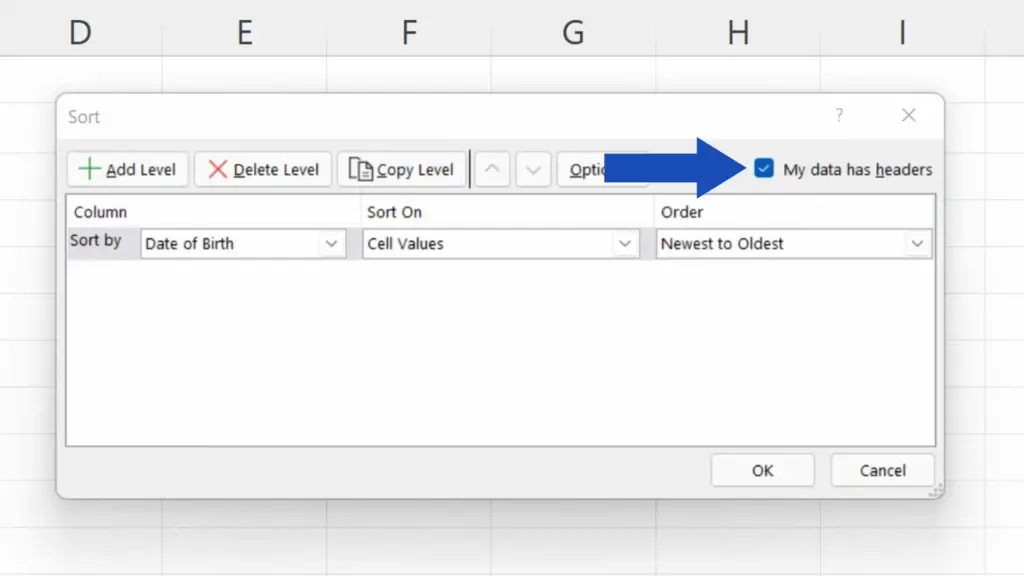
With this we’ll make sure that the names of the column headers from the table will be displayed in the ‘Sort by’ drop-down list.
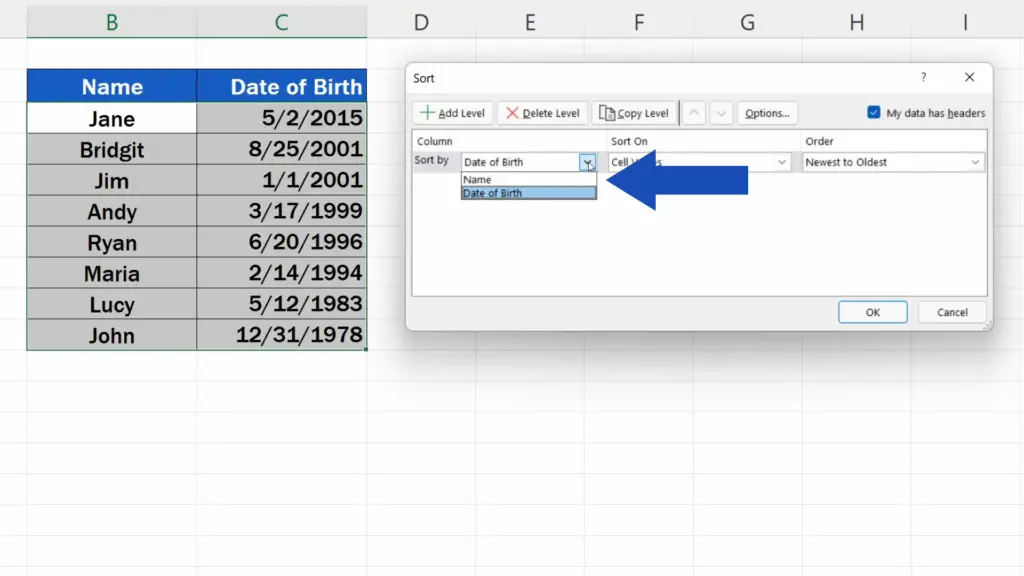
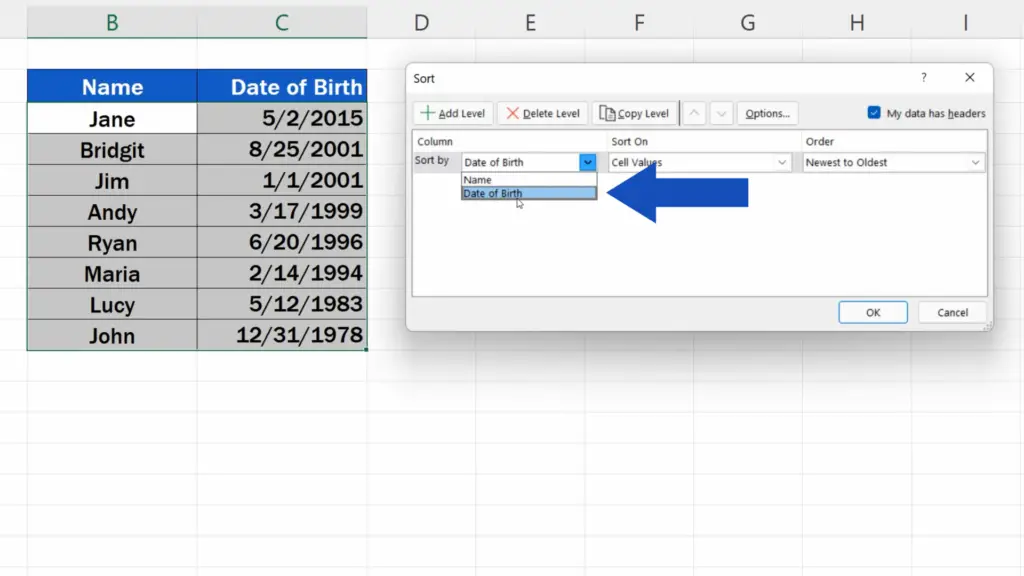
Here we want to sort by ‘Date of Birth’, so we’ll select this option and move on to the next step.
Now, in the section ‘Order’, we can choose which way we want to sort the dates – ‘Oldest to Newest’ or ‘Newest to Oldest’.
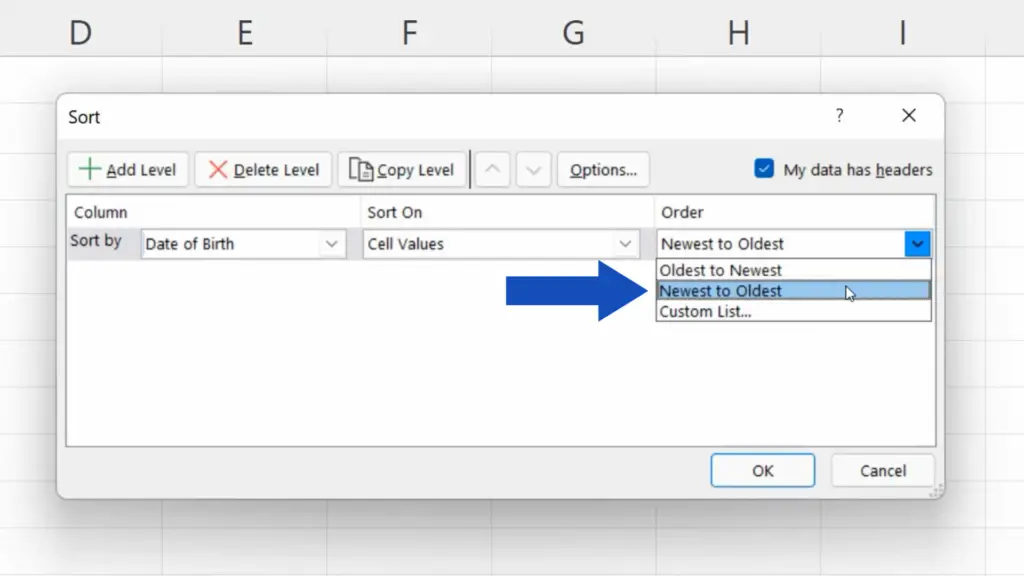
Let’s click on ‘Oldest to Newest’ and confirm with OK.
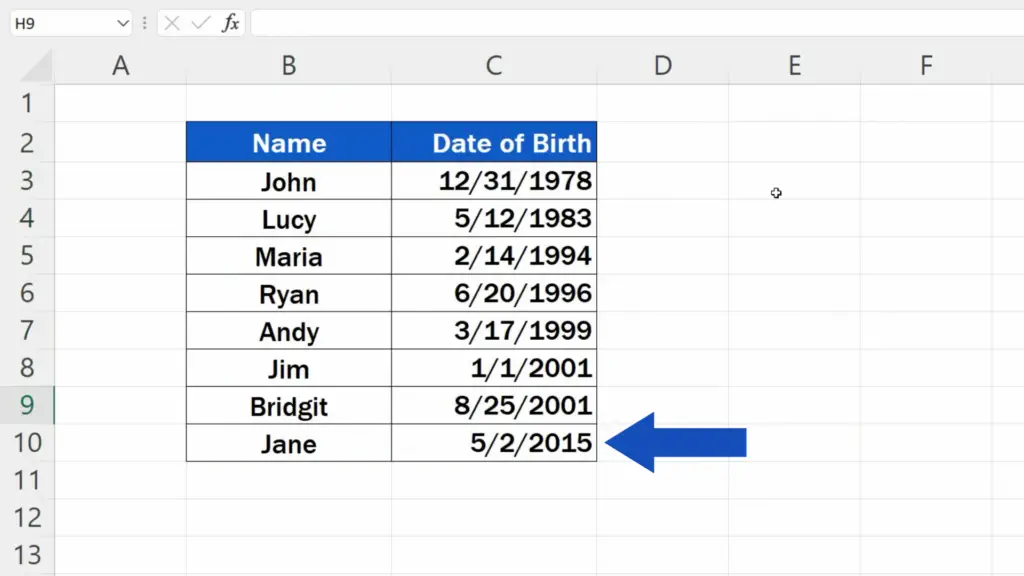
As you can see, all the dates have now been sorted, starting with the oldest one – just as we wanted.
How to Sort by Date in Excel – ‘Newest’ to Oldest’
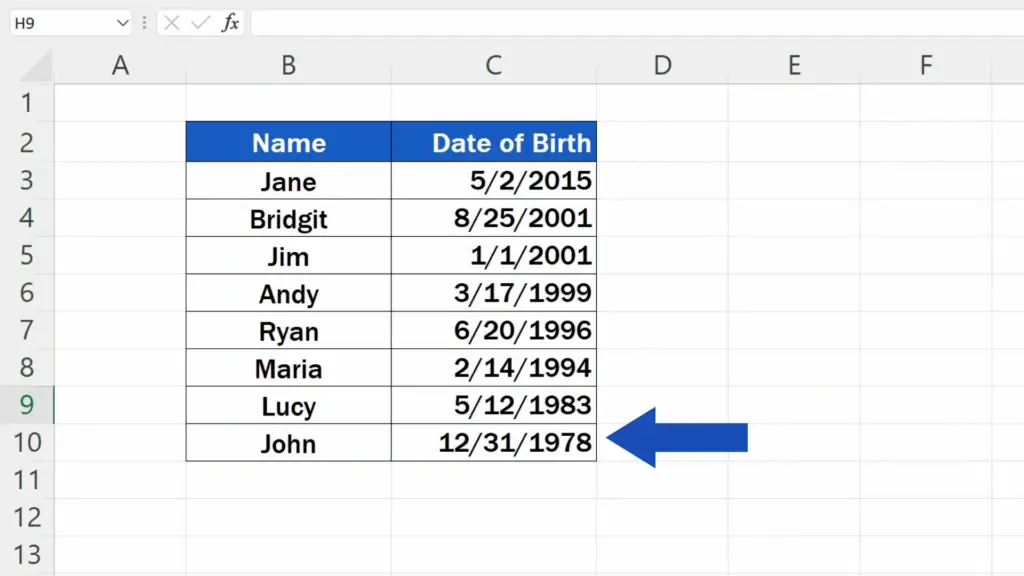
If you need to sort the dates the other way round, you can follow the same procedure, just select the option ‘Newest to Oldest’ in the last step.
To have a closer look at other possibilities to sort in Excel, check out more tutorials by EasyClick Academy! The links are included in the list below.
Don’t miss out a great opportunity to learn:
- How to Sort Alphabetically in Excel
- How to Remove Blank Rows in Excel – ADVANCED
- How to Clear or Remove Filter in Excel
If you found this tutorial helpful, give us a like and watch other tutorials by EasyClick Academy. Learn how to use Excel in a quick and easy way!
Is this your first time on EasyClick? We’ll be more than happy to welcome you in our online community. Hit that Subscribe button and join the EasyClickers!
Thanks for watching and I’ll see you in the next tutorial!


