How to Search in Excel Sheet (From Basic to Advanced)
Working with a significant amount of data means that from time to time, you need to be able to look for something specific promptly. That’s when the function Search in Excel comes handy. Let’s have a look together at how to search in an Excel sheet in a simple and easy way.
Would you rather watch this tutorial? Click the play button below!
Where to Find the Function Search in Excel
If you want to search for specific data in Excel, go to the ribbon, which is the top bar in Excel, and look for ‘Find & Select’. Click on it and select ‘Find’.
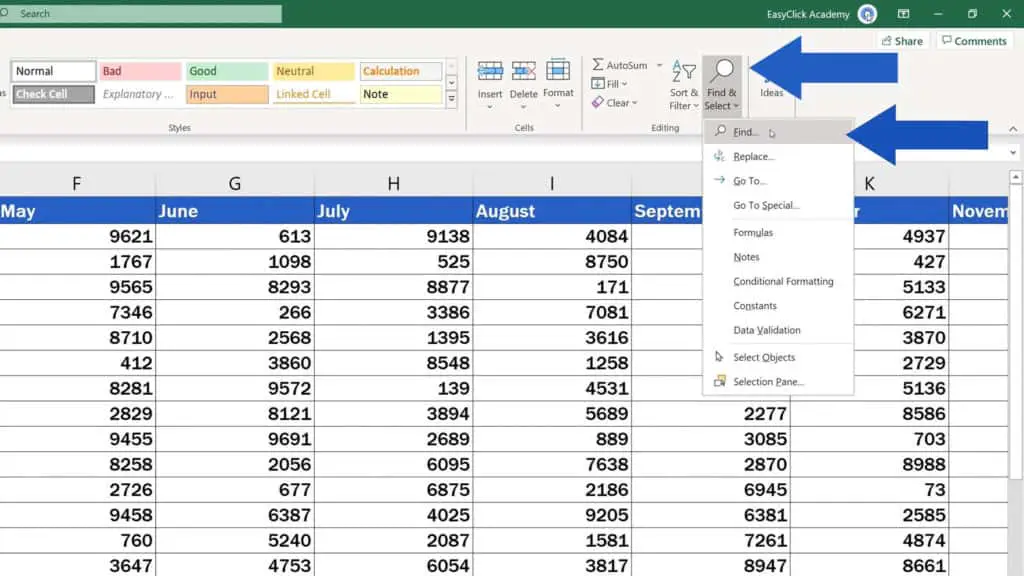
A window will pop up where you can search for data using quite a lot of options that are available, so let’s go through them one by one now.
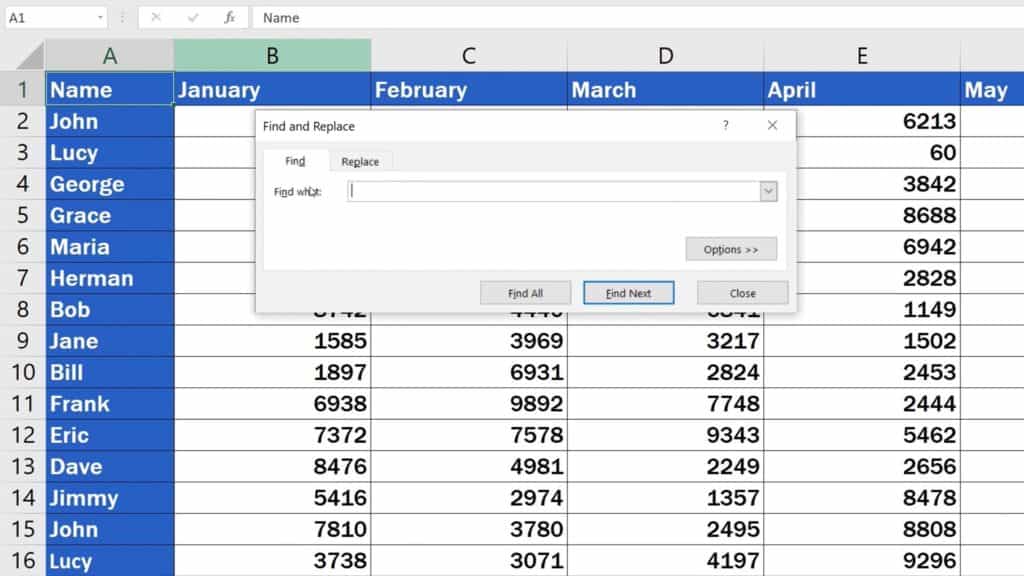
How to Search in Excel For a Specific Word
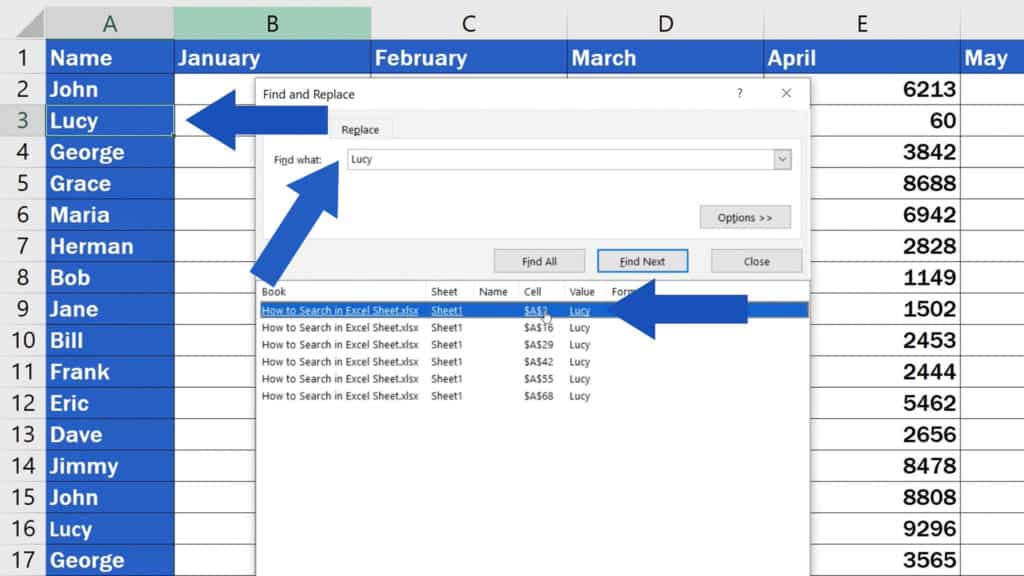
The easiest way to search in Excel is to type a specific text or number you’re looking for into the field that says ‘Find what’. For example, we’re gonna search for ‘Lucy’.
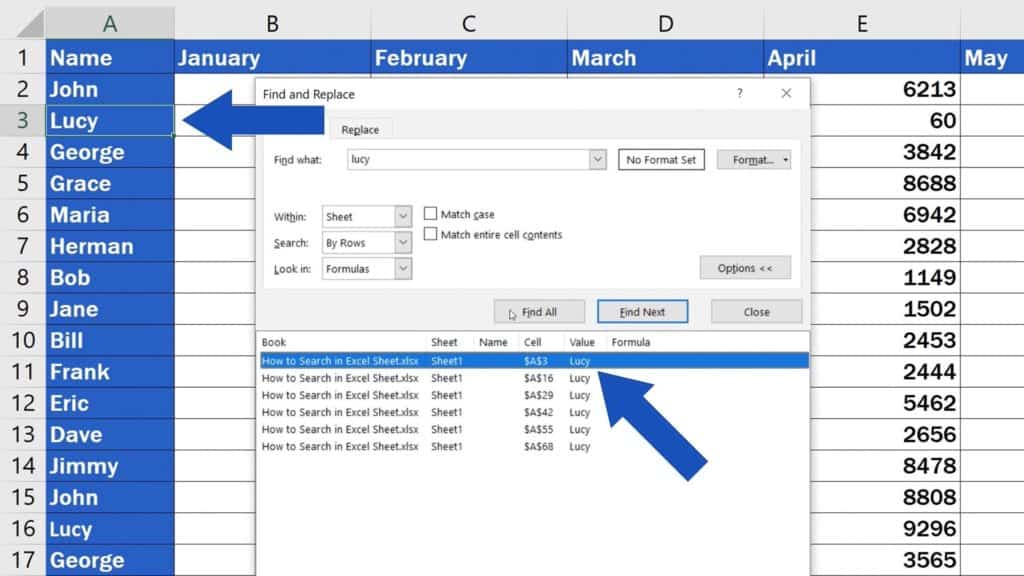
Let’s click on ‘Find All’ and Excel will list all occurrences of ‘Lucy’ within the data table. You can conveniently click through specific cells which contain the searched text.
And we’re gonna take a look a bit further.
How to Use Advanced Filters in Excel
To do an advanced search, there are more options available in Excel and we’re gonna go through them together now.
You can see these options, if you click on the button ‘Options’.
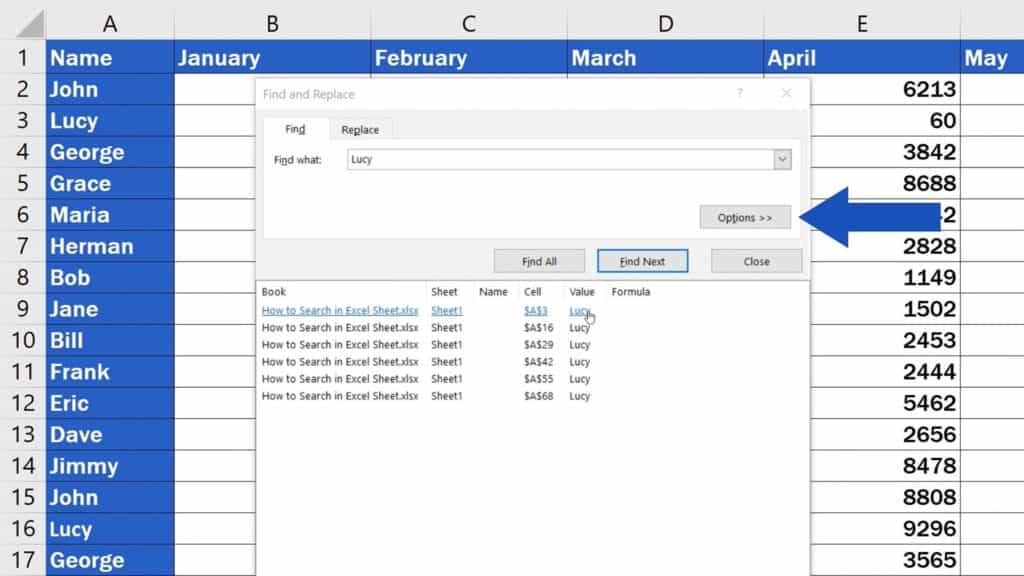
And you can:
- Search based on specific formatting
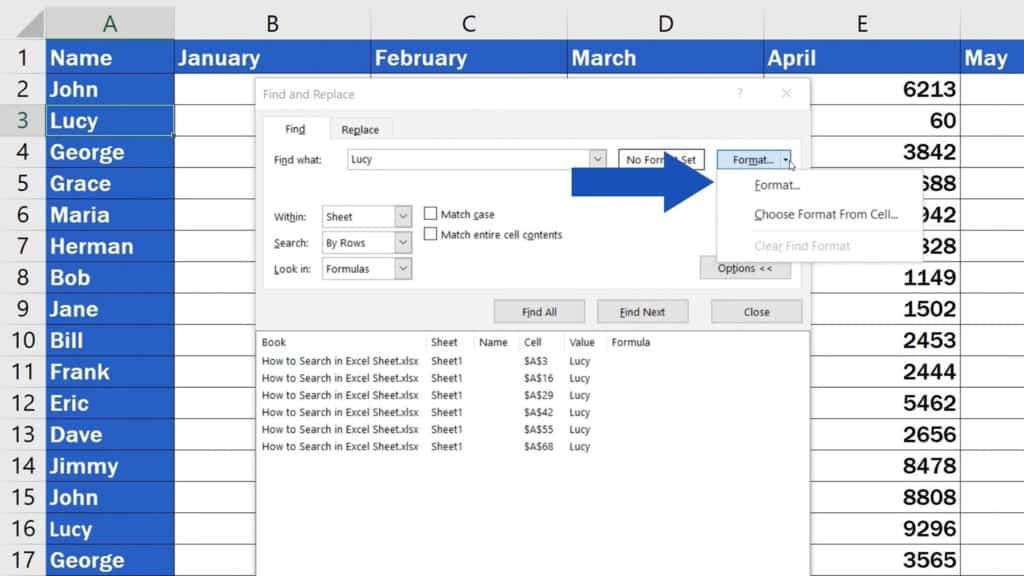
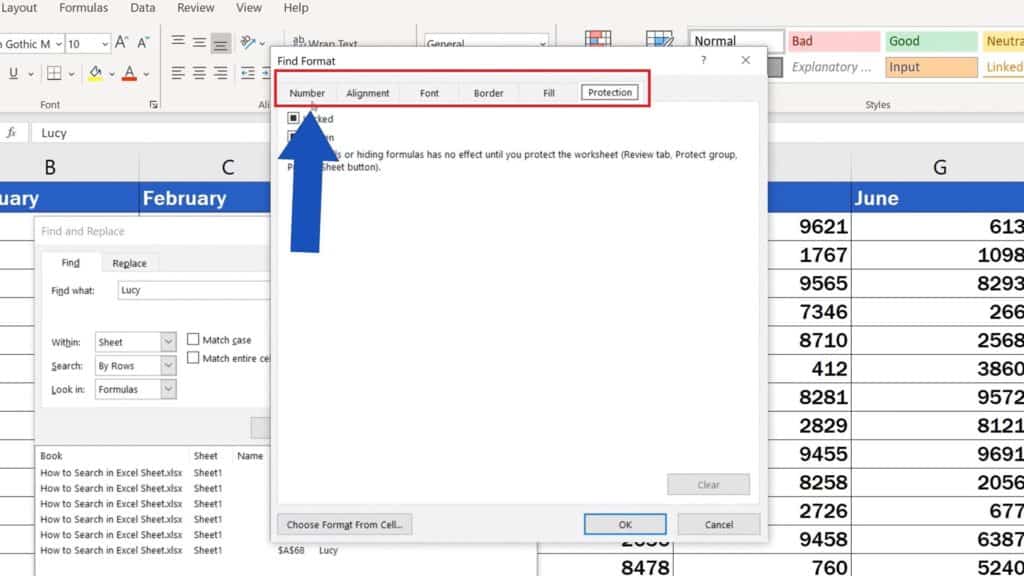
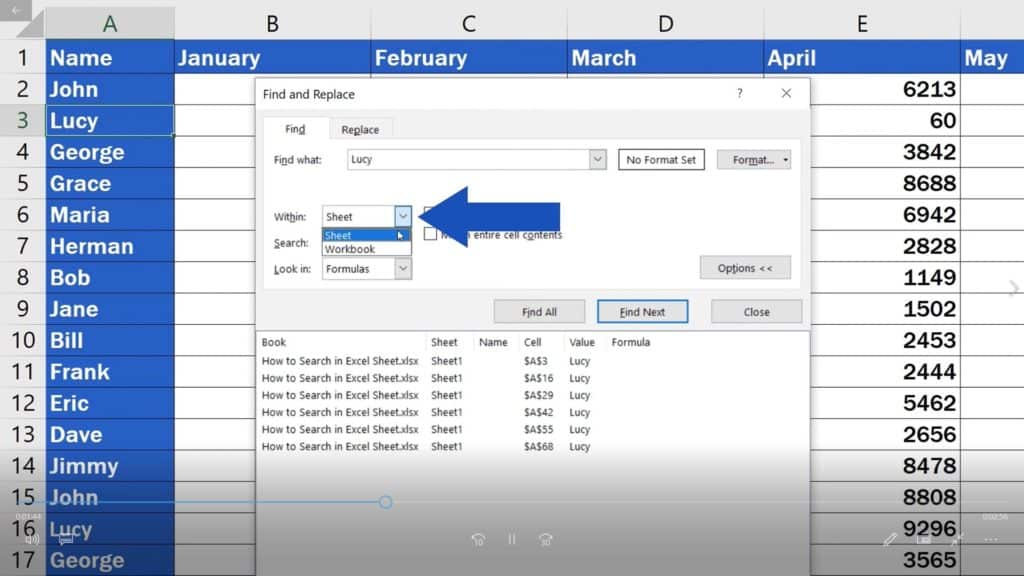
- Choose whether you want to search within the sheet or the whole workbook
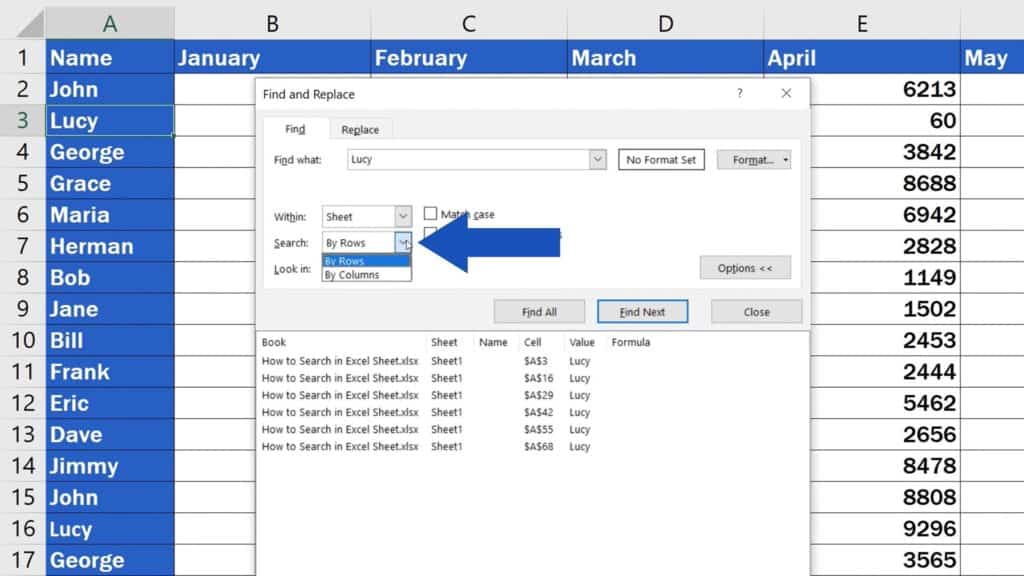
- Choose whether to search either ‘By Rows’, which is set in the field by default, or ‘By Columns’
- Or you can also set whether you want to search only in formulas, values, notes or comments
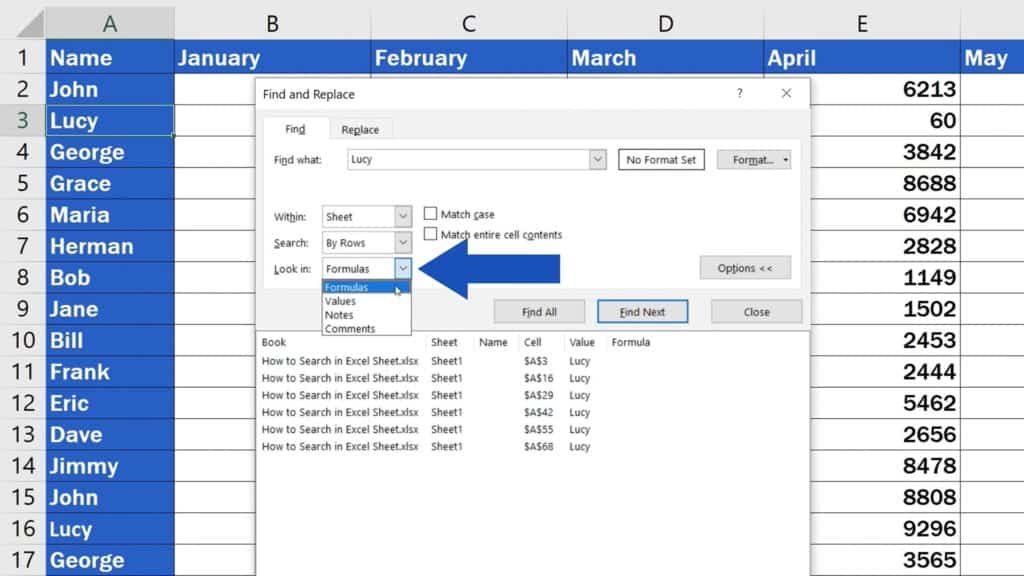
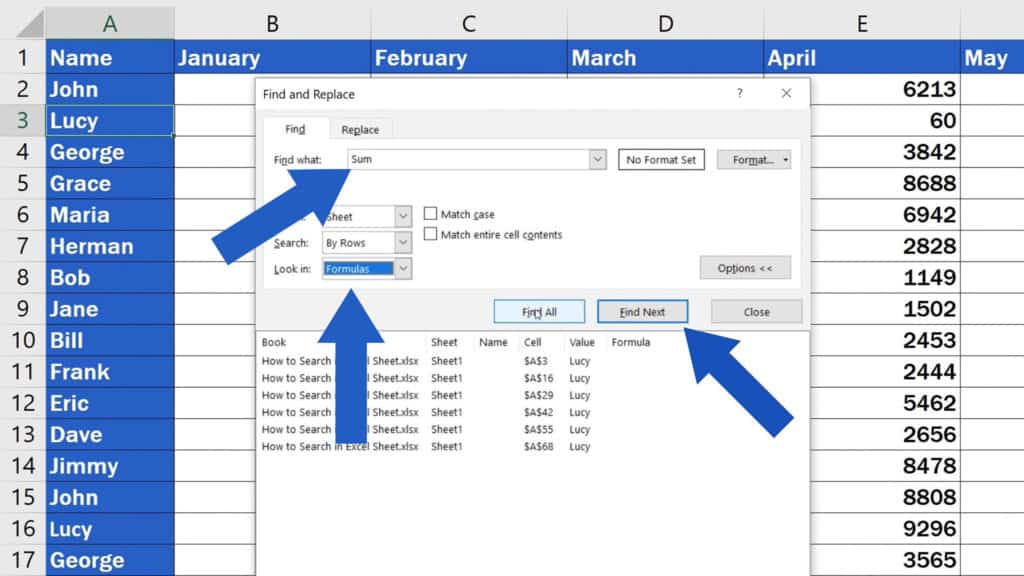
So, let’s say we want to find where within the sheet is the function ‘Sum’. We’ll click into the field ‘Find what’, type in ‘Sum’ and choose to look in formulas. Then we’ll click on ‘Find Next’.
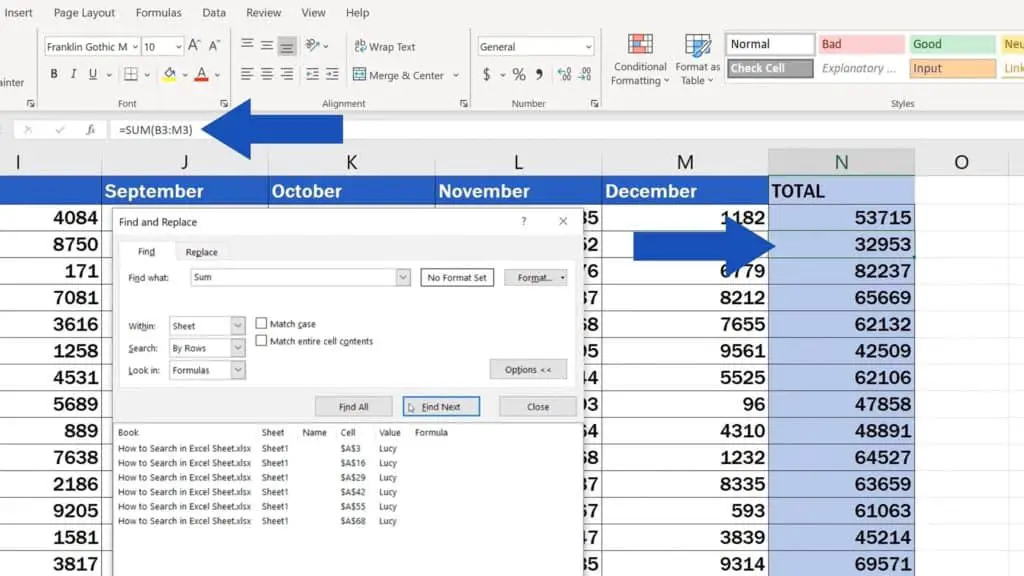
Excel will immediately find the next cell where the function ‘Sum’ is located.
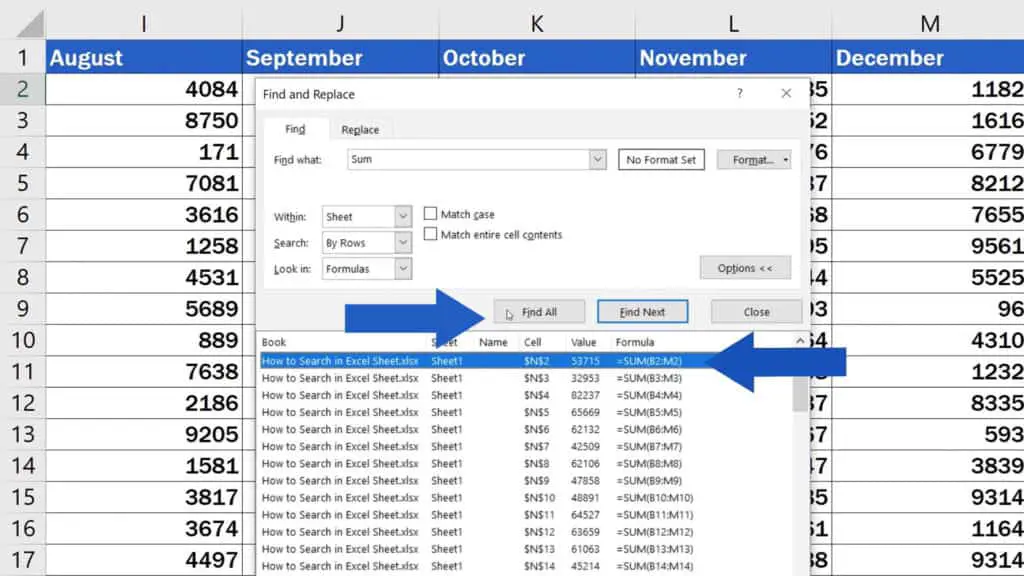
If we click on ‘Find All’, we’ll see all cells that contain this function listed below.
Quite handy, right? But let’s carry on.
Select the option ‘Match case’ only if you want to make the search case-sensitive. This basically means that it matters whether the text you type into the field will be written in lower- or upper-case letters.
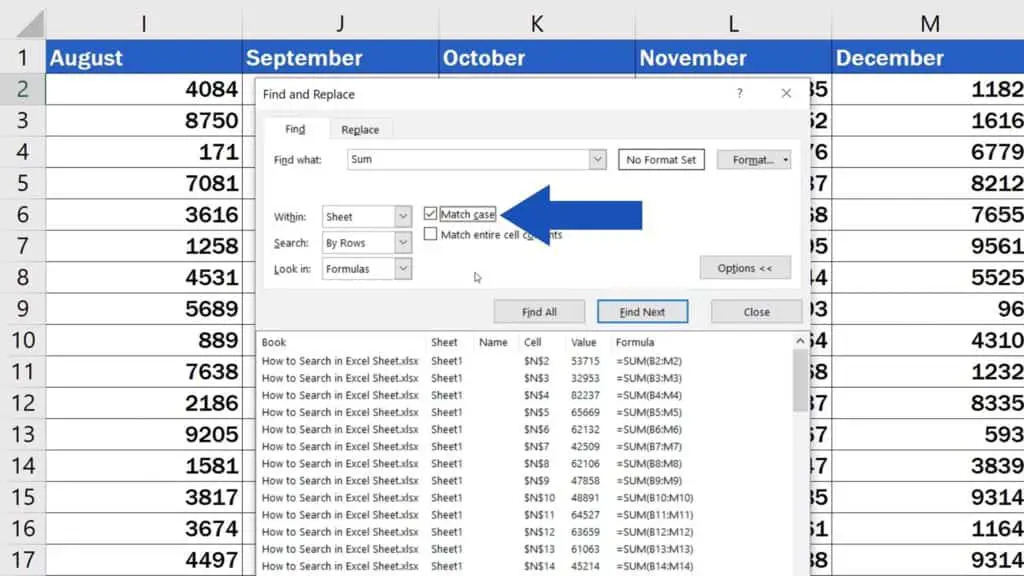
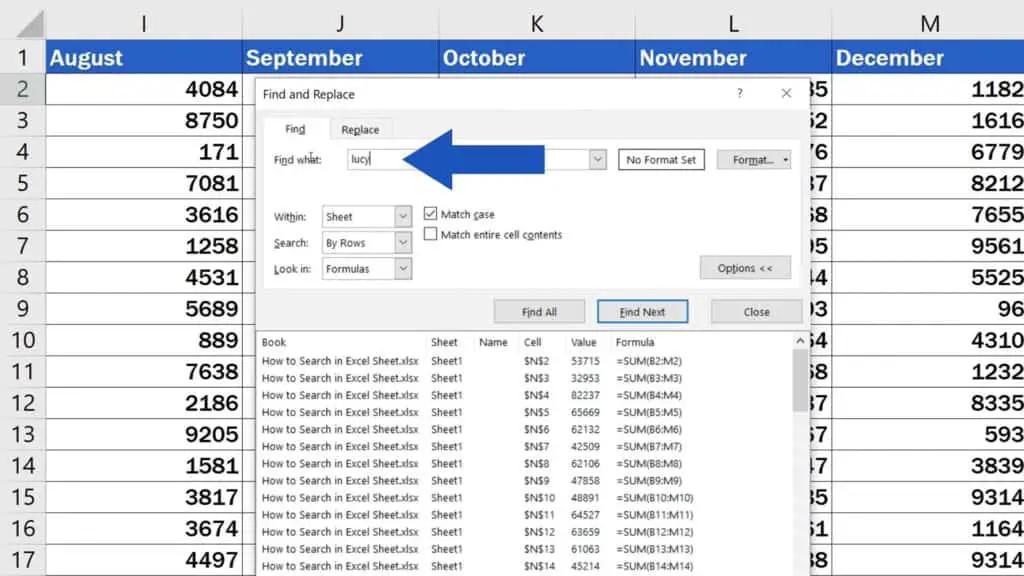
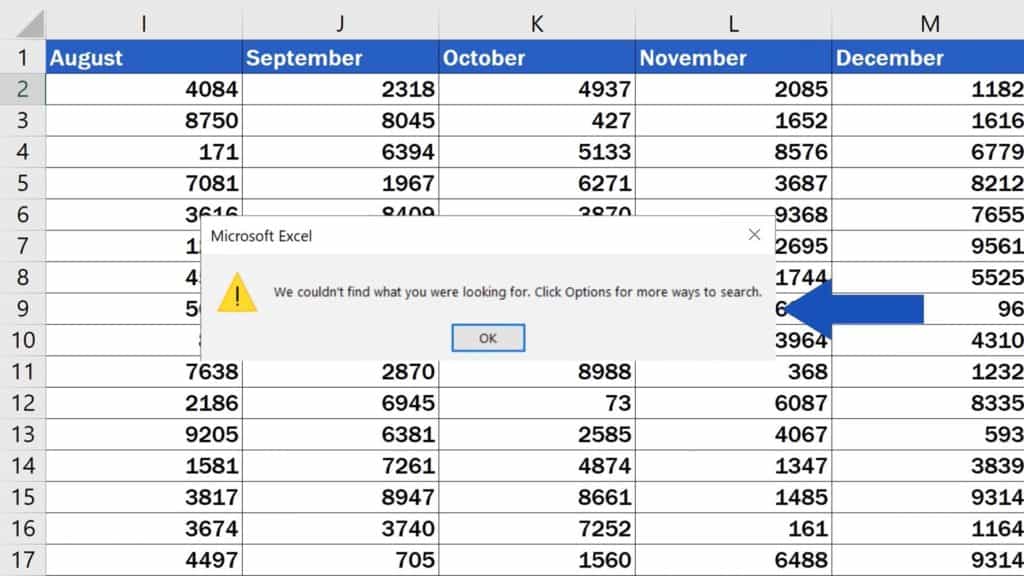
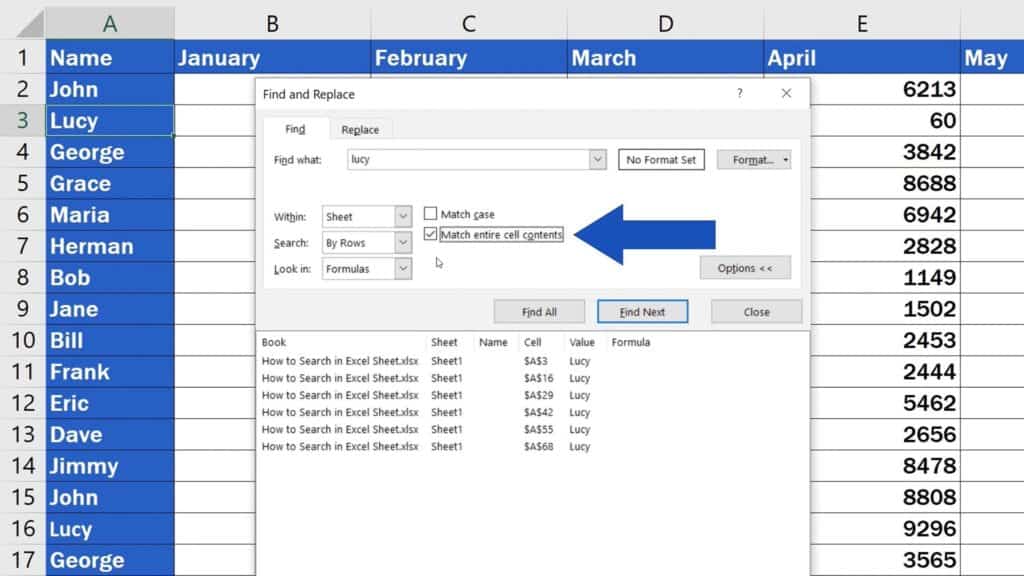
Let’s say we want to find ‘lucy’, but we type the name all in lower case. If you’ve selected ‘Match case’, there will be exactly 0 results, because our ‘Lucy’ is spelt with the capital ‘L’ in the table.
If we untick the box, Excel will not differentiate between the lower and upper case and it will find all cells that contain the text ‘Lucy’ with the capital ‘L’, even though we typed it all in lower case.
Then there’s the option ‘Match entire cell contents’, which you should select if you want to search for the cells that contain just and only those characters that you type into the ‘Find what’ field.
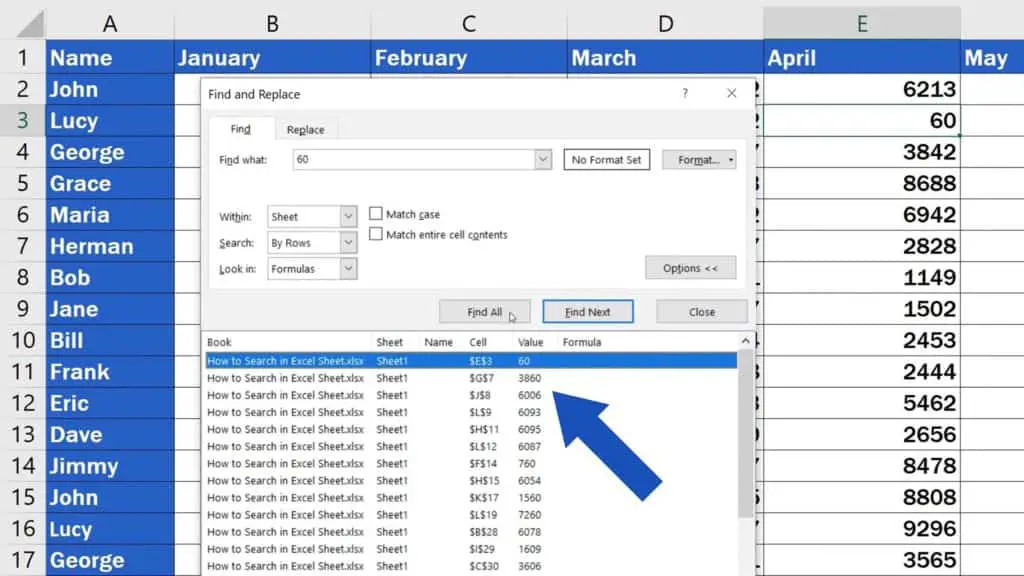
This is quite helpful if you want to look for, let’s say the number 60. If we don’t select the box ‘Match entire cell contents’, Excel will find all cells where the number 60 is present at least partially. In our case, this means that one of the results will be the cell containing the value 3860.
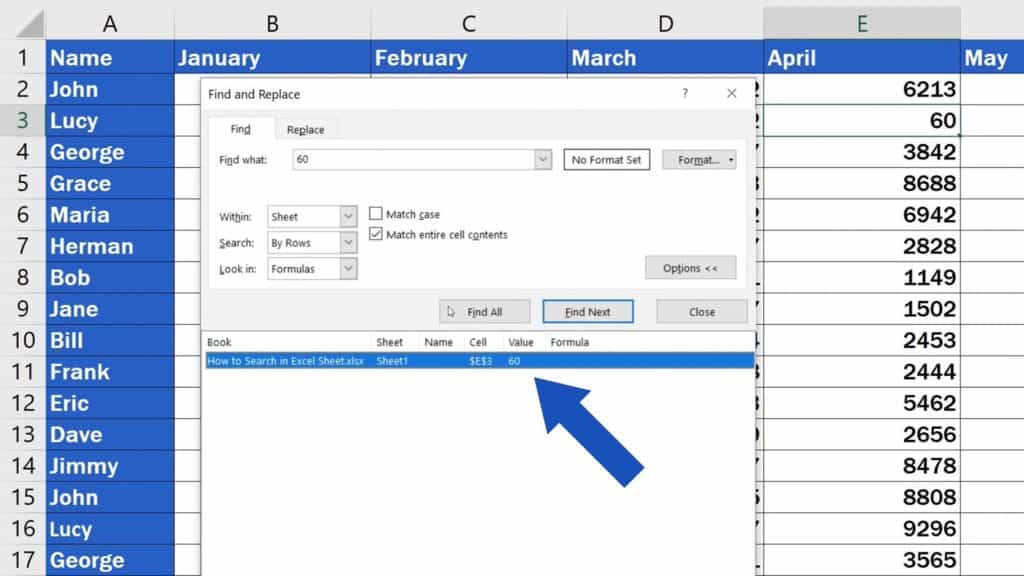
However, if we tick the box, we’ll see the cells containing only the value 60 among the results. Here in our table, it’s just one cell.
How to Search in Excel Sheet – Shortcut
And finally, here’s a little time-saving trick: you don’t have to click through all the buttons to get to the search window. You can also use the shortcut ‘Ctrl’ and ‘F’. This will start the search function straight away and you can immediately start looking for the data you need to find. Just as you saw in this tutorial.
Don’t miss out a great opportunity to learn:
If you found this tutorial helpful, give us a like and watch other video tutorials by EasyClick Academy. Learn how to use Excel in a quick and easy way!
Is this your first time on EasyClick? We’ll be more than happy to welcome you in our online community. Hit that Subscribe button and join the EasyClickers!
Thanks for watching and I’ll see you in the next tutorial!


