How to Create Filter in Excel
In this tutorial, we’ll cover how to create a filter in Excel. At the end of the session, you’ll be able to filter out relevant data within a table effectively.
Let’s have a look!
See the video tutorial and transcription below:
See this video on YouTube:
https://www.youtube.com/watch?v=04_kOwCnyog
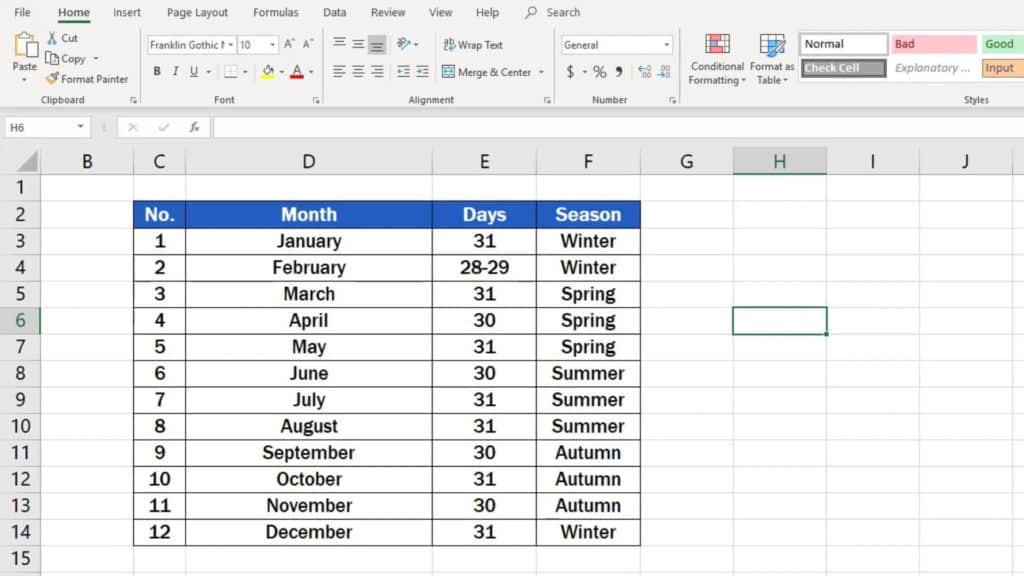
To see how to create a filter in Excel, we’ll use this table as an example.
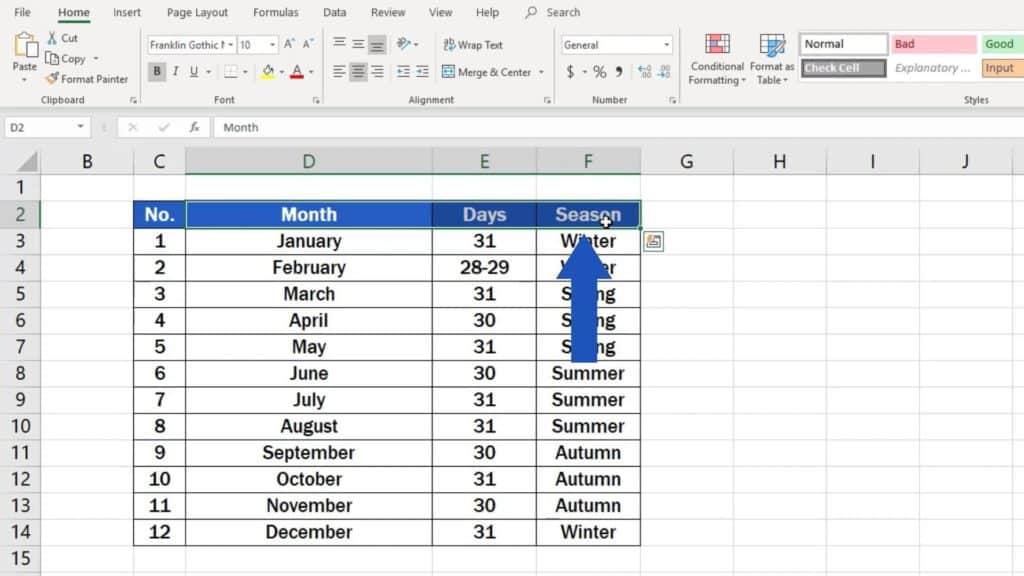
The first thing to do, if you want to use the filter function in a table, is to use headers to select the columns in which you want to apply the filter. Let’s select the headers ‘Month’, ‘Days’ and ‘Season’ now.
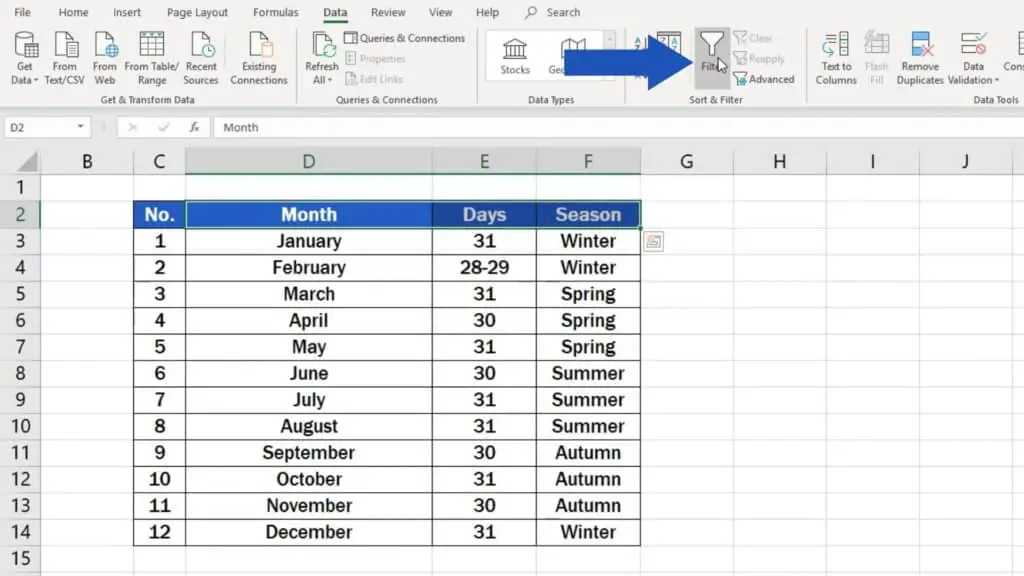
Click on the ‘Data’ tab and look for the group ‘Sort & Filter. Then find and click on the ‘Filter’ option.
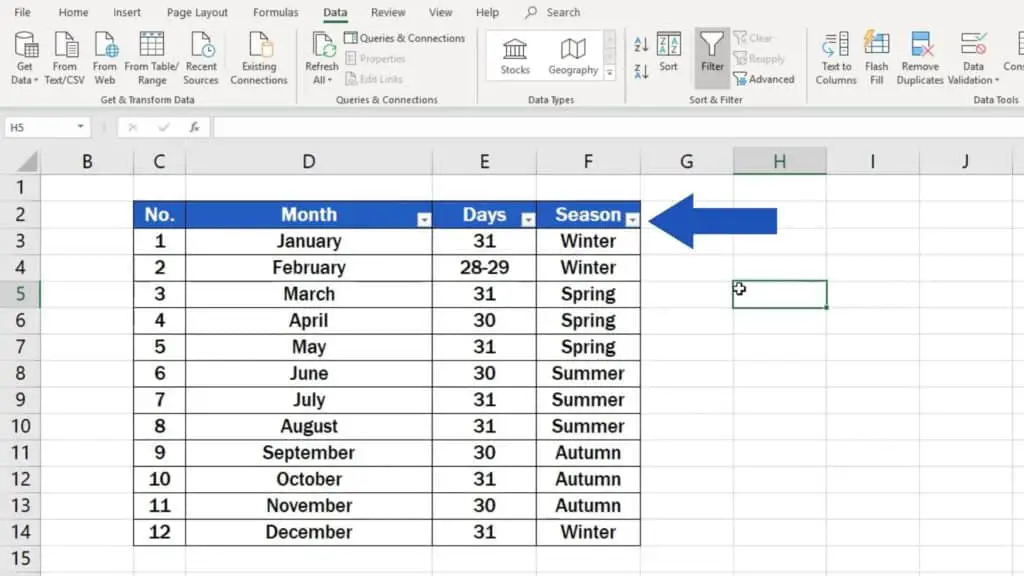
Excel will create these drop-down arrows (or buttons) in the cells containing the headers of the selected columns. You can use the buttons to filter out the information you need in each column.
Now, it’s time to take a step forward and try out the filter we’ve just created in practice.
How to Filter Out in Excel
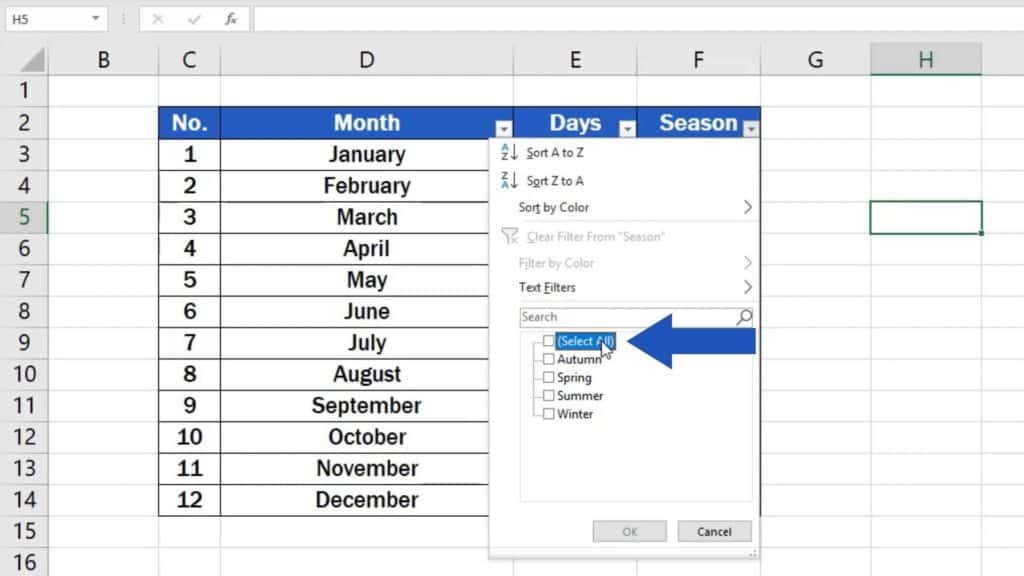
Let’s say we want to filter out only the summer months. Click on the drop-down arrow in the column ‘Season’. All of the options are selected by default. Unselect the options by clicking on ‘Select All’.
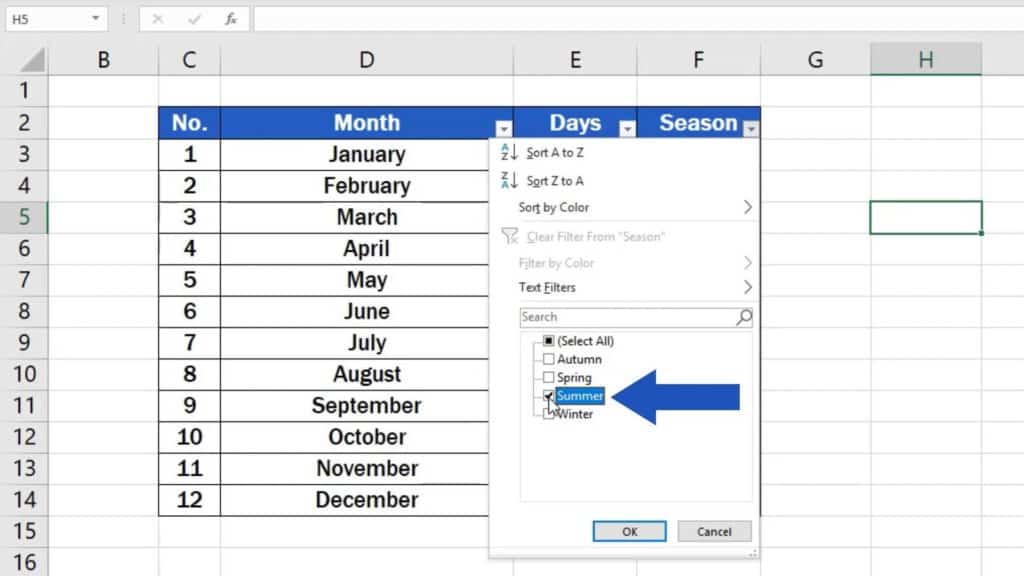
Now tick the box next to the option which we want to filter out, which is ‘Summer’.
Confirm with OK and you see that only the summer months are now displayed in the table.
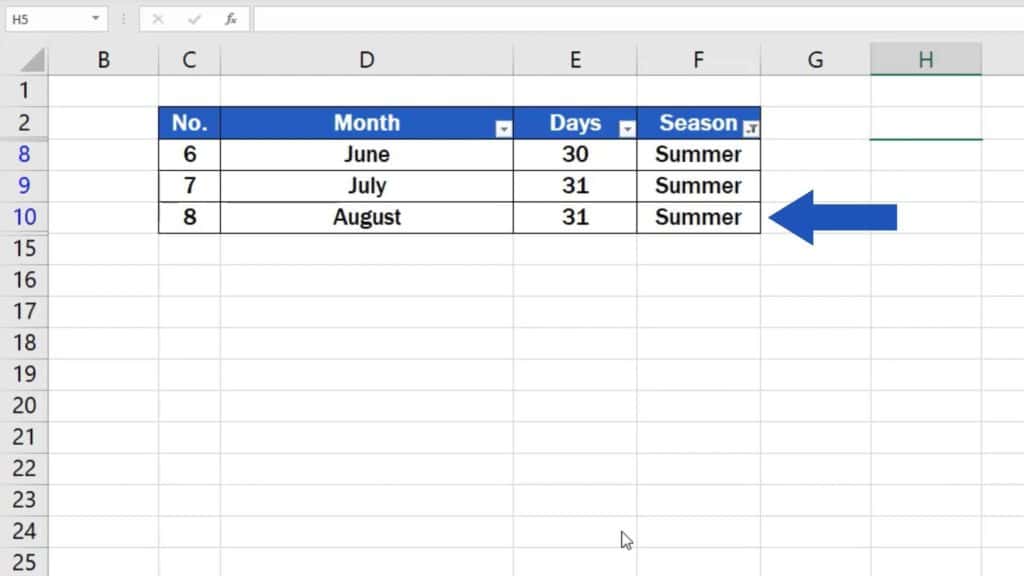
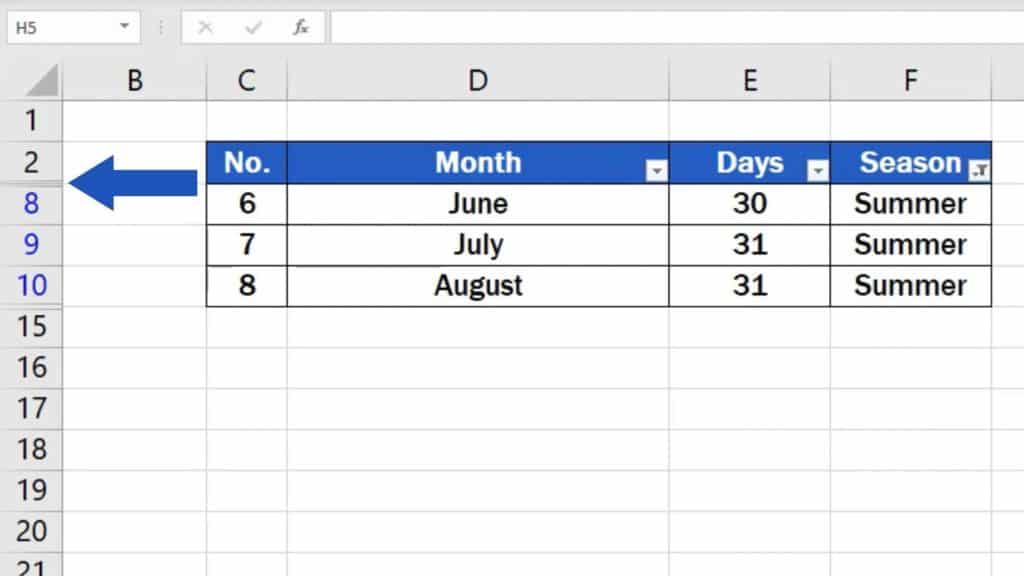
If you have a look at row numbers, you’ll see that the rows with data for other months have not been deleted. They’re only hidden. Look, there’s row 2 and rows 8, 9 and 10 follow right after. Then the next row number you can see is 15.
How to Use More Filters in Excel
Now we can carry on. Imagine you need to do some more filtering, let’s say you want to filter out months that have thirty-one days only. We’ll do what you’re already familiar with.
Click on the drop-down arrow in the column ‘Days’, click on ‘Select All’, and once everything’s been unselected, tick the box for only those months that have thirty-one days, so select ‘31’.
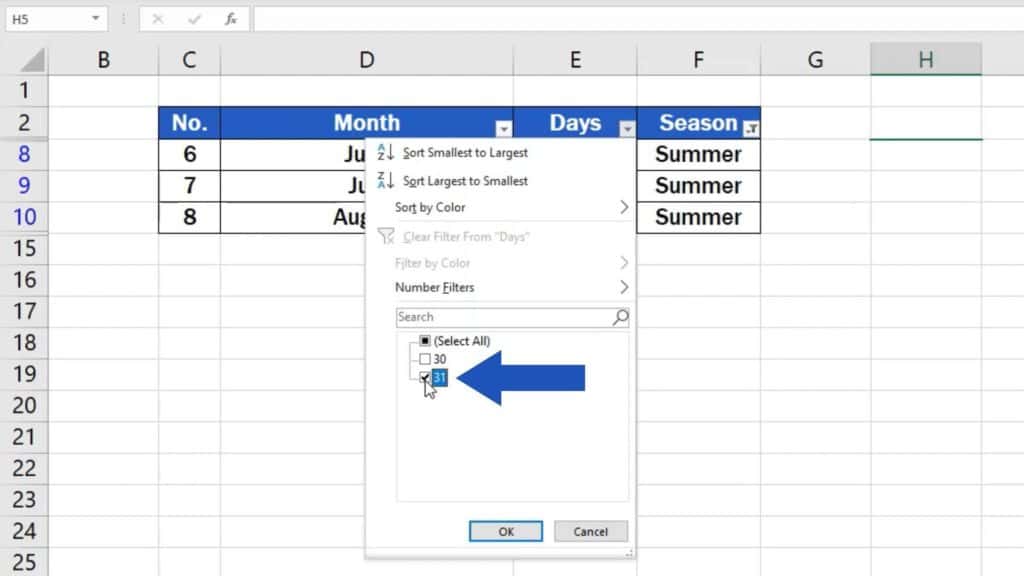
Click on OK and here we go! We’ve used filter to show only those summer months that have thirty-one days.
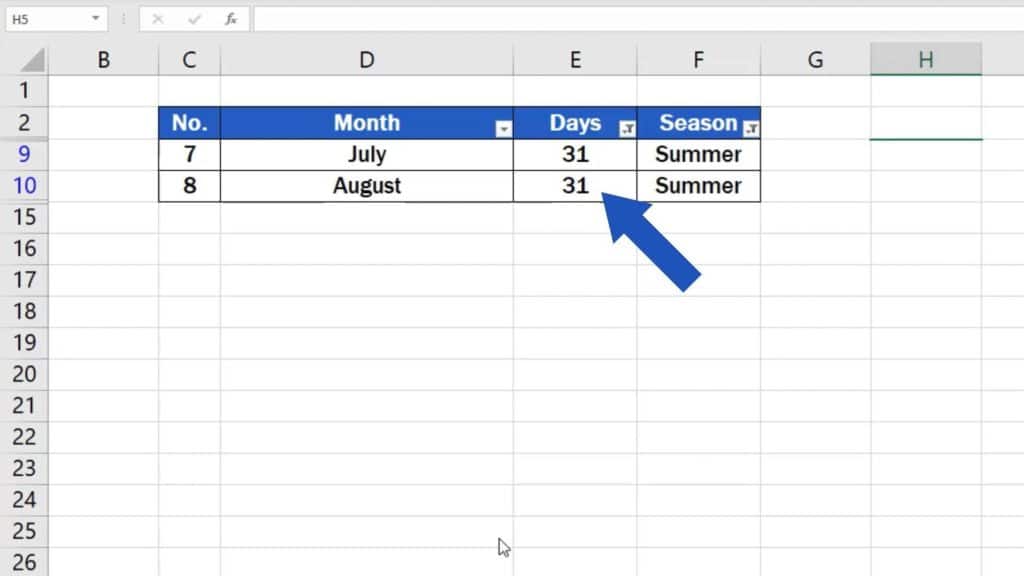
Easy, right? You can follow these steps to filter out data in any table you need.
Are you wondering:
If you found this tutorial helpful, give us a ‘like’ and watch other video tutorials by EasyClick Academy. Learn how to use Excel in a quick and easy way!
Is this your first time on EasyClick? We’ll be more than happy to welcome you in our online community. Hit that Subscribe button on our YouTube channel and join the EasyClickers!
See you in the next tutorial!


