How to Create a QR Code in Excel (Free and Simple)
In this video tutorial, we’ll be having a look at how to create a QR code in Excel in a free and simple way.
Keep watching to learn more!
Would you rather watch this tutorial? Click the play button below!
If you’d like to create QR codes in Excel, first you’ll need to install a handy add-in which will enable you to do so.
How to Install QR4Office Add-in
And this is easier than you might think. Click on the Insert tab, find the group ‘Add-ins’ and click on the option ‘Get Add-ins’.

You’ll see a library of features where you can use the option ‘Search’ to look for the ‘QR4Office’ add-in.
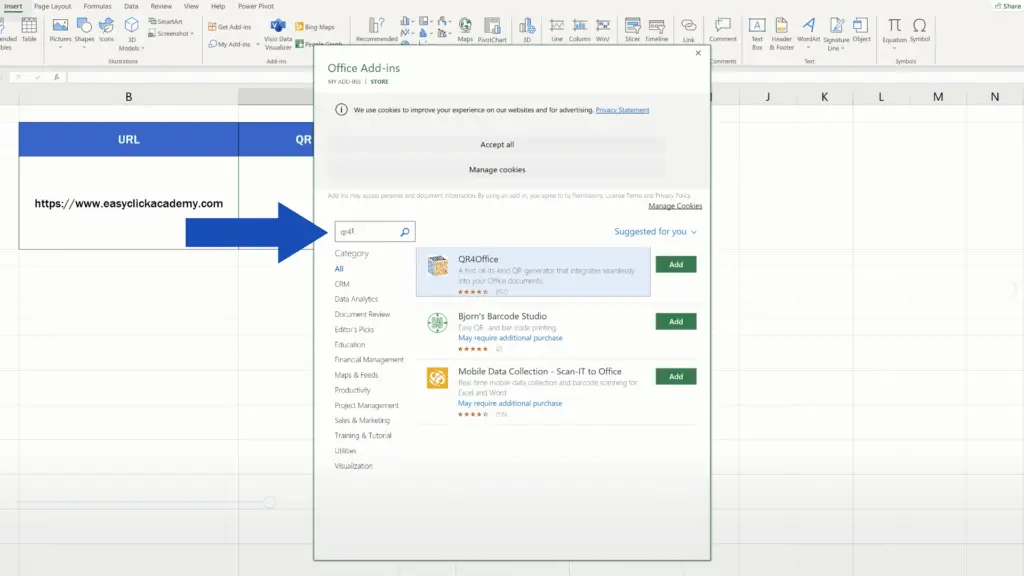
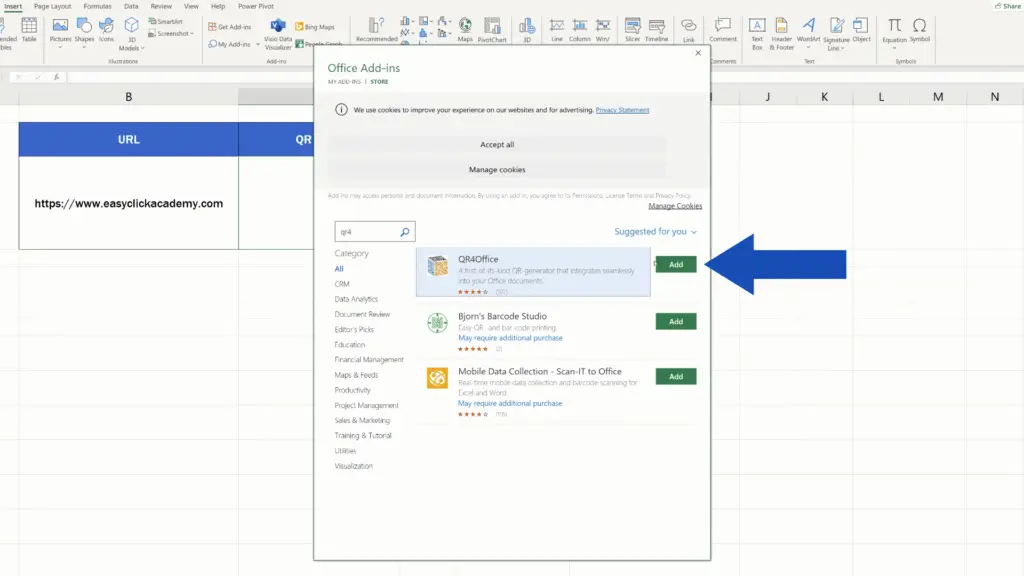
Now just confirm your choice by clicking on ‘Add’, and you’re all set!
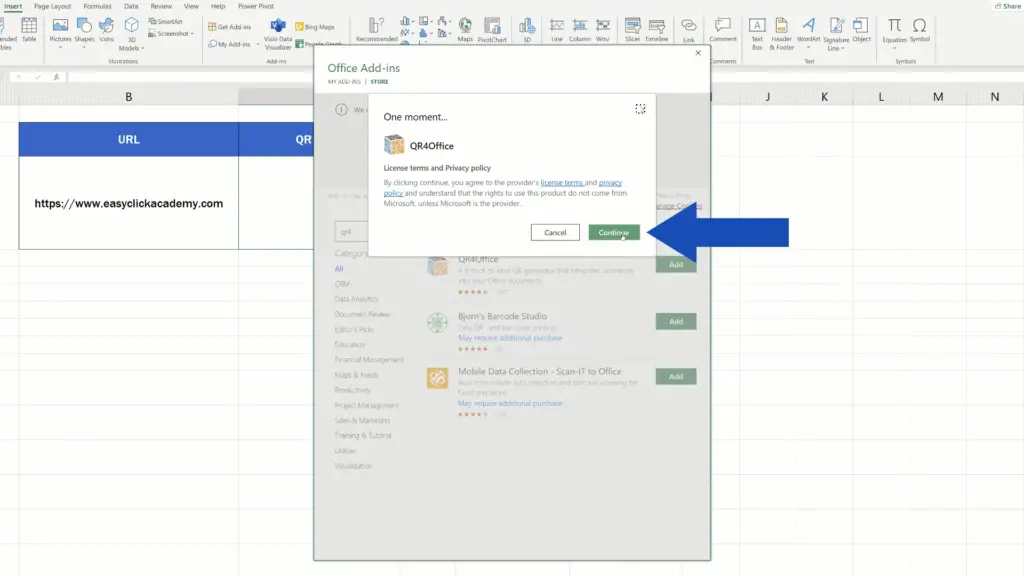
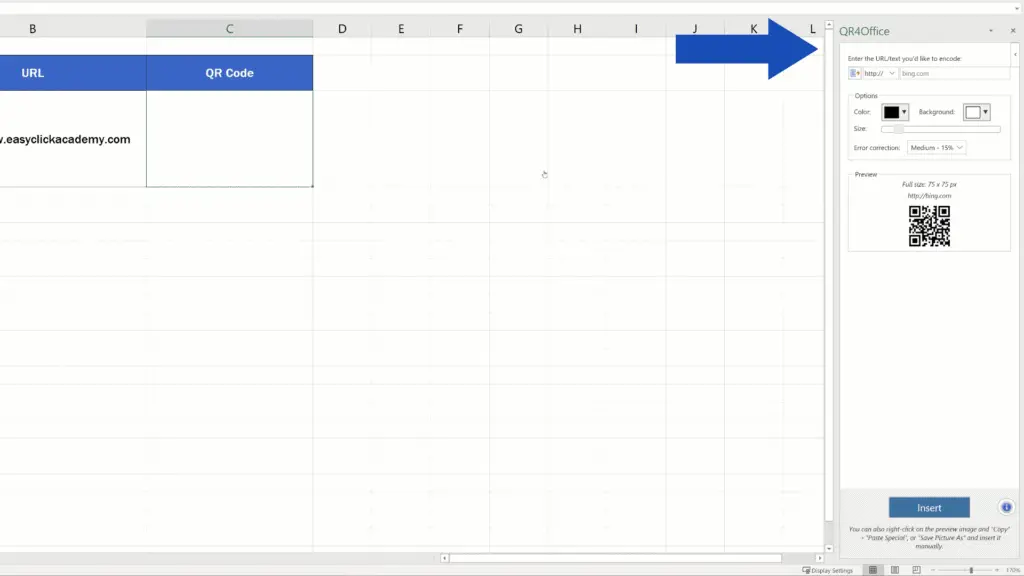
On the right-hand side of the screen, QR4Office will open a pane which you can use to create your own QR codes.
Before we go through how to do that, let’s have a look at how you can display these options for QR4Office add-in anytime you need.
Close the pane and if you’d like to see it again, go to ‘My Add-ins’ up here at the top.
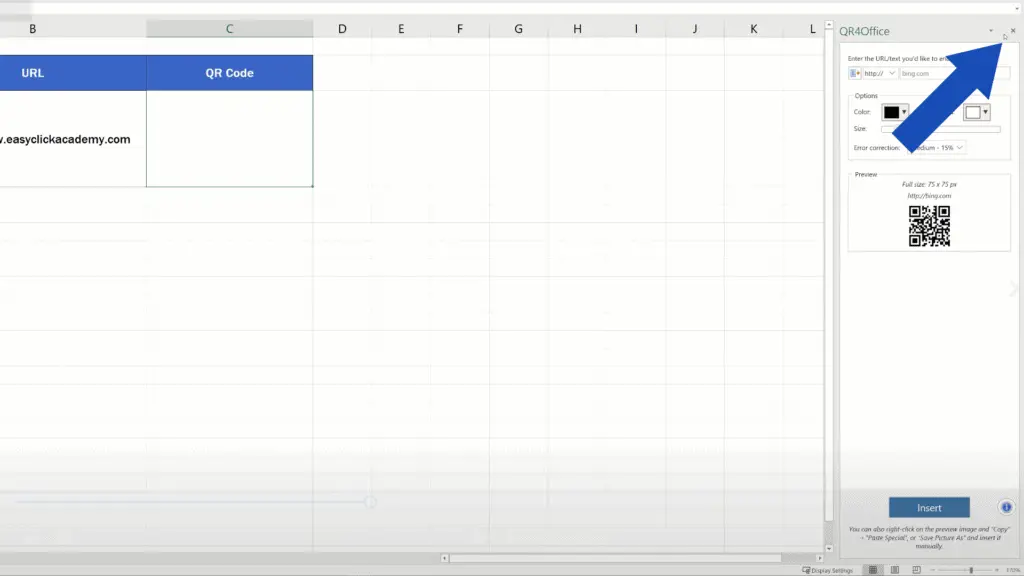
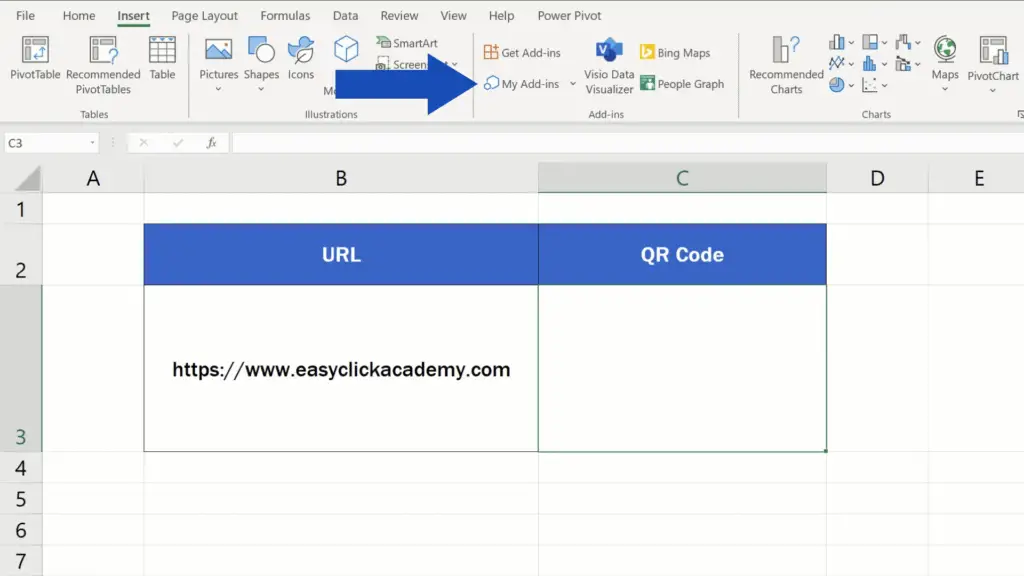
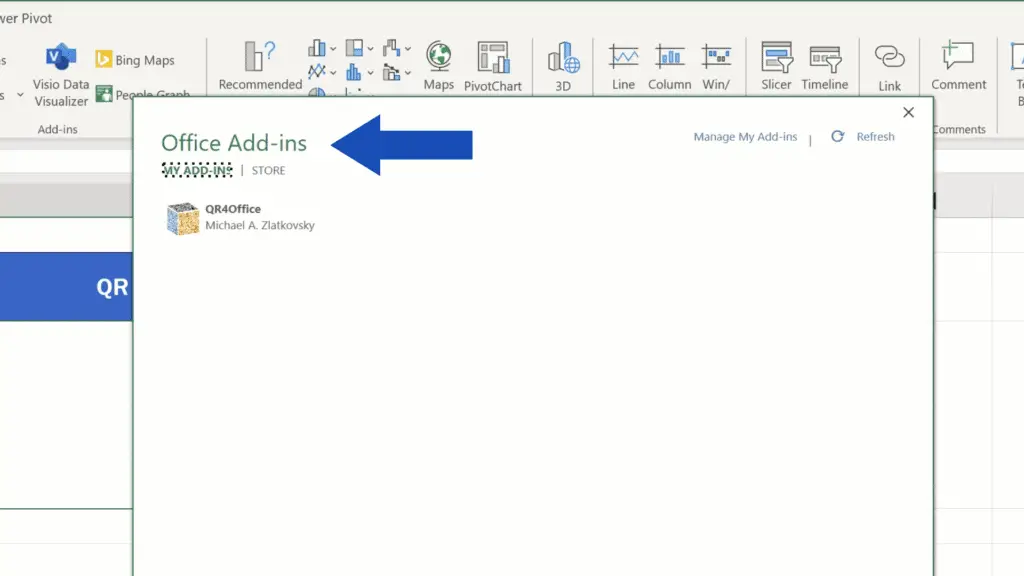
A whole list of installed add-ins appears, so double-click on this one and it opens on the right again.
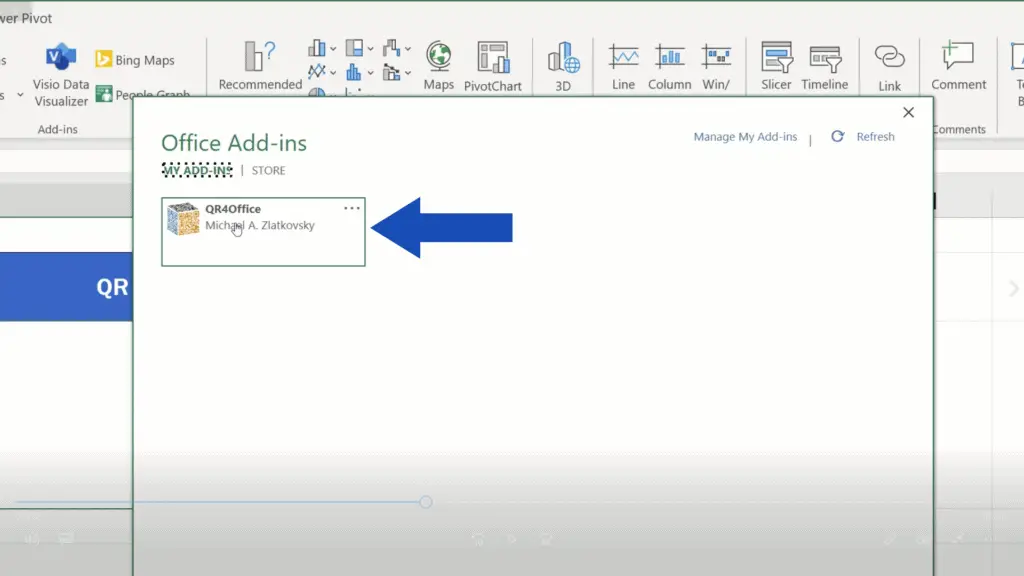
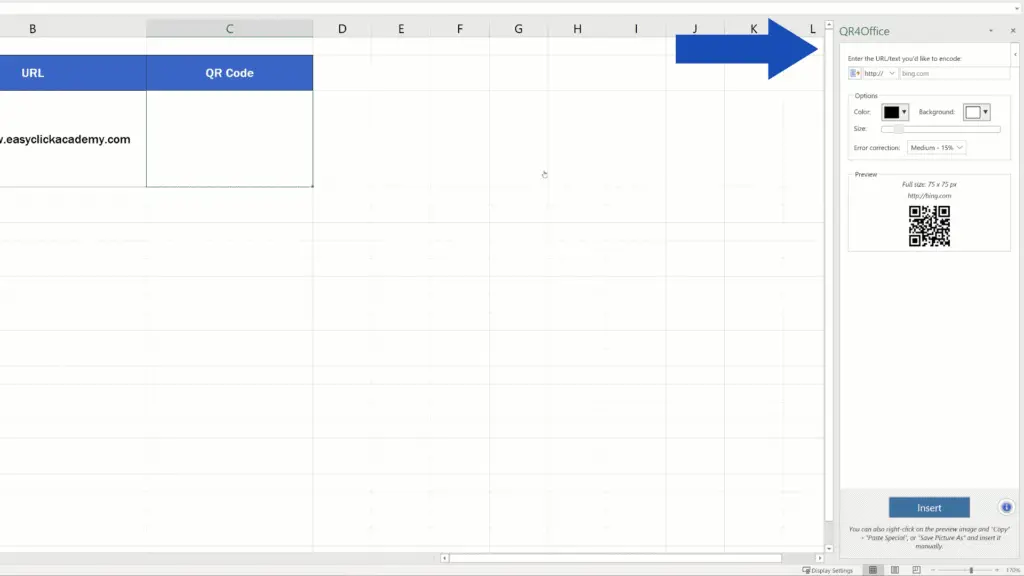
And now let’s move on to create a QR code together.
How to Create a QR Code
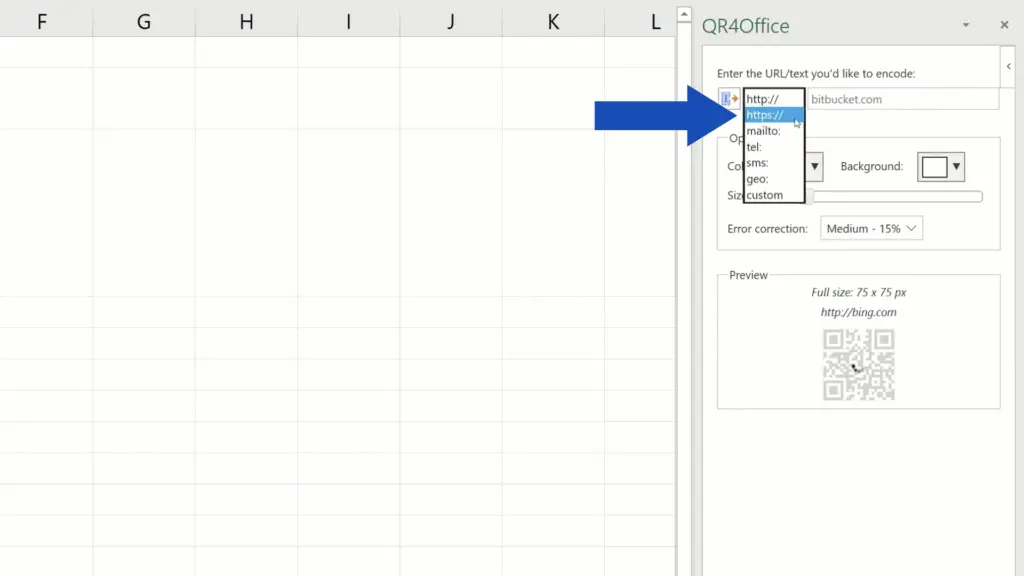
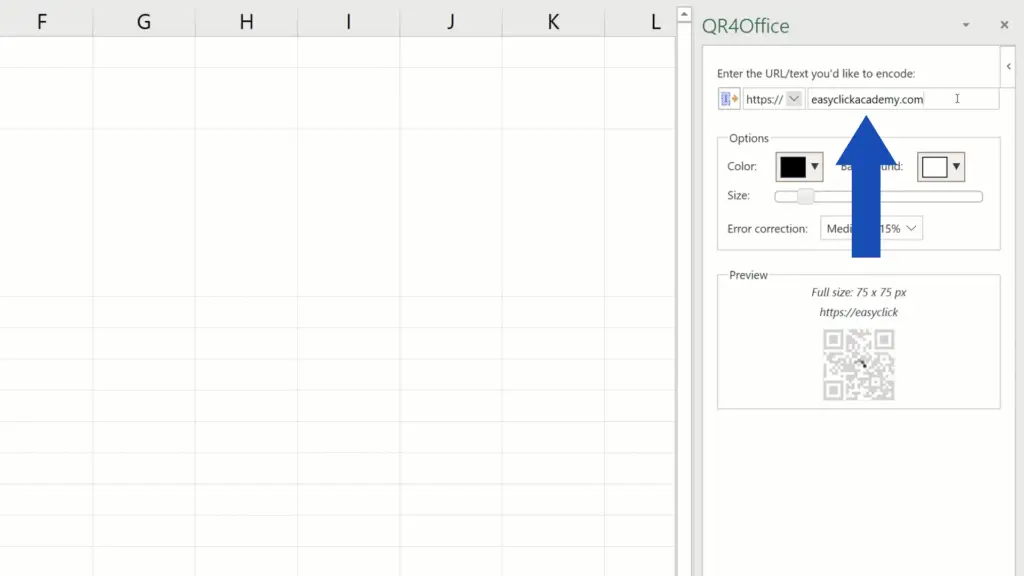
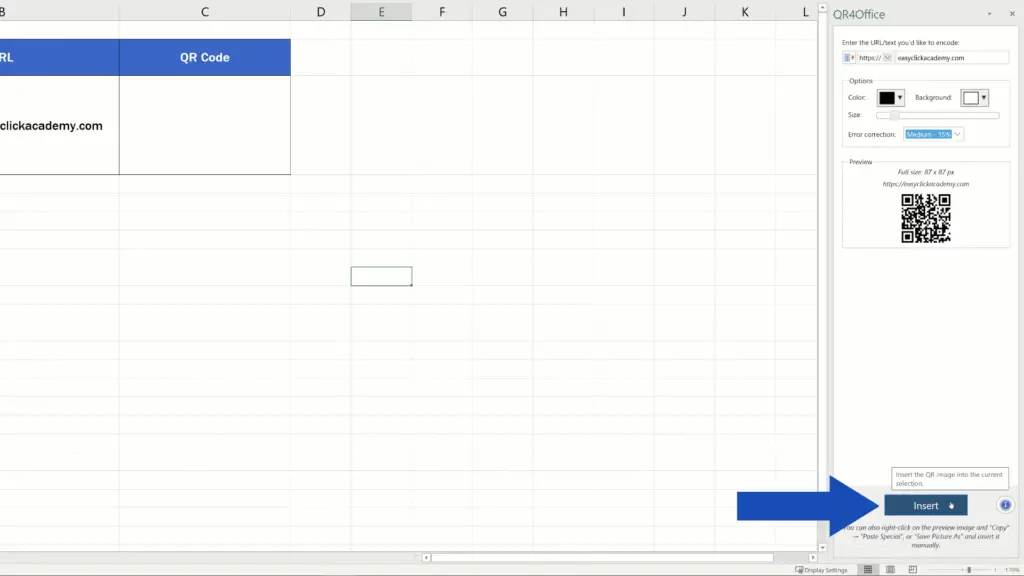
Up here you can choose whether you want to create a QR code from a URL address, email or telephone or you can select any other item on the list. We’re gonna use the URL address, so we’ll go for the option ‘https://’ and we’ll type in ‘easyclickacademy.com’.
How to Adjust QR Code
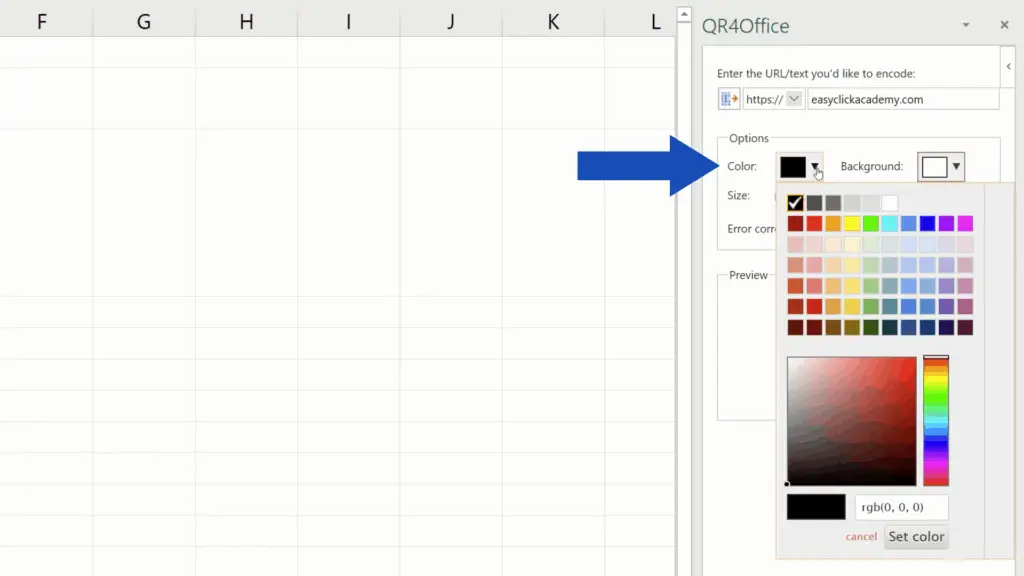
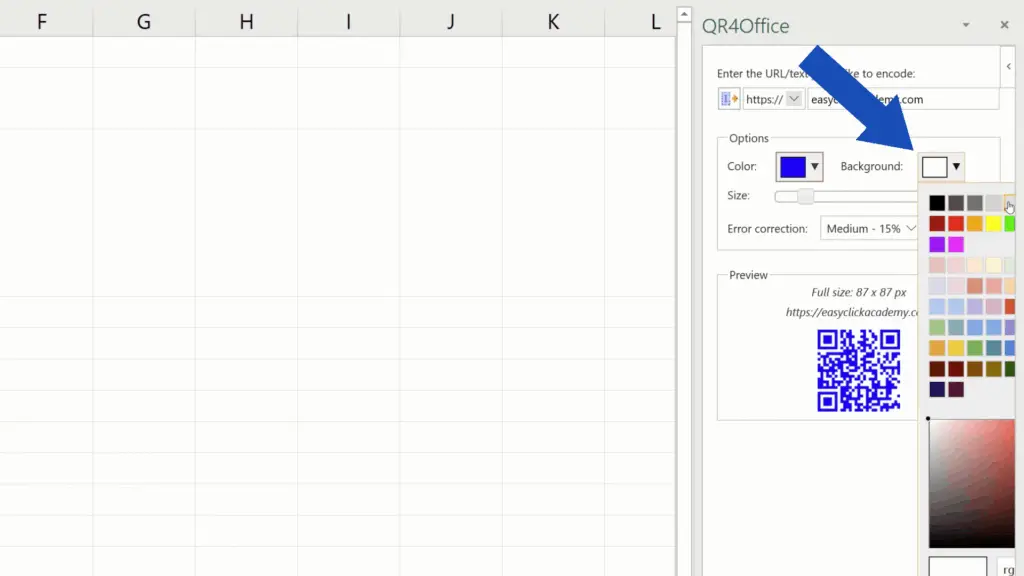
Now you can pick a colour for the generated QR code here or the background colour here. But for now, we’ll keep the colours as they are.
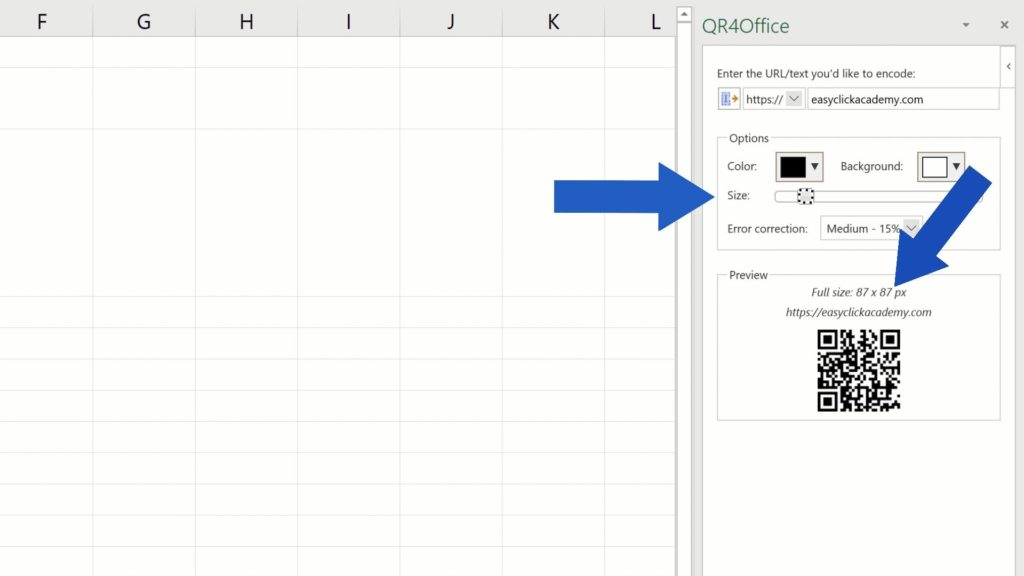
This slider here helps you set the right size of the QR code you need. The current size is displayed in pixels above the QR code.
How to Set Error Correction
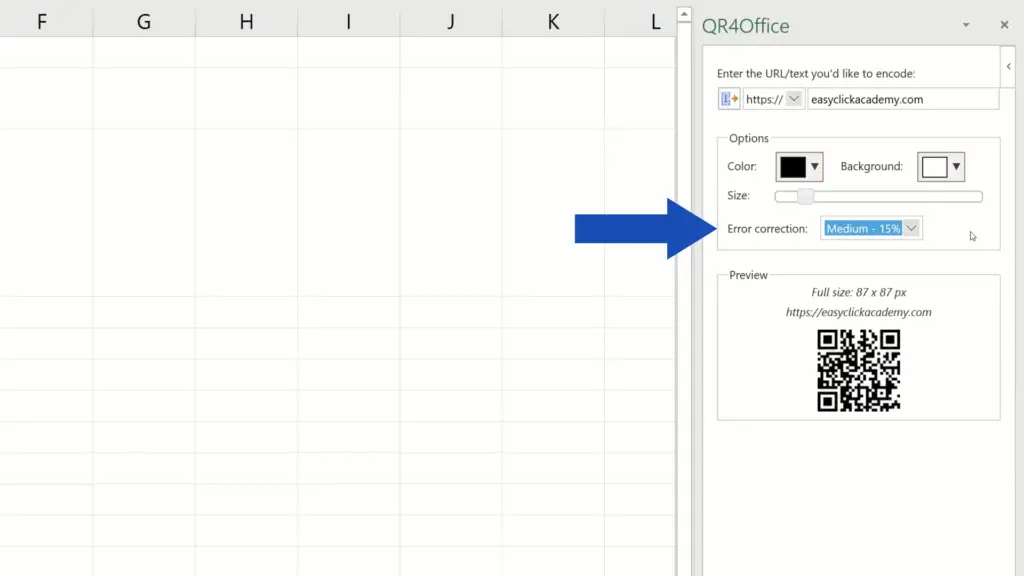
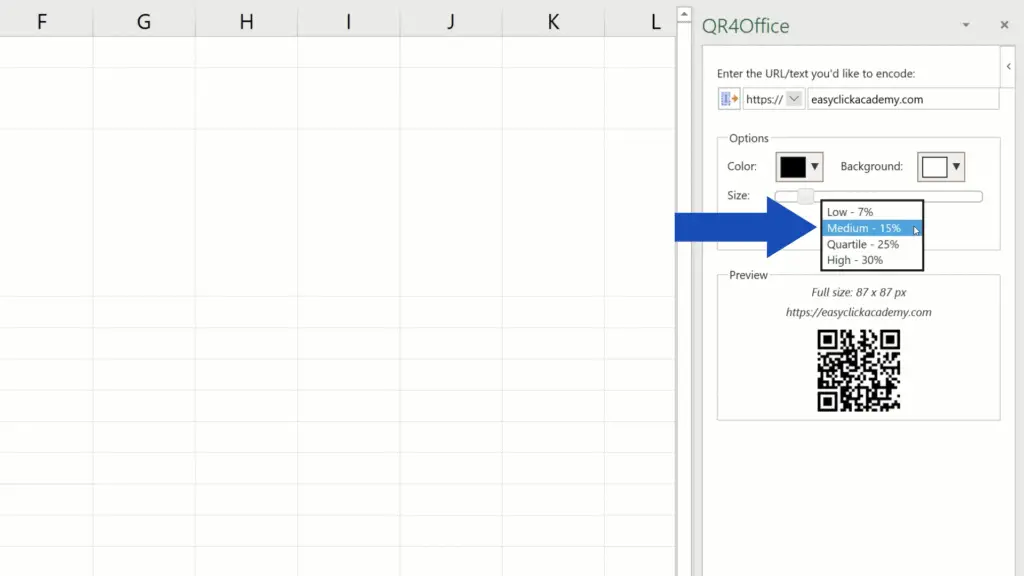
Well, the last thing to set is Error correction. The right error correction level can improve scannability in case the code gets dirty or damaged or part of it is covered with another image. You can select from four options, but for now we’ll keep it to ‘Medium’ and move on.
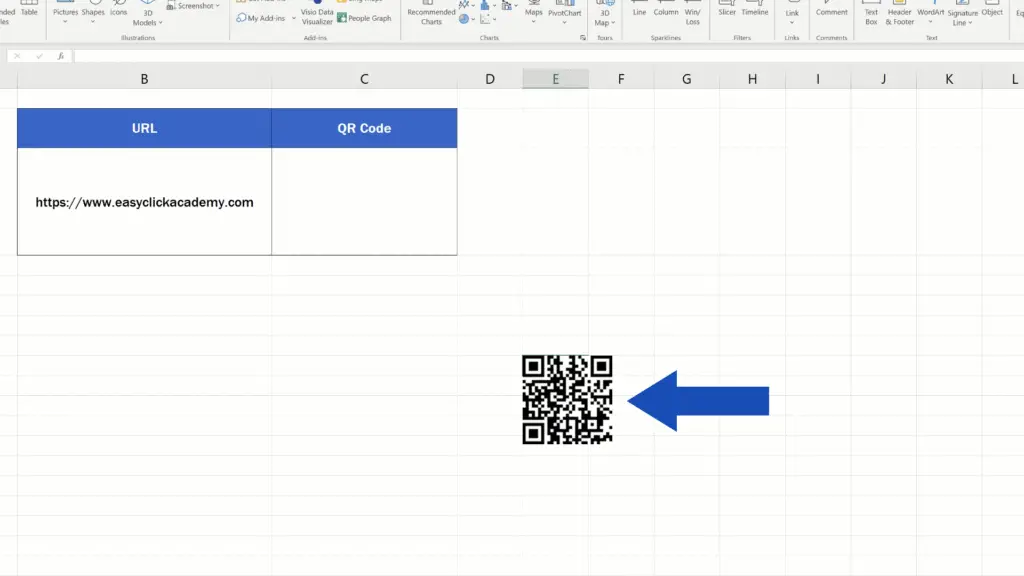
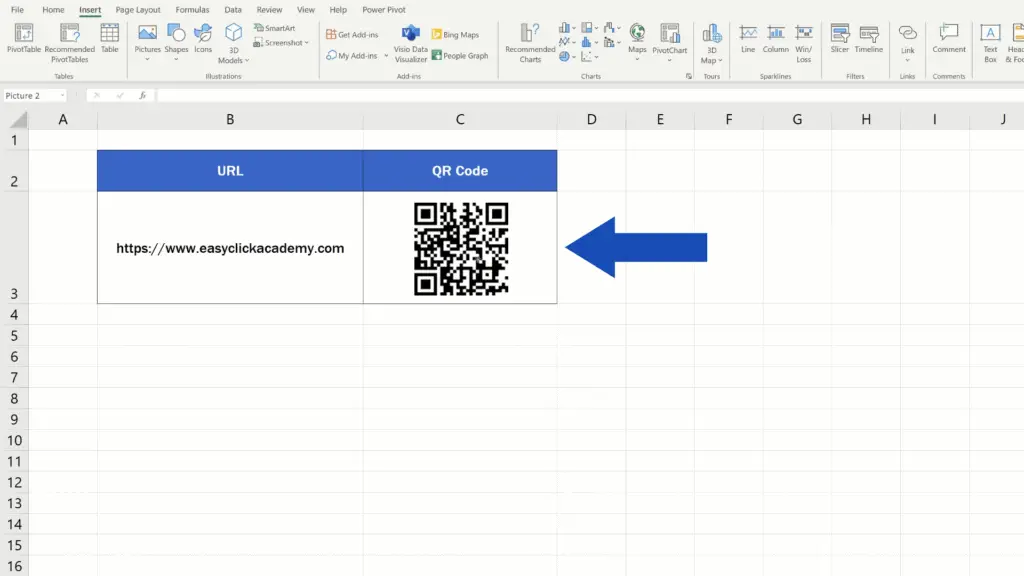
Once everything’s been set, just click on the button ‘Insert’ down here and that’s it! Here’s your QR code all ready to be moved where you need it.
How to Prepare QR Code to Use in any Other Application
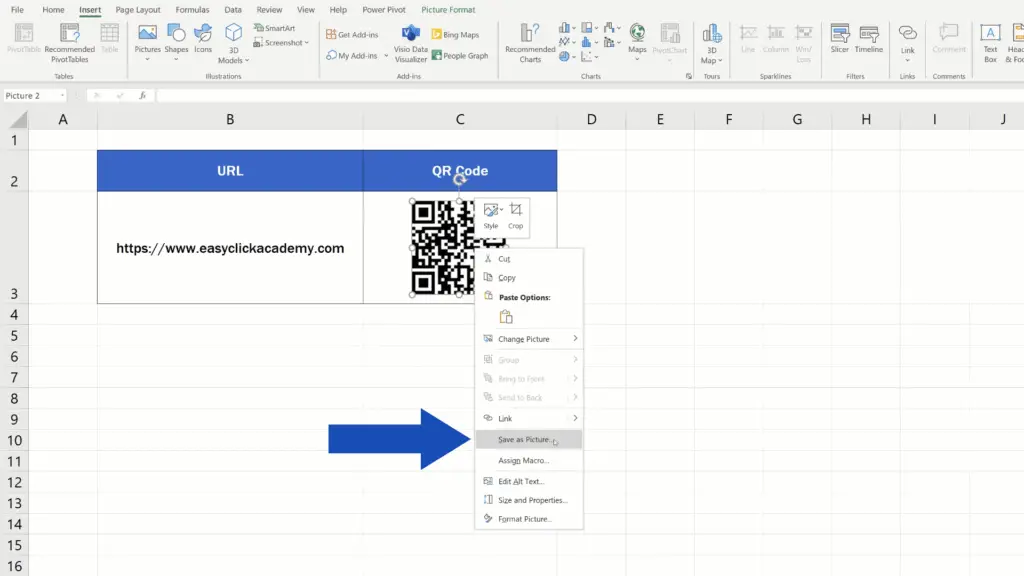
If you right-click on it and select the option ‘Save as Picture’, the QR code will be saved into your computer and you can use it in any other application.
If you’ve found this tutorial interesting and want to know more on how to create barcodes in Excel, watch our EasyClick Academy tutorial the link to which you can find in the list below.
Don’t miss out a great opportunity to learn:
- How to Create Barcodes in Excel (The Simple Way)
- How to Insert a Symbol in Excel
- How to Insert Image in Excel Cell (Correctly)
If you found this tutorial helpful, give us a like and watch other tutorials by EasyClick Academy. Learn how to use Excel in a quick and easy way!
Is this your first time on EasyClick? We’ll be more than happy to welcome you in our online community. Hit that Subscribe button and join the EasyClickers!
Thanks for watching and I’ll see you in the next tutorial!


