How to Concatenate in Excel (Quick and Easy)
In this tutorial we’re going to talk about how to concatenate in Excel. Thanks to this function, you’ll be able to link the contents of several different cells, like you can see in this example with a first name and a surname, into one.
So, are you ready to find out how?
Today, we’ll go step by step to see how to concatenate in Excel and we’ll use this data table as an example. The same way you’ll be able to concatenate an even bigger list, so you won’t have to lose time with tedious copying or retyping table items one by one.
So, let’s have a look!
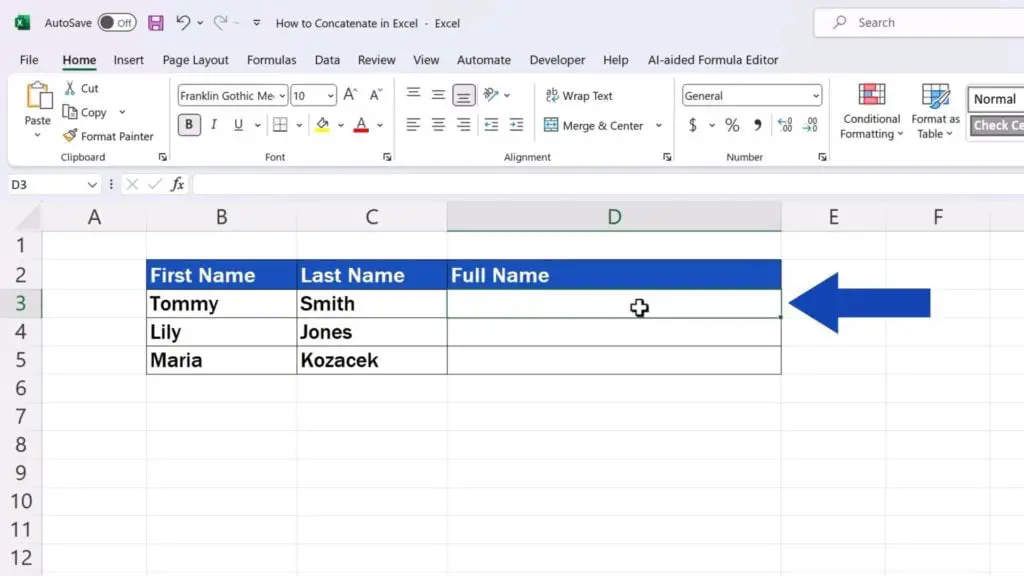
First, let’s click on a target cell – a cell where we’d like to see the result, in this case, the full name. We’re going to click here, on D3.
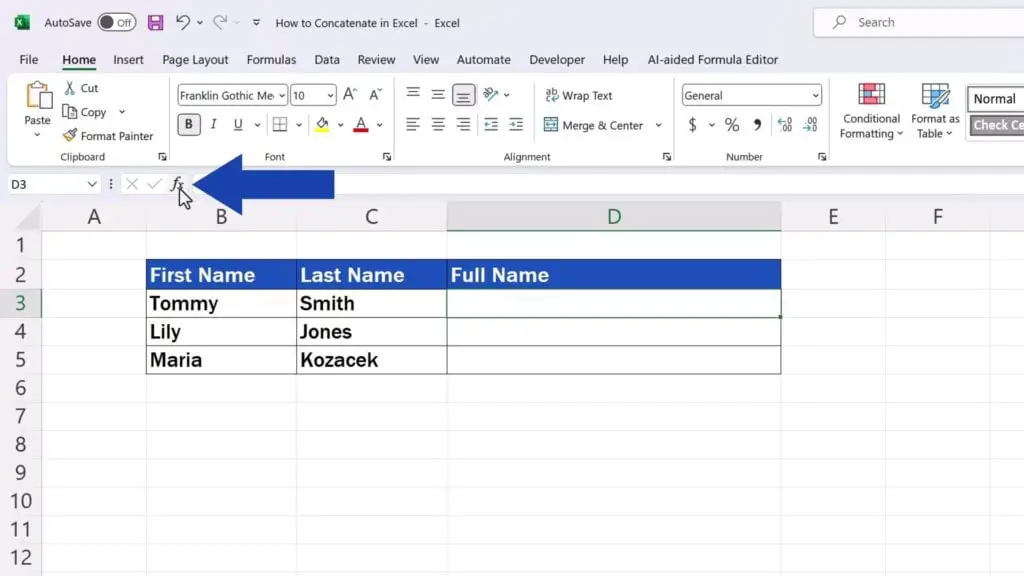
Then we click on ‘fx’ up here, which is basically the button for ‘Insert Function’.
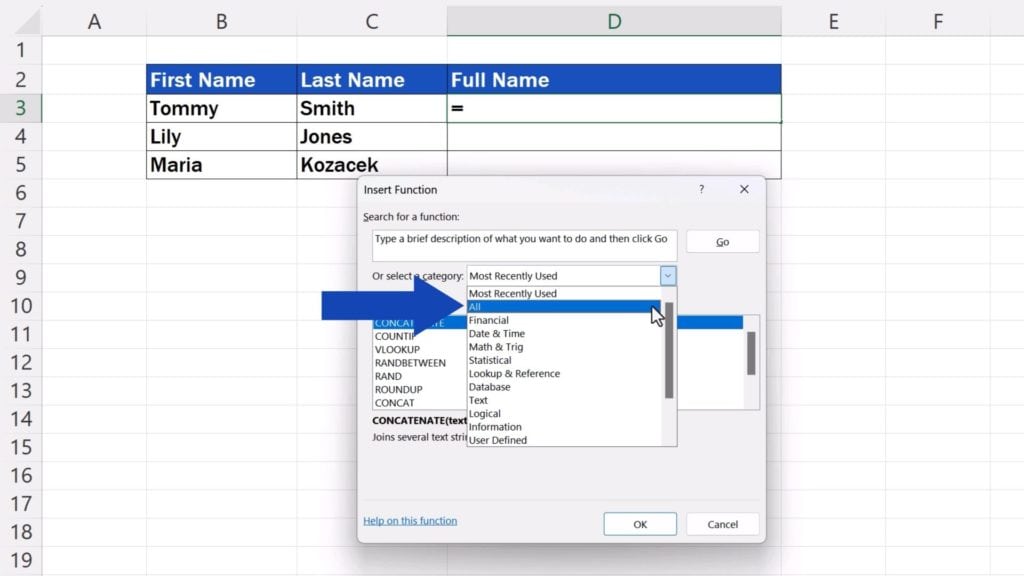
And here’s a window where we can pick a category, so we select ‘All’, look up ‘CONCATENATE’ and confirm with OK.
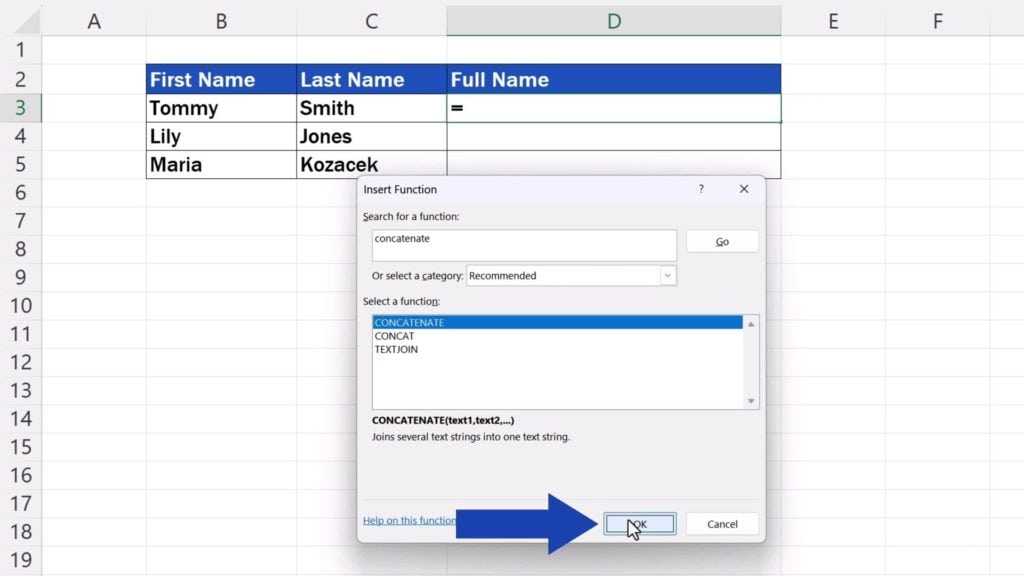
This function can concatenate up to 255 various data items into one cell.
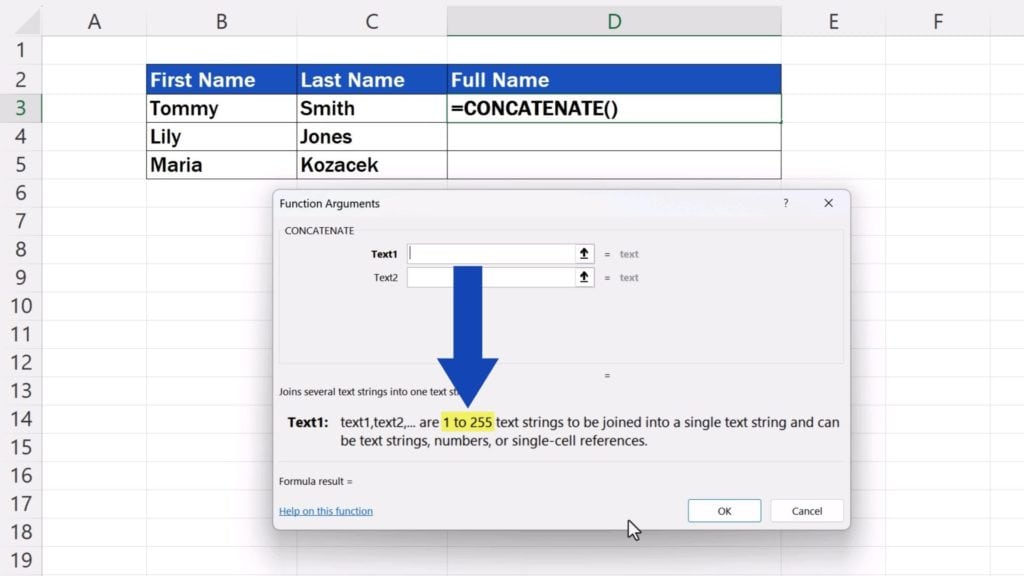
What you’ll see first is just these two boxes– Text1 and Text2. Here you can enter the data you’d like to concatenate.
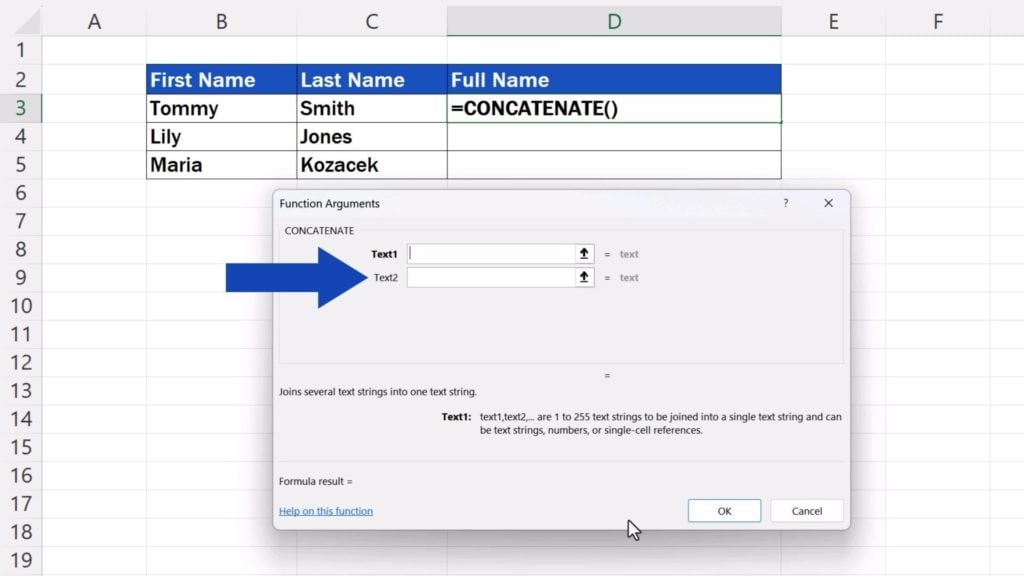
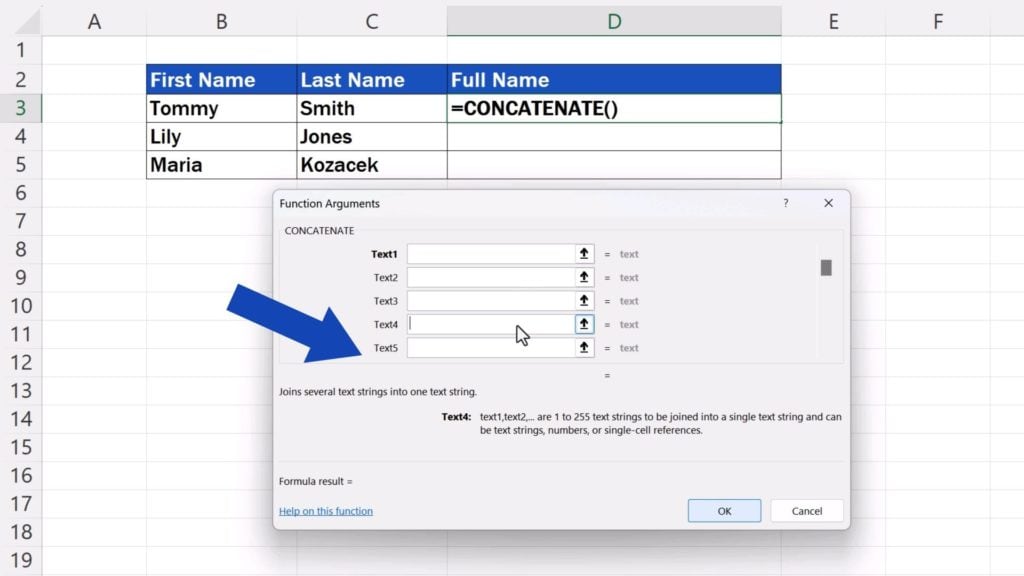
If you need to concatenate more data items, the options for the third, fourth, fifth box open automatically once you click into the last field.
So, let’s start with the first one.
We need the full name to appear in the format ‘first name – space – surname’.
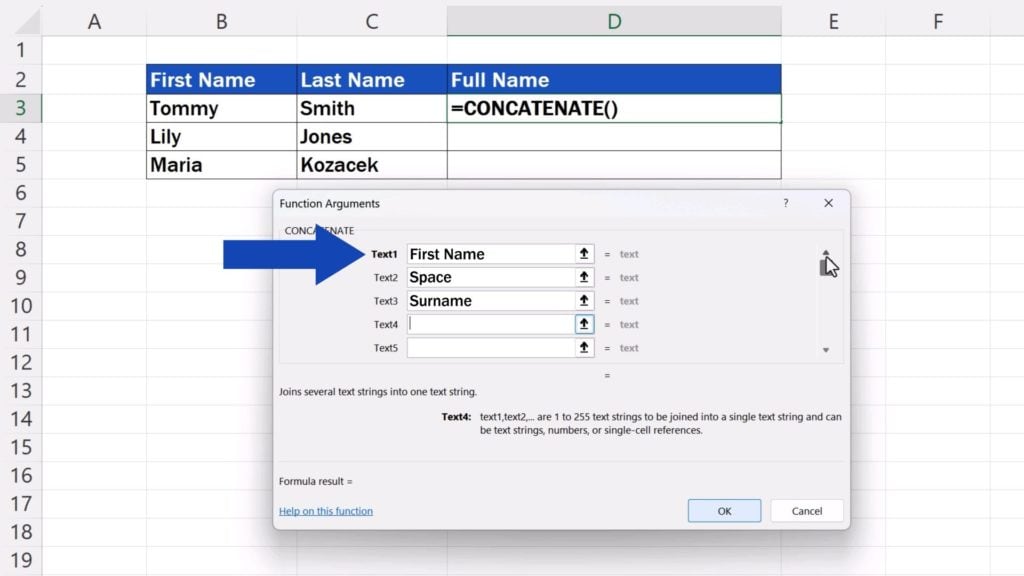
Text1 must contain the first name, so we click in the field and then click on the cell containing this bit of the information. Here it’s stored in B3.
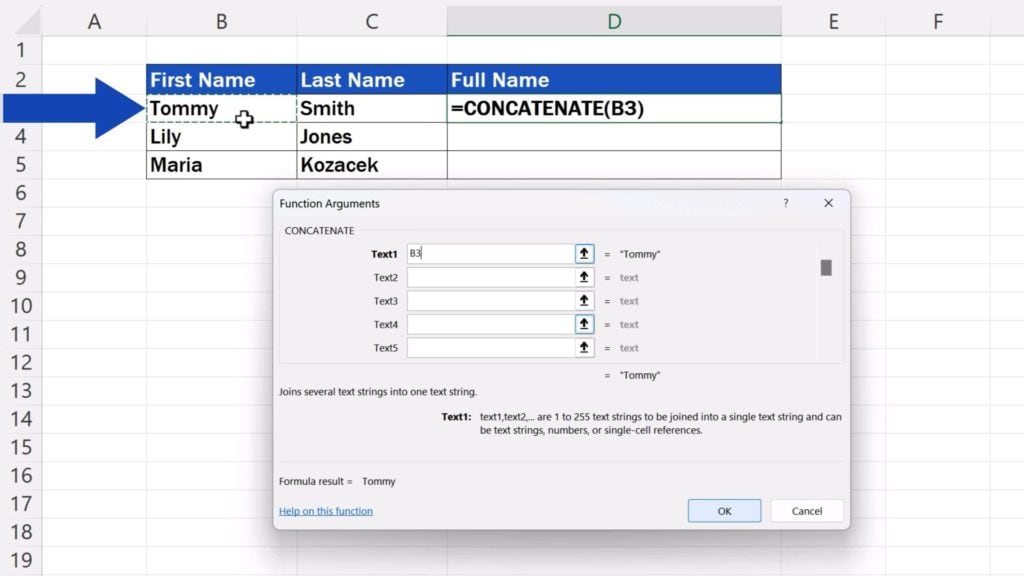
Now, since we need a space between the first name and surname, we’ll enter a space in Text2 by simply hitting the spacebar once we’ve clicked into this box.
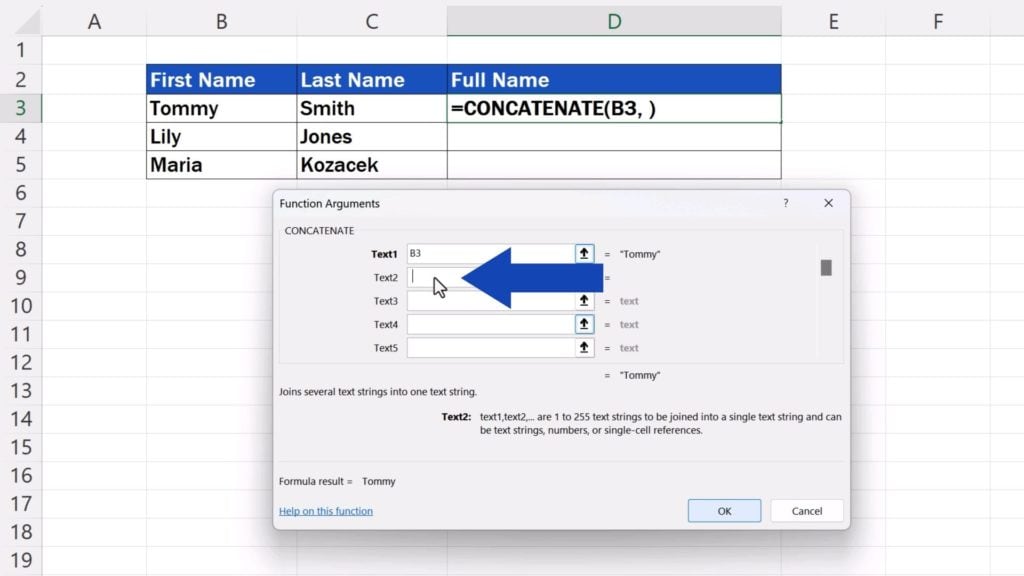
Then, we click into Text3 to carry on. We can see that quotation marks have been added around the space in Text2 and that’s alright. This is the way Excel ‘encodes’ the information in the boxes.
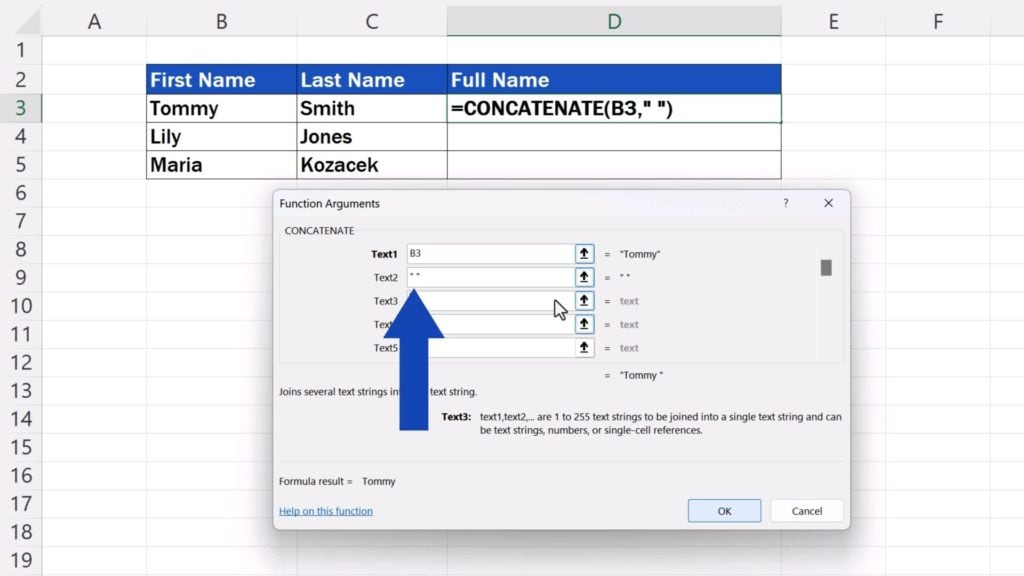
The same way we can enter any symbol – a dash, hyphen, colon, simply whatever we need.
We’ll be using space, so we leave the box as it is.
Now we need to add the surname in Text3, so we click in there and then we click on C3 which contains this information.
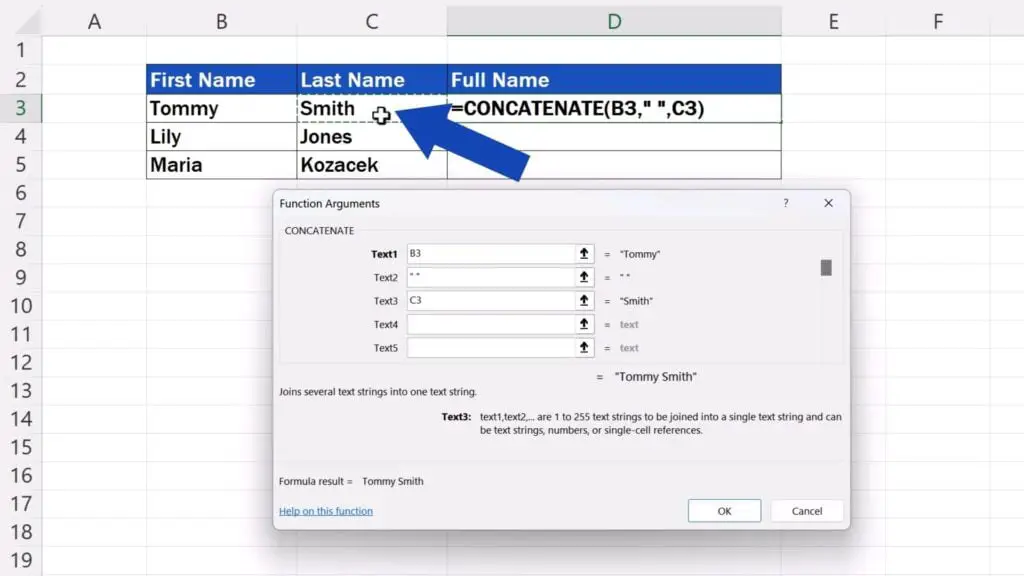
Here below we can see the full, concatenated text.
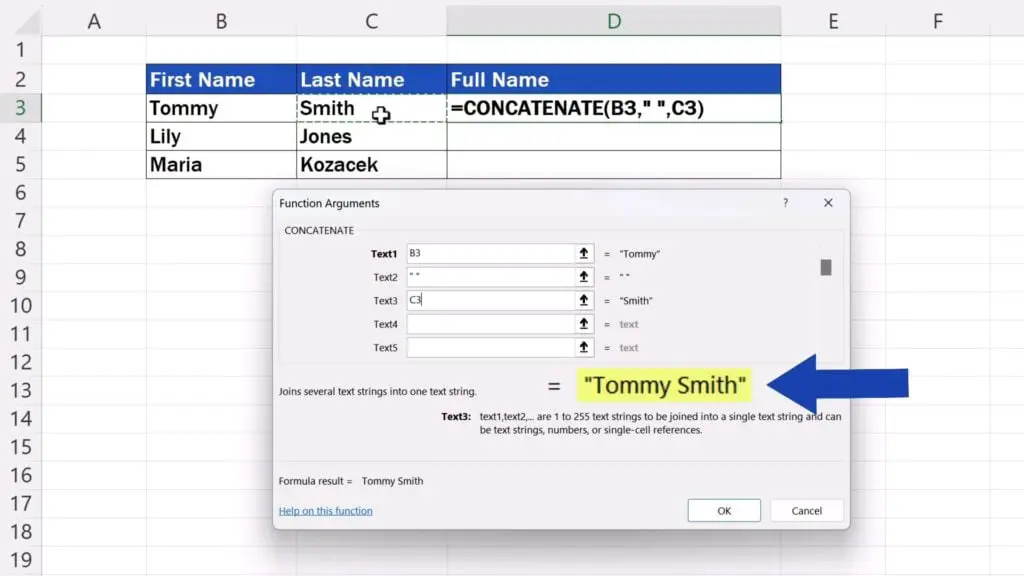
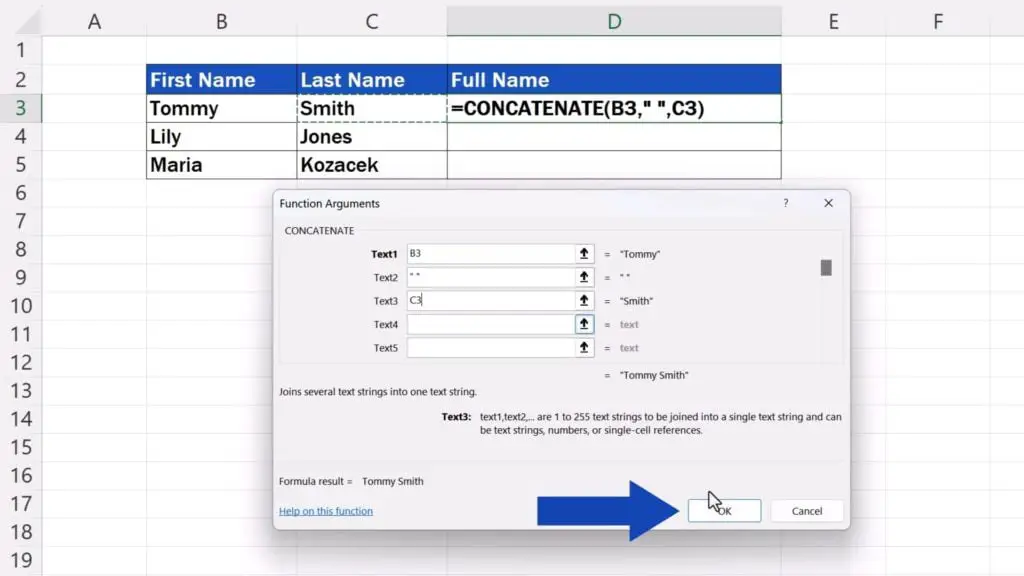
Once we’ve entered all the necessary information, we can click on OK and that’s it!
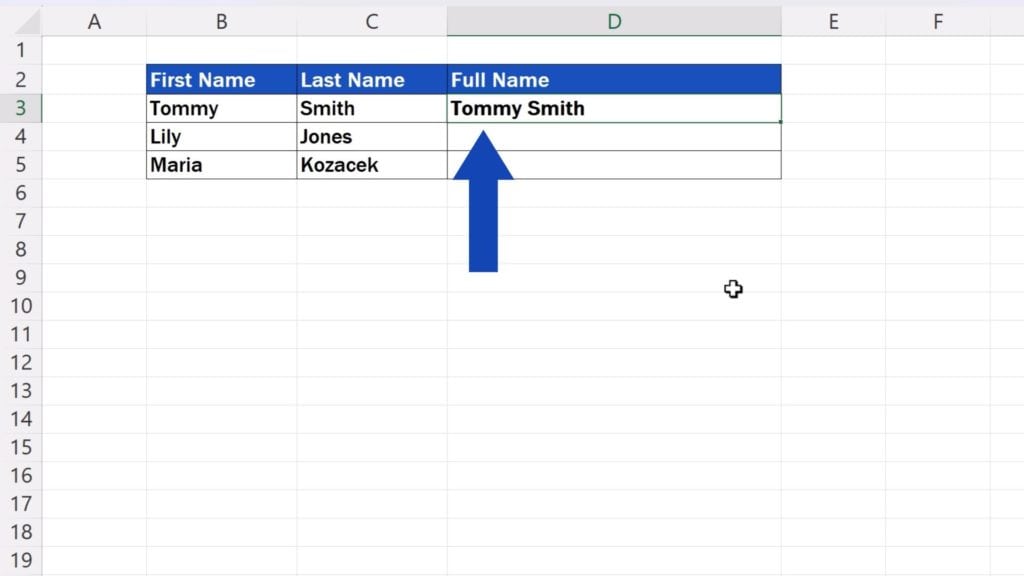
Here we go with the full name, concatenated in a quick and easy way, avoiding tedious retyping or copying.
To concatenate the rest of the names, we can copy the formula by simply dragging down the bottom right corner of the first target cell, which copies the formula to the rest of the rows.
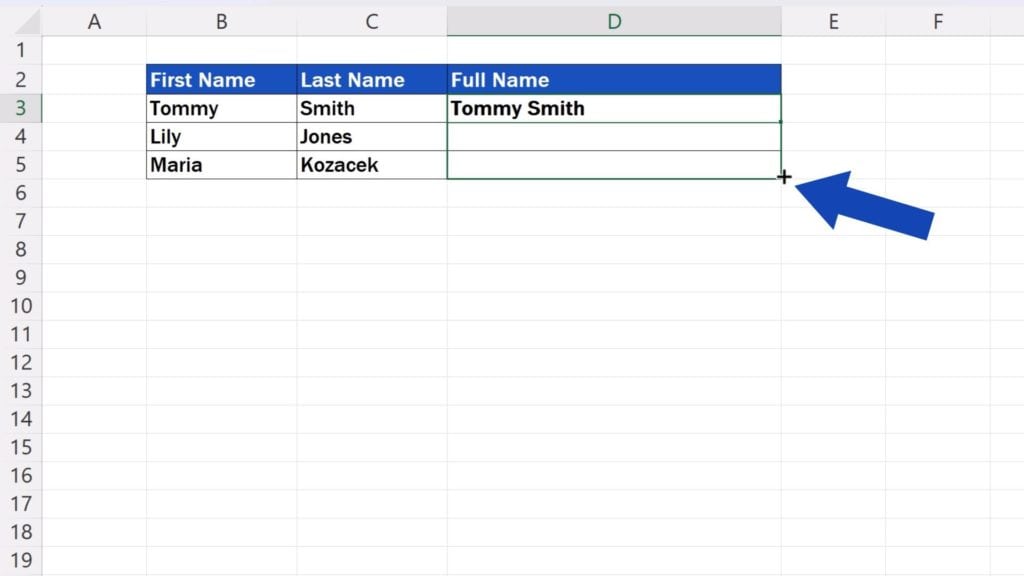
Like this.

And before we wrap it up today, let me mention three important, helpful points.
The First Point – Changing The Information In The Target Cell
If you’d like to change the information in the target cells, you need to change the contents of the source cells.
If you click on a target cell, you can see that the cell contains only the formula CONCATENATE, not the text itself, not the name. This formula contains a reference to the source cell which actually stores the name in the form of text. The formula in the target cell draws the information from the source cells.
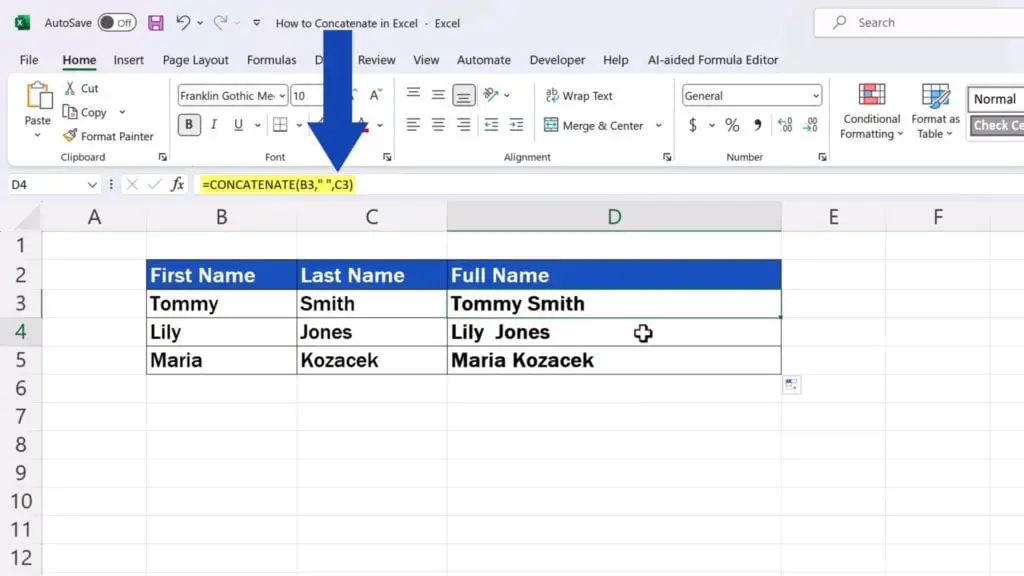
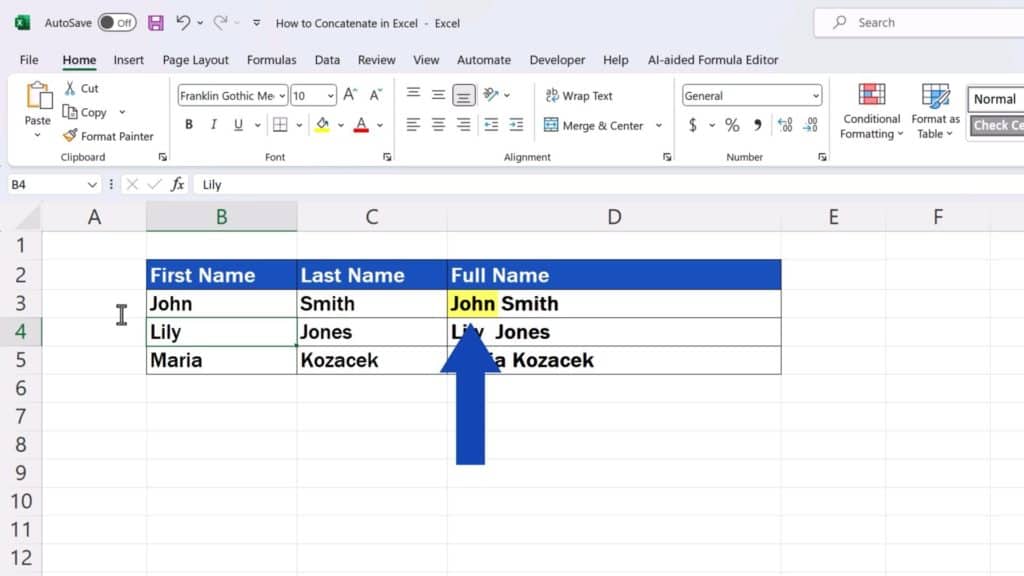
So, if you’d like to change anything in the outcome, you’ll need to do it through a change in the source cells. For instance, if we want to change ‘Tommy’ to ‘John’, we delete ‘Tommy’ and type ‘John’ in B3. The text in the target cell updates automatically.
The Second Point – Regarding Copying
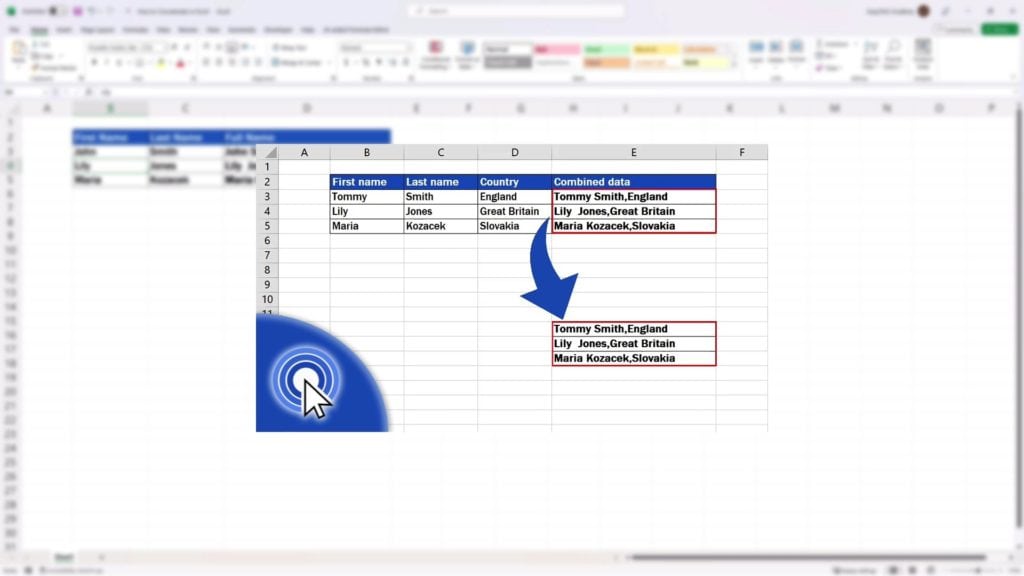
If you’d like to copy the concatenated names, you can have a look at how to do that in a separate tutorial titled How to Copy and Paste Values Without Formula in Excel. You’ll see how to easily copy cells containing a formula and paste them in a way that you’ll preserve only the actual values of the cells, not the formulas inside them.
The link to the tutorial is provided in the list below.
The Third Point – Separate Names
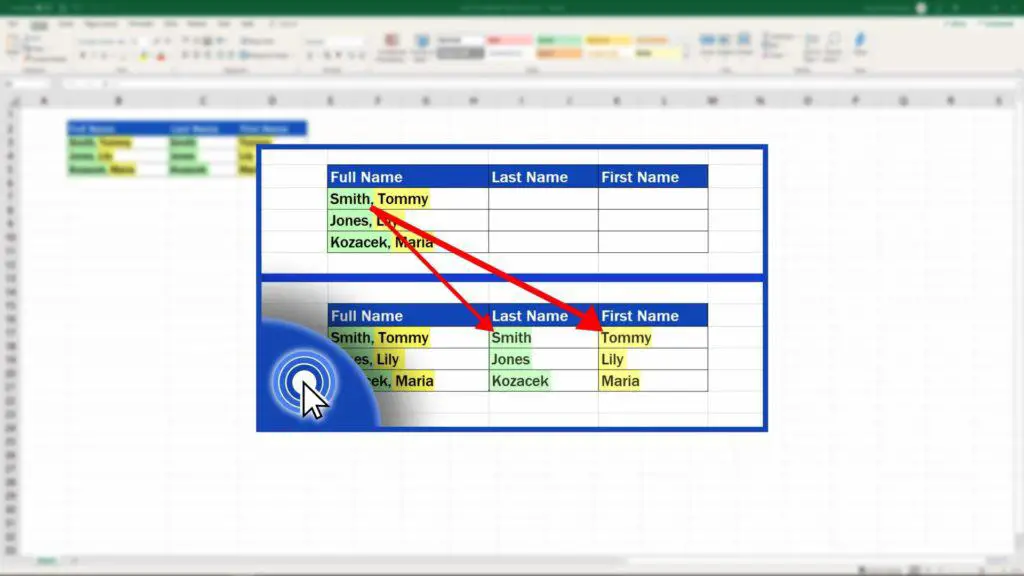
Sometimes you might need to do the opposite – you’ve got full names and you need to separate them to a first name and a surname. There’s a simple solution to this task and you can watch how to do that in a tutorial with the title How to Separate Names in Excel. The link to this tutorial is also in the list below.
Don’t miss out a great opportunity to learn:
- How to Copy and Paste Values Without Formula in Excel
- How to Separate Names in Excel
- How to Combine First and Last Name in Excel
If you found this tutorial helpful, give us a like and watch other tutorials by EasyClick Academy. Learn how to use Excel in a quick and easy way!
Is this your first time on EasyClick? We’ll be more than happy to welcome you in our online community. Hit that Subscribe button and join the EasyClickers!
Thanks for watching and I’ll see you in the next tutorial!


