How to Combine First and Last Name in Excel
In this tutorial, we’ll have a look at how to combine the contents of two cells – in this case a first name and a family (or last) name – thanks to which we’ll have a full name merged in one cell.
Sounds interesting? Let’s see how to do it!
See the video tutorial and transcription below:
See this video on YouTube:
https://www.youtube.com/watch?v=jtcKjKh51jk
To start with, let me show you this short data table we’ll use to go through all the steps needed to combine names in Excel.
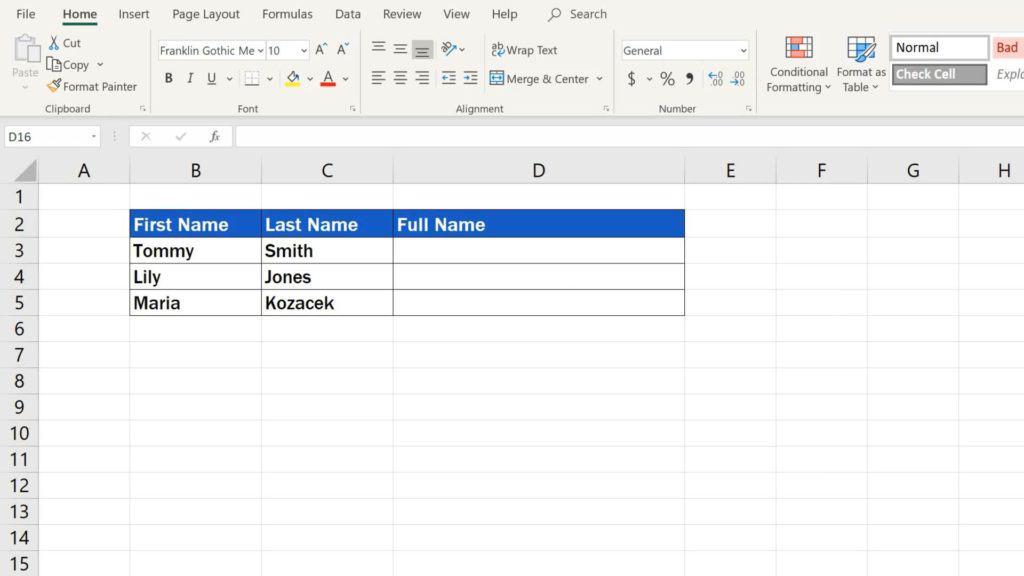
Keep in mind that you’re not limited by the size of the table – you can work with lists much longer than this. It’ll save your time and you’ll avoid dull copying and pasting data bit by bit.
Shall we begin?
How to Combine First and Last Name in Excel Using ‘CONCATENATE’ Function
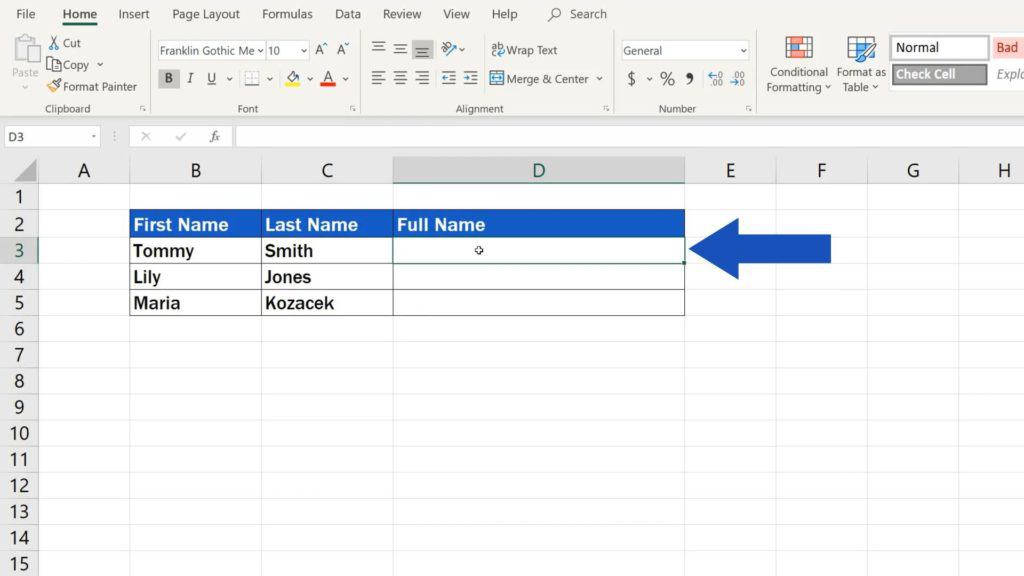
First, choose the location where the merged full name should appear. Click on the selected cell – we’ll click on the cell D3 here.
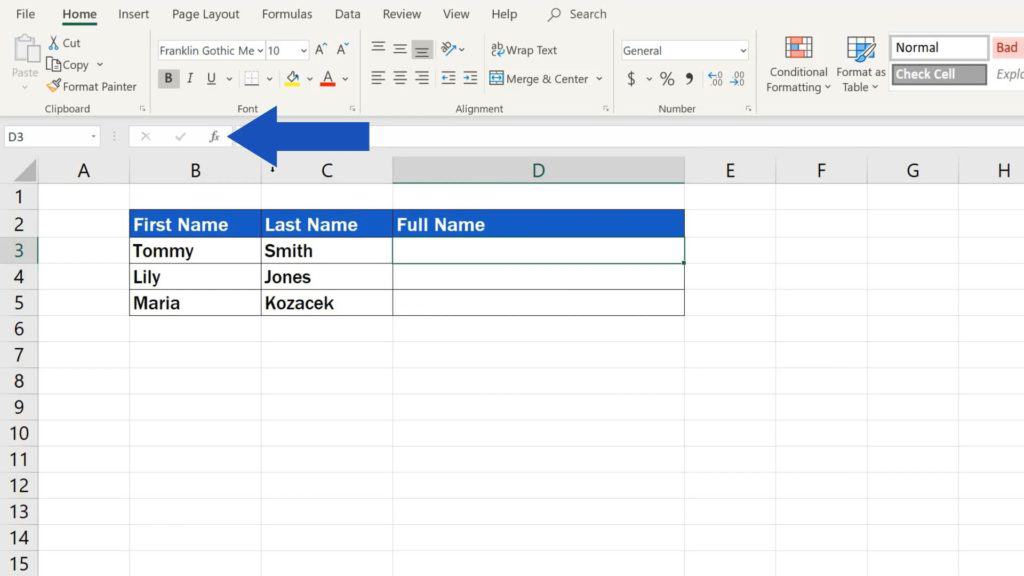
Then click up here on the button fx, which serves to insert a function.
In the pop-up window, choose the category ‘All’
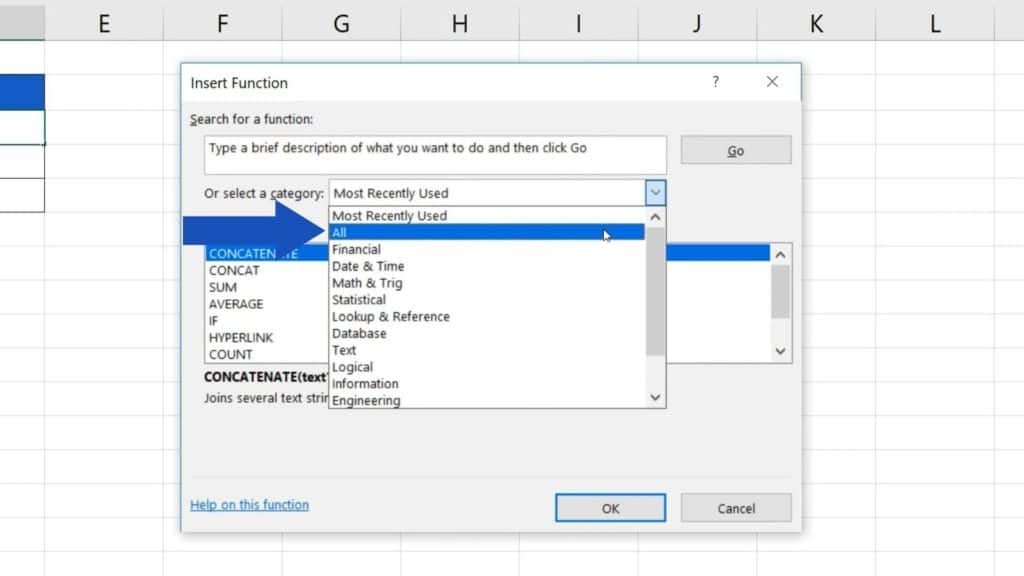
and find the function ‘CONCATENATE’. Confirm with OK.
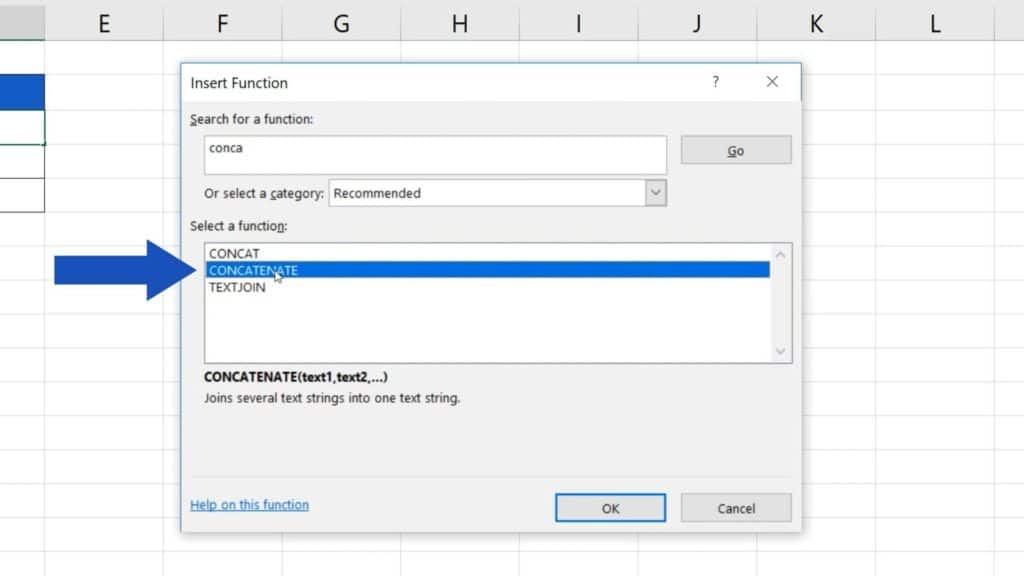
The function ‘CONCATENATE’ can merge up to 255 different items into a single cell.
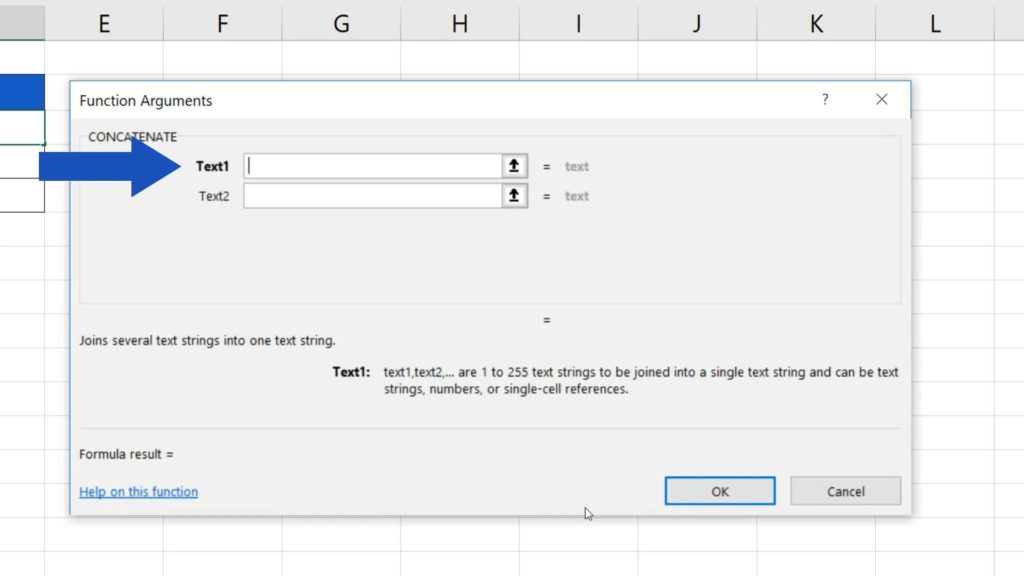
For now, Excel will offer only two fields – ‘Text 1’ and ‘Text 2’. Here you can enter the data you need to combine.
Don’t worry if there are more than two items to be combined on your list. When you start entering the data, the third, the fourth and the fifth box will appear automatically, once you’ve reached the last visible field, and it will carry on like that. Altogether, Excel will allow you to combine up to 255 different items.
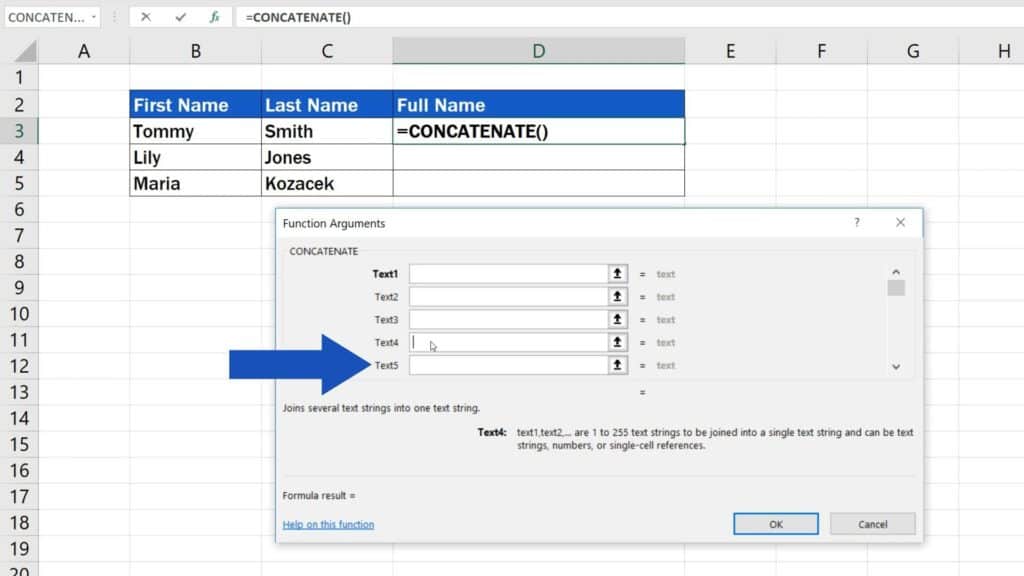
And this is how you can enter the first one.
Think of the format of the combined text. We want the merged full name to appear as the first name – a single space – then family (or last) name. Therefore, the first name will go to the first field, ‘Text 1’. Click on the cell which contains the first name, in this case cell B3.
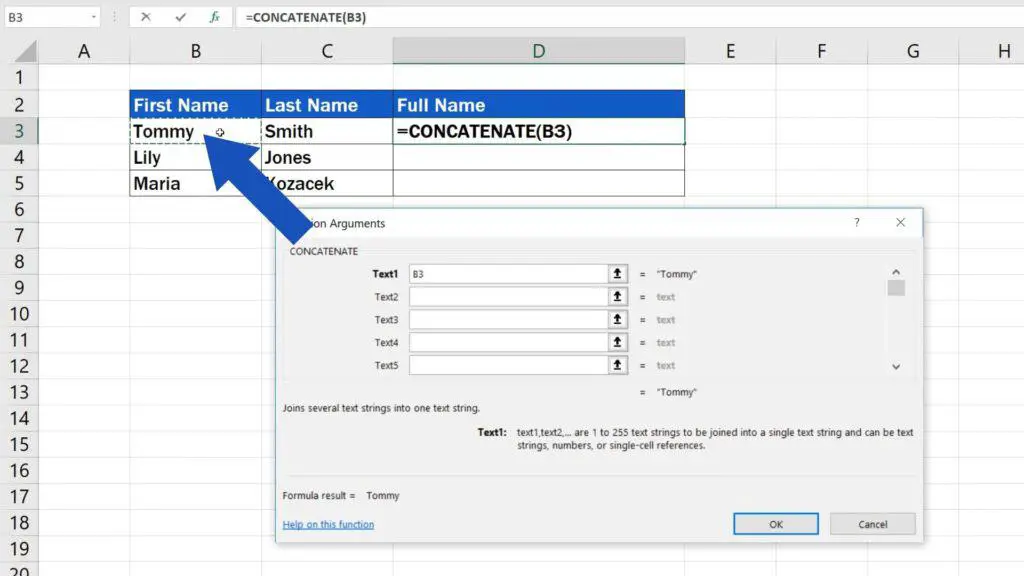
Great!
Now, since we need a single space between the first name and the family name, we’ll enter the space in the field ‘Text 2’, simply by clicking into the box and pressing the spacebar.
When we click into the field ‘Text 3’, Excel will ‘encode’ the single space into the form that’s necessary – you can see the space enclosed in double quotation marks.
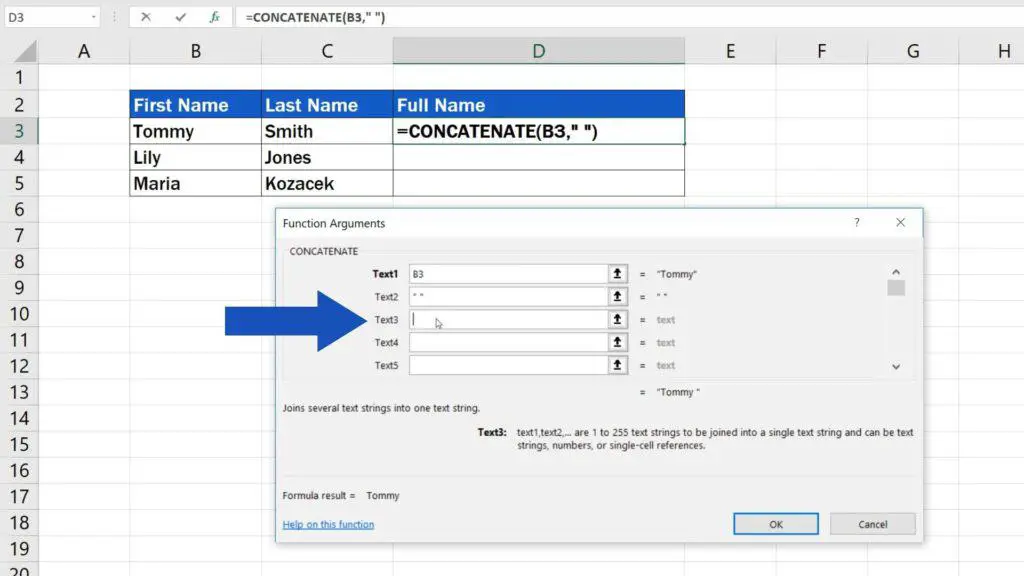
The same way would work for a dash, colon, or any other character.
We’ll leave the single space in field 2 and move on.
Click into the box ‘Text 3’ and enter the second part by selecting cell C3 that contains the family name.
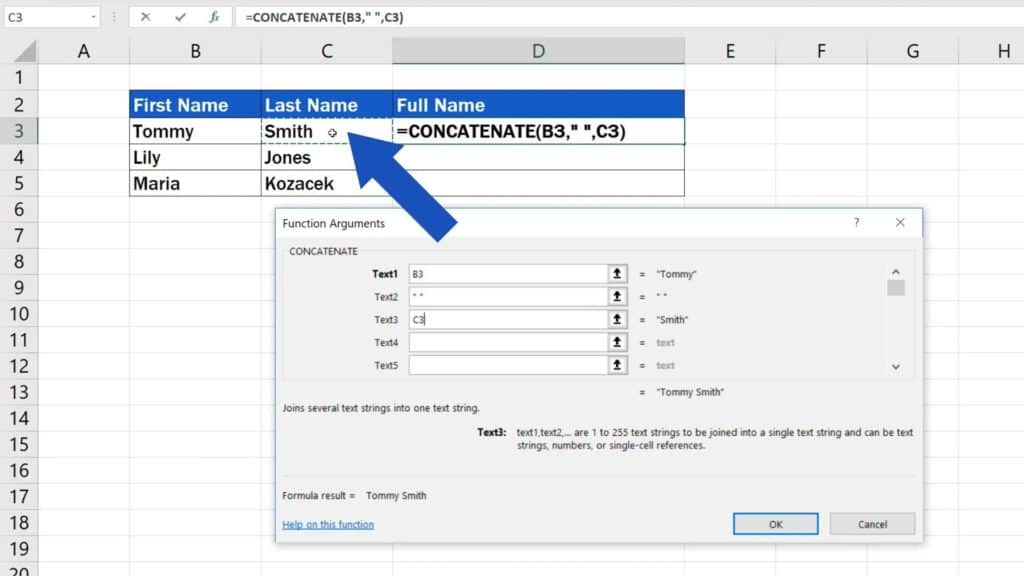
If you look at the section just below the text fields, you can see the text being combined and check its final form.
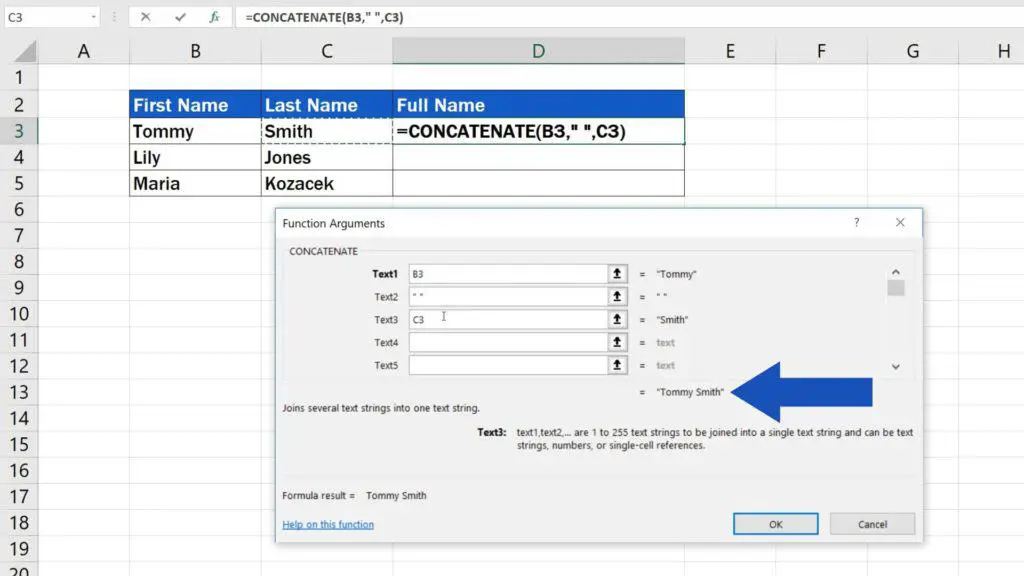
Once you’ve entered all the necessary information, click on OK. Good job!
We’ve combined the names from the list without manual rewriting or copying and pasting.
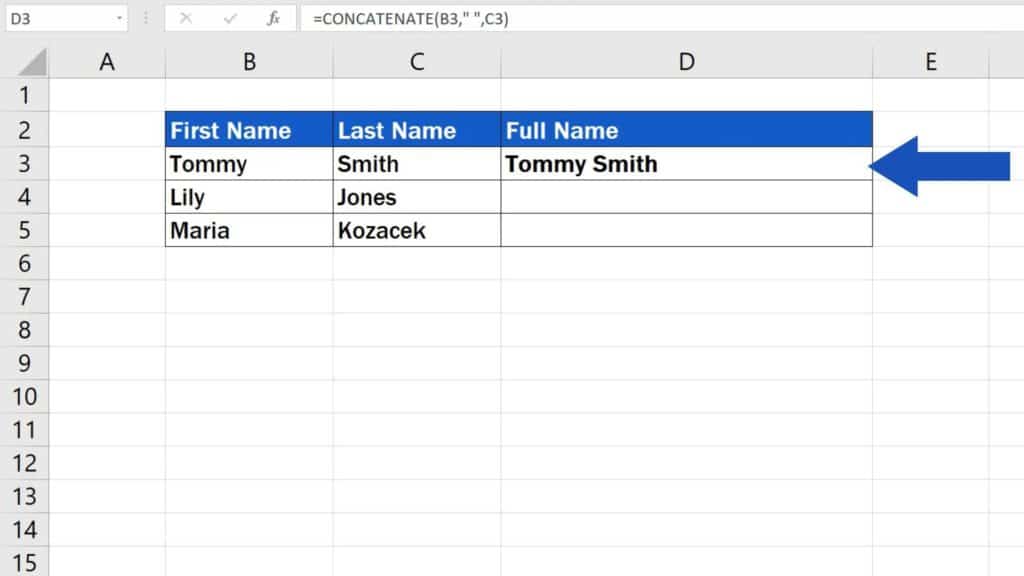
How to Use ‘CONCATENATE’ Function in Other Rows
If you want to carry on and merge the rest of the names on the list, you don’t have to enter the function and reference to the data anew in each row.
Simply set the pointer of your mouse to the cell containing the function and drag the bottom right-hand corner of the cell to populate the rest of the rows with the same formula. That way, you’ll concatenate all the names on the list.
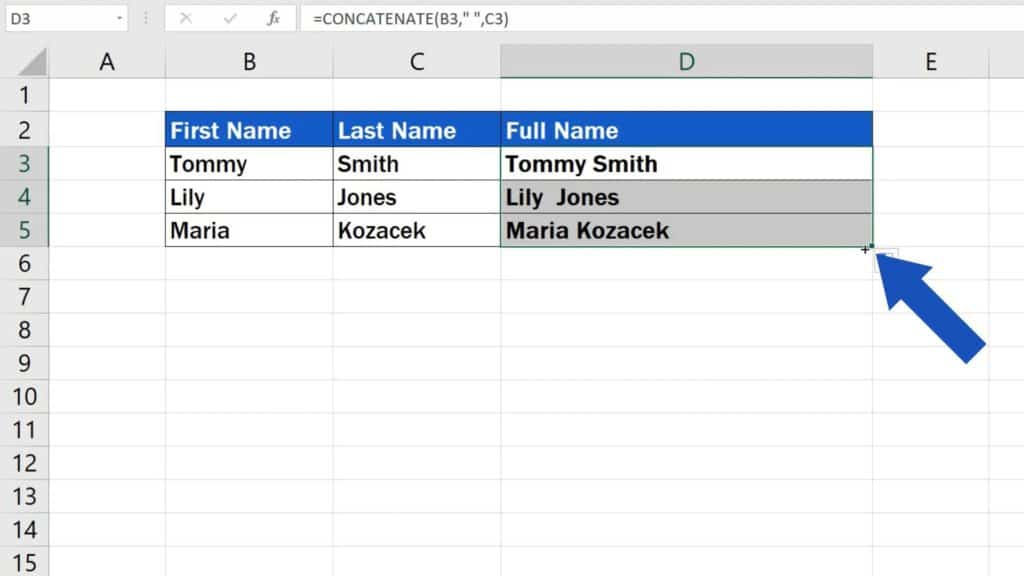
Like this.
And just before we wrap it up, there’s one more thing to remember.
How to Change Concatenated Data
If you need to change the information on the list, you’ll have to do it in the source cells the formula refers to.
Click on any cell with the combined names and you’ll see that this target cell does not contain the text itself, in this case the full name, but rather the function and reference to other cells in the table, along with a single space we included in the second field.
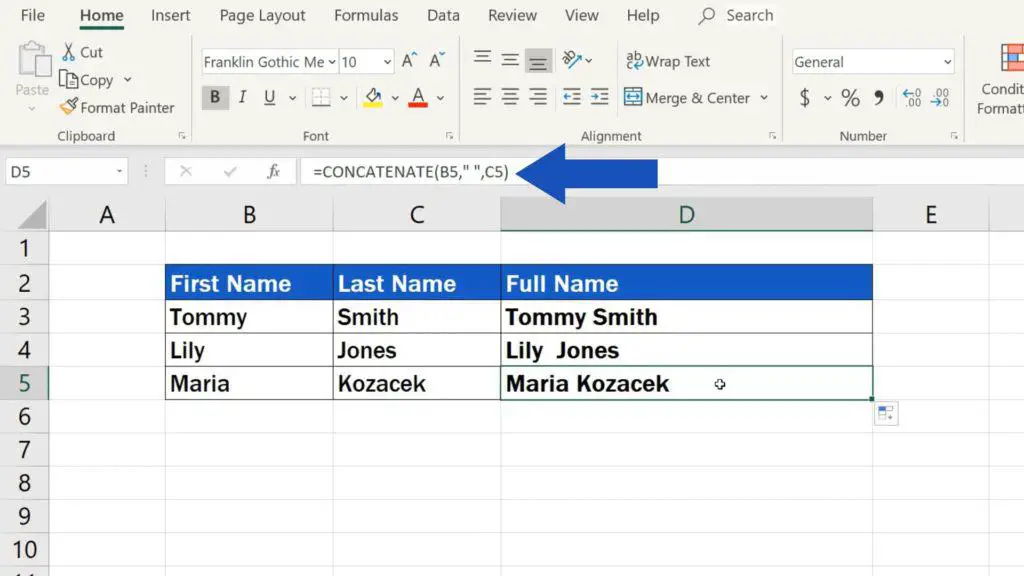
That’s why, if you need to change concatenated data, you’ll need to go to the source cell first and rewrite the information there. For instance, if we need to change Tommy to John, we’ll do so by changing the text in the cell B3.
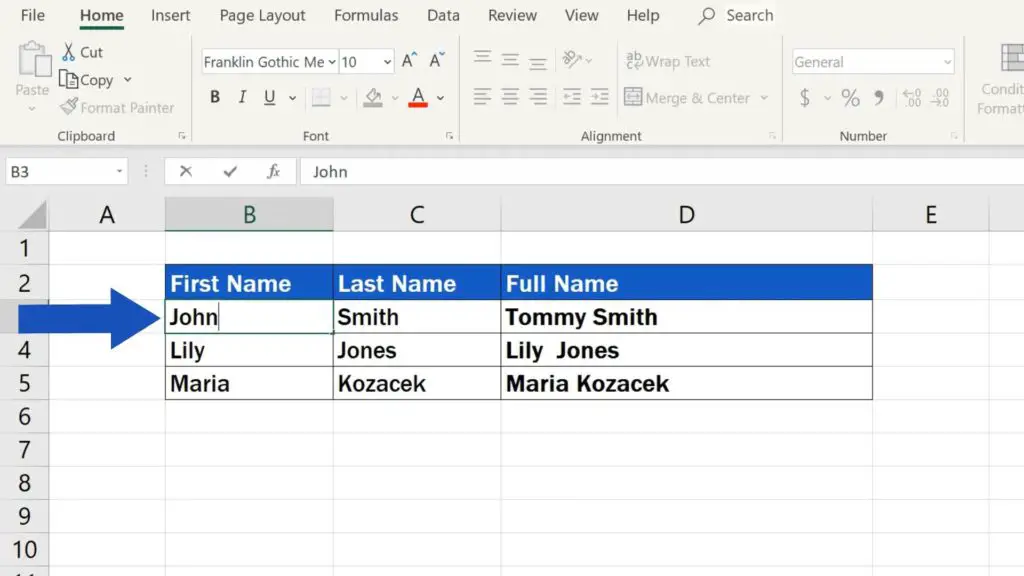
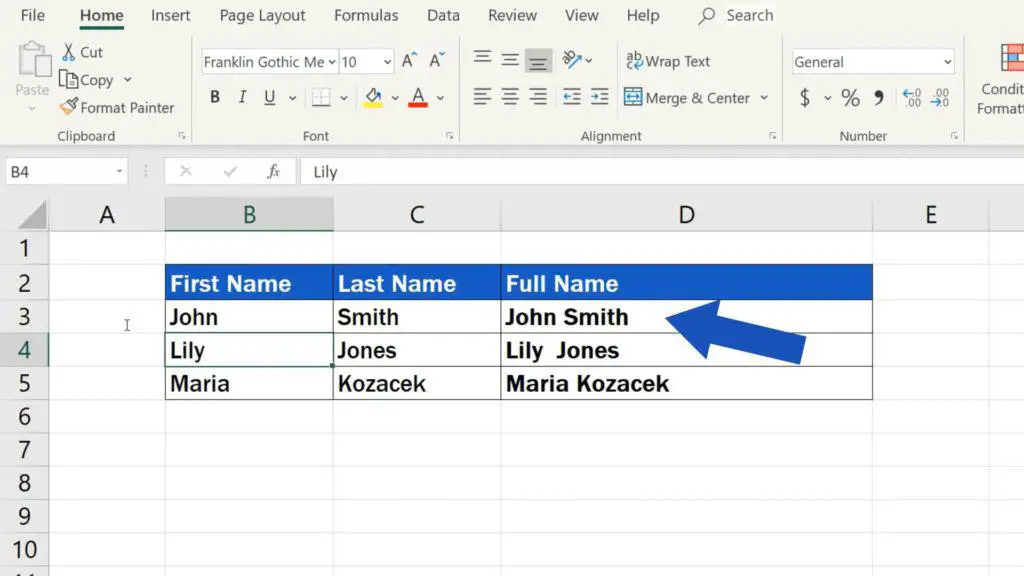
The change will reflect in the cell D3, which contains the combined names.
Are you wondering:
If you found this tutorial helpful, give us a like and watch other video tutorials by EasyClick Academy. Learn how to use Excel in a quick and easy way!
Is this your first time on EasyClick? We’ll be more than happy to welcome you in our online community. Hit that Subscribe button and join the EasyClickers!
Thanks for watching and I’ll see you in the next tutorial!


