How to Calculate Age Using a Date of Birth in Excel (The Easy Way)
This video tutorial offers a step-by-step guide on how to calculate age using a date of birth in Excel. You’ll be able to find out the exact number of years that passed from a date of birth until now. It’s easier than you might think!
Let’s take a look!
Would you rather watch this tutorial? Click the play button below!
How to Use Function “DATEDIF”
The most suitable function to calculate age in Excel is the function DATEDIF.
Before you use the function, make sure the data table is formatted properly – the cells with dates must be formatted as Date and the cells to display the calculated age need to be formatted as Number.
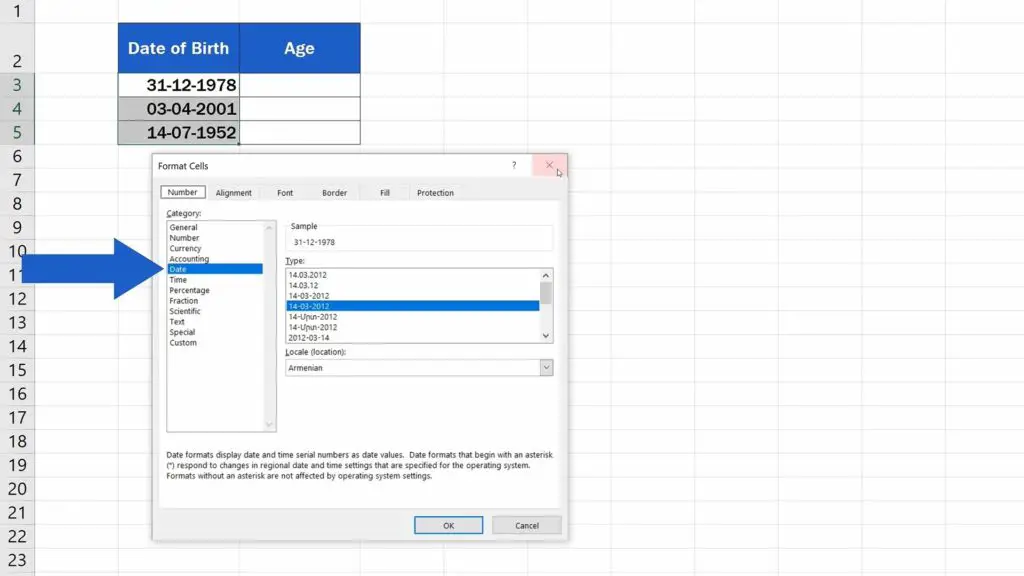
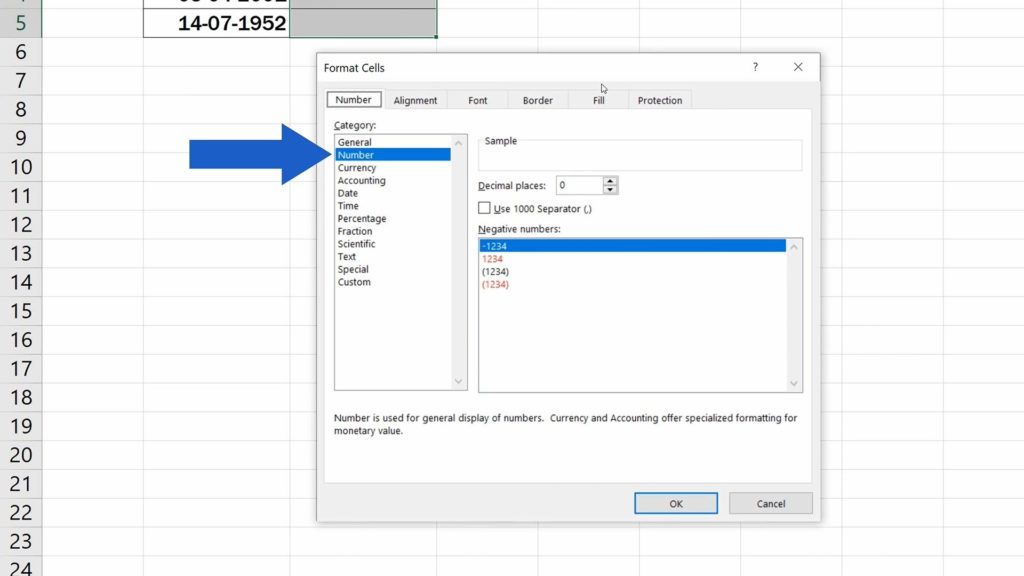
Select the cell to display the result, enter the equal sign and right after, type in ‘DATEDIF’.
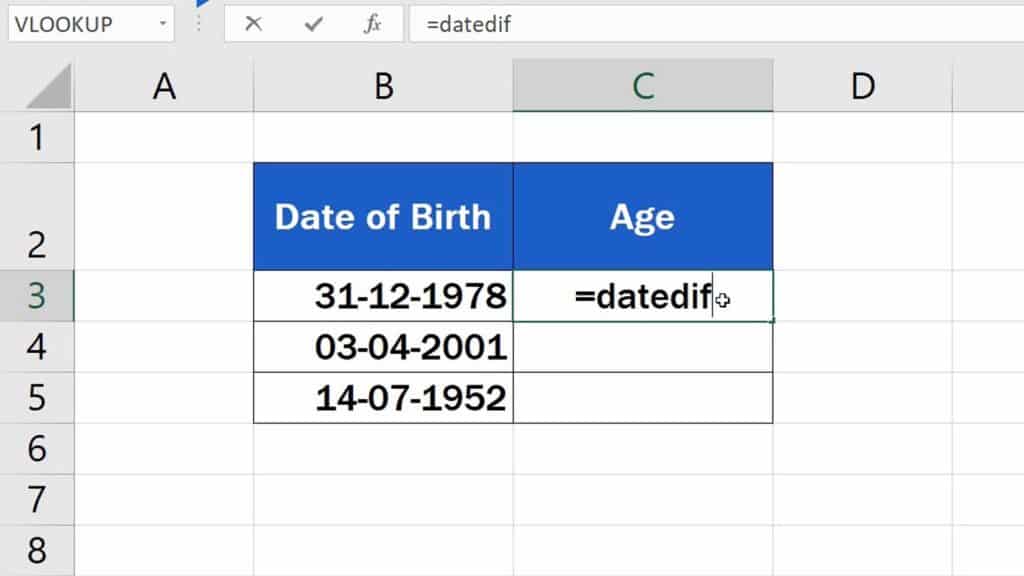
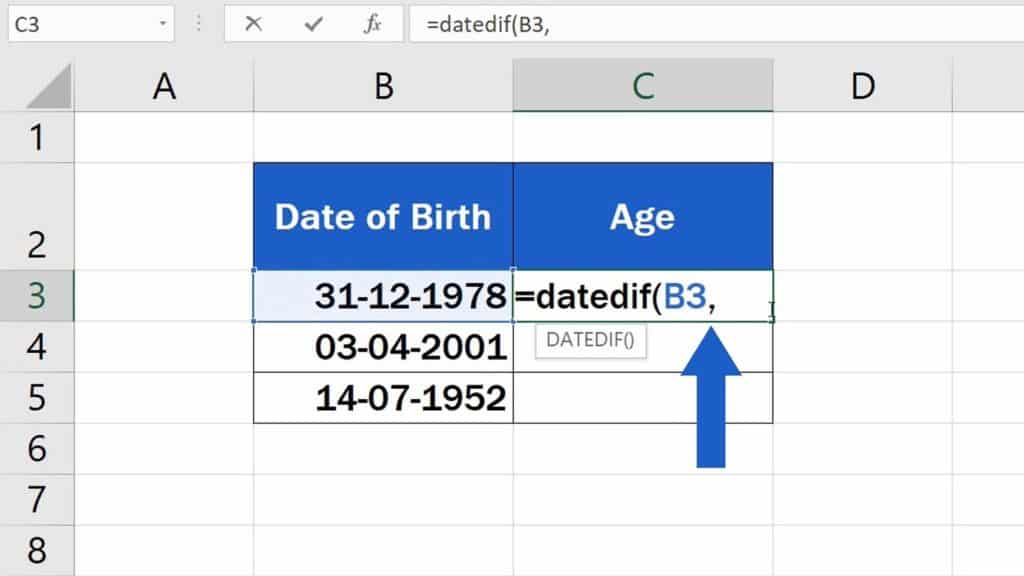
Now we need to enter three details.
How to Combine DATEDIF and TODAY Functions in Excel
The first one is Date of Birth, so click in the cell B3, then add a comma and Excel now needs today’s date.
This can be easily entered as TODAY Function. Type in ‘TODAY’ and carry on by adding the opening and the closing bracket. This command will ensure that Excel will always use the current date for its calculations, making the result always up to date.
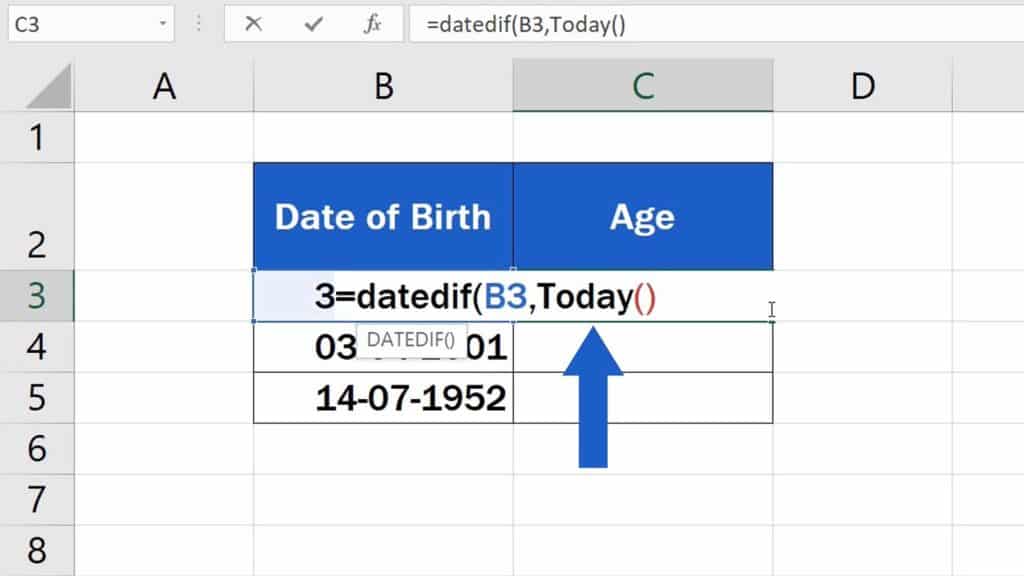
If you need to use any other date than the current one, you can use a separate cell to store this information and refer to this cell in the formula – just like we did with Date of Birth.
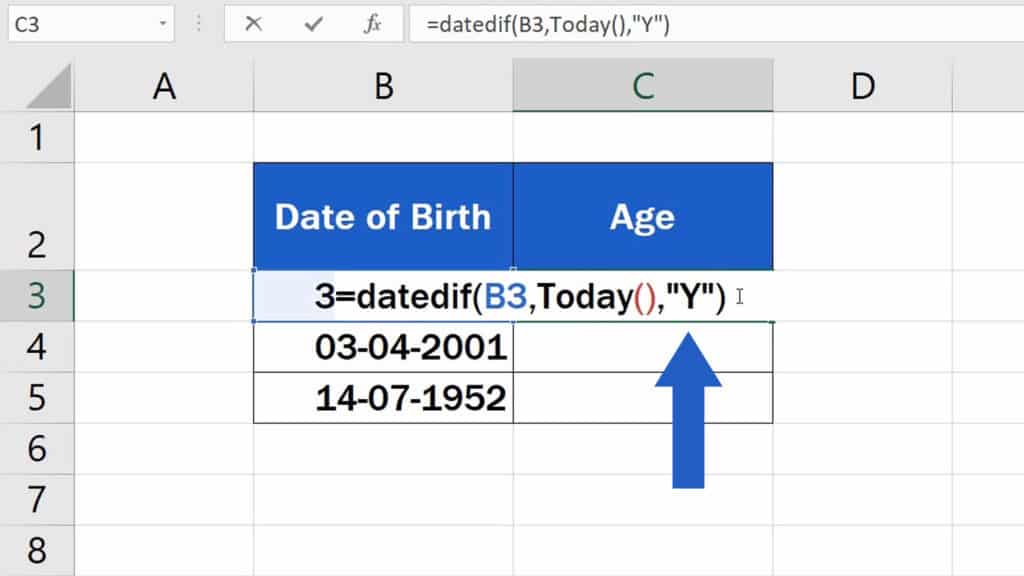
Since we want to use the current date, we’ll leave the function TODAY in the formula and move on to the next step. Add another comma and carry on typing Y in quotation marks for years, to find out the exact number of the completed years that passed between the date of birth and today’s date. Now just close the brackets and hit ‘Enter’. Good job!
How Can Simply Be the Function Used in the Other Rows in Excel
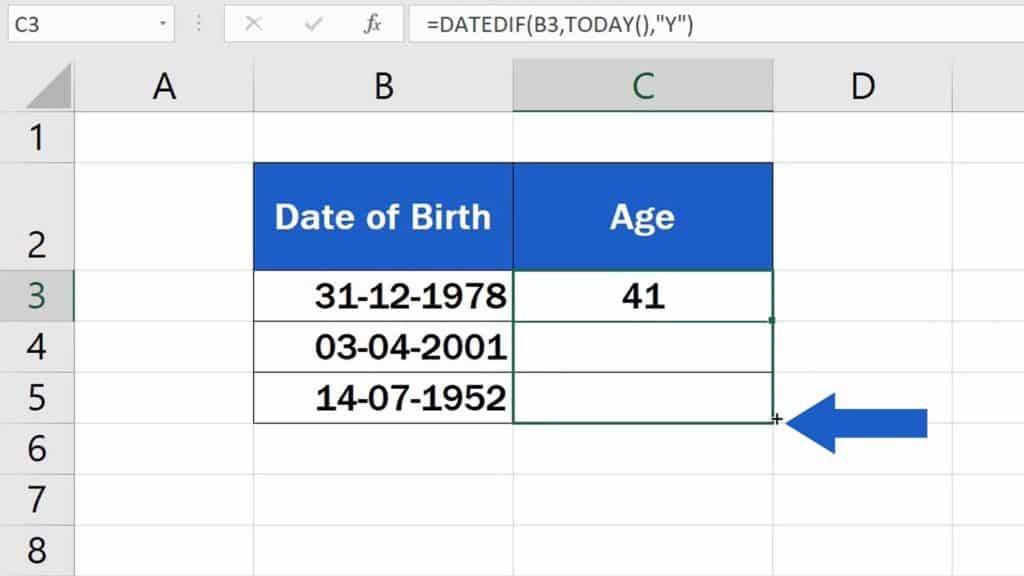
The function can be used to calculate age in the other rows, too. Simply copy the formula from the first cell by dragging down the bottom left corner of that cell. And that’s all it takes!
Each row now contains the calculated age as the number of completed years that passed between the date of birth and today.
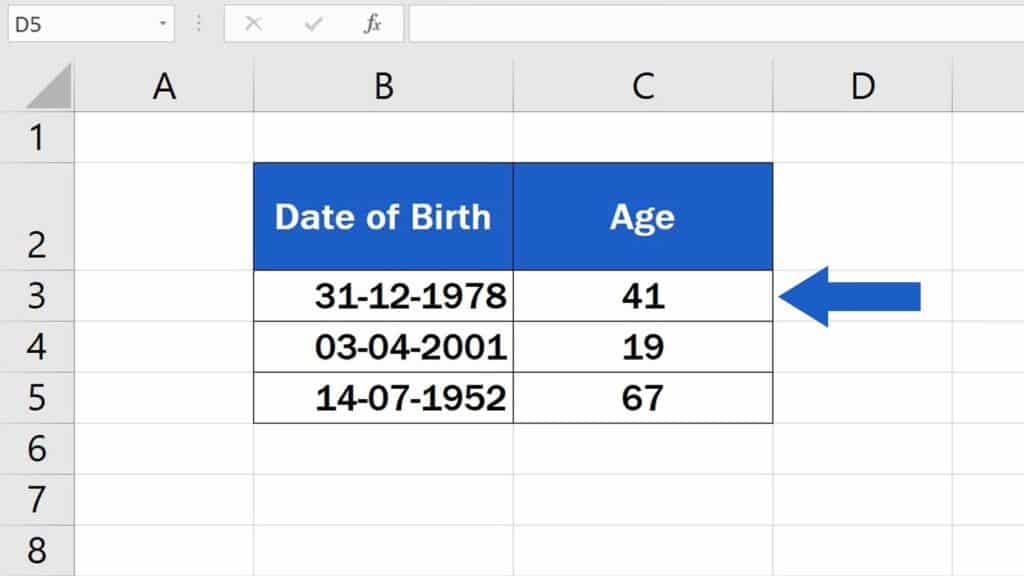
To find out the exact number of days or months, see our tutorial on how to calculate the difference between two dates in Excel. Check out the link in the list below!
Don’t miss out a great opportunity to learn:
- How to Calculate Difference Between Two Dates in Excel
- How to Change Negative Numbers to Positive in Excel
- How to Find the Largest Number in Excel
If you found this tutorial helpful, give us a like and watch other video tutorials by EasyClick Academy. Learn how to use Excel in a quick and easy way!
Is this your first time on EasyClick? We’ll be more than happy to welcome you in our online community. Hit that Subscribe button and join the EasyClickers!
Thanks for watching and I’ll see you in the next tutorial!


