How to Autofill Dates in Excel (Quick and Easy)
In today’s video tutorial, we’re going to talk about how to autofill dates in Excel. You’ll see how Excel can quickly create a series of dates of any length with no tedious typing needed on your side.
Getting curious? Join us now!
How to Enter the Starting Date
To create a series of dates of any length automatically, first, we need to type in the very first day of the series into the cell where we want the series to start.
Which means that in cell B3 we enter let’s say 4-17-2028.
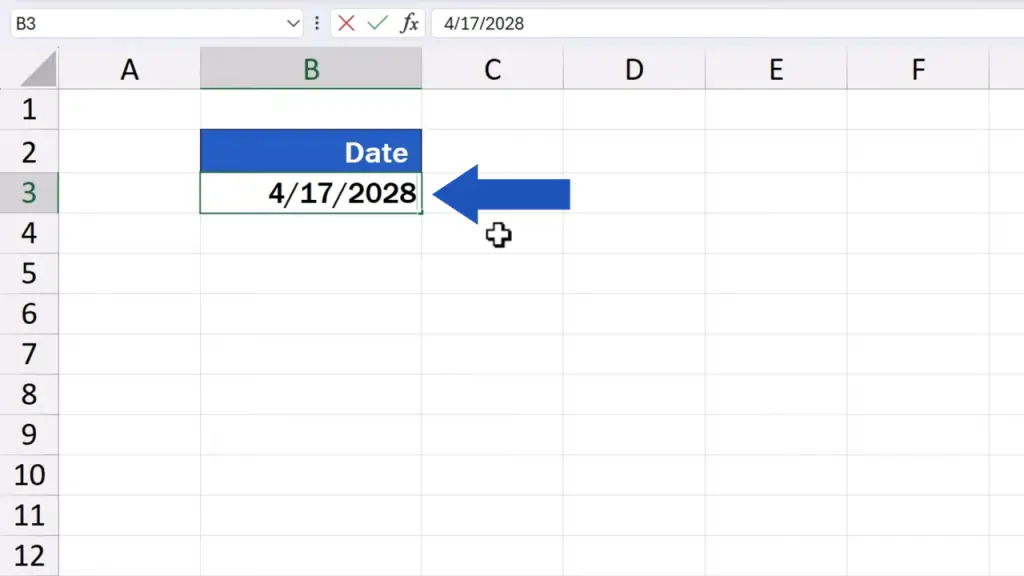
It’s important to keep in mind that various countries use different date formats. For example, in the United States, the preferred format is month, day, year. Of course, we can easily change the date format in Excel. Here we’ll work with the American date format, so we’ll keep the current settings.
How to Access the Fill Series Function
As soon as we’ve entered the first date, we click on the cell that stores the date and up here, in the Home tab.
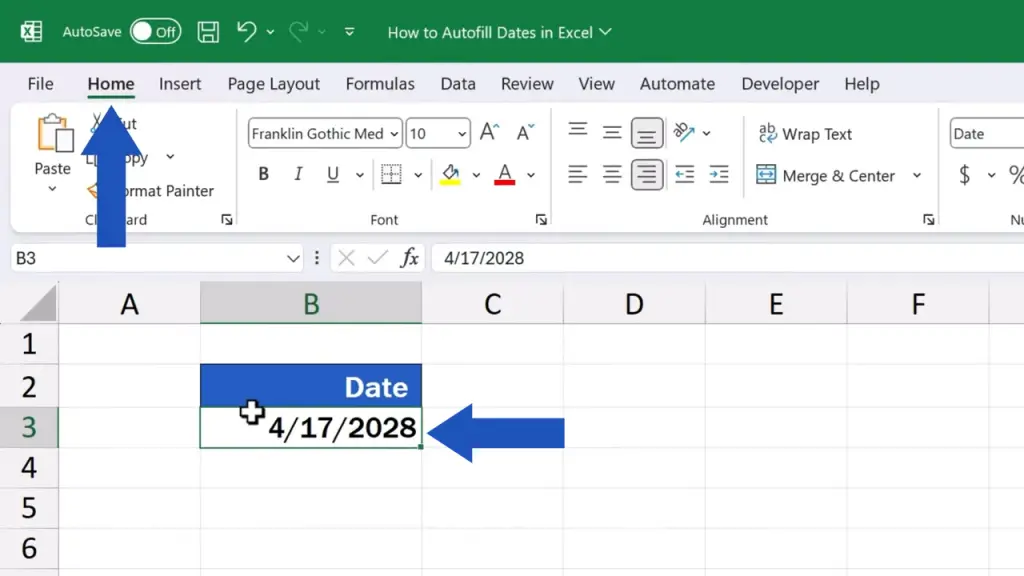
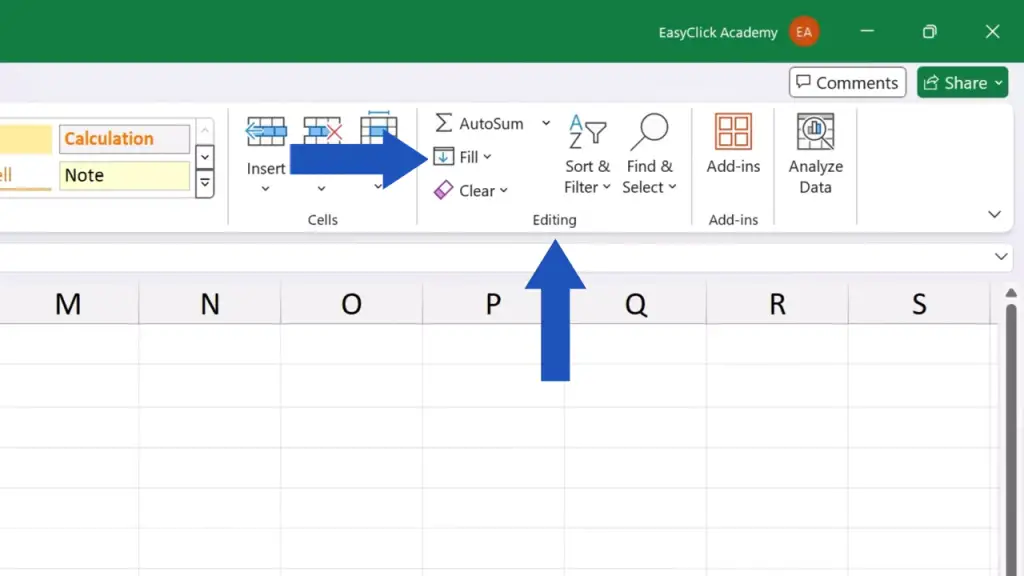
We’ll find the section Editing where we look for the ‘Fill’ button.
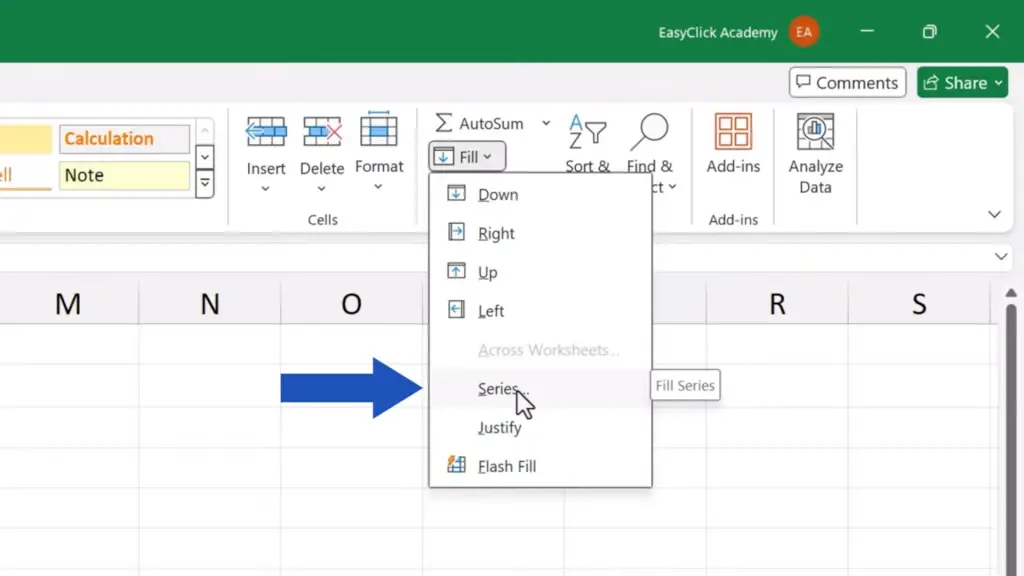
And there we select ‘Series’.
How to Choose the “Series in”, “Type” and “Date Unit”
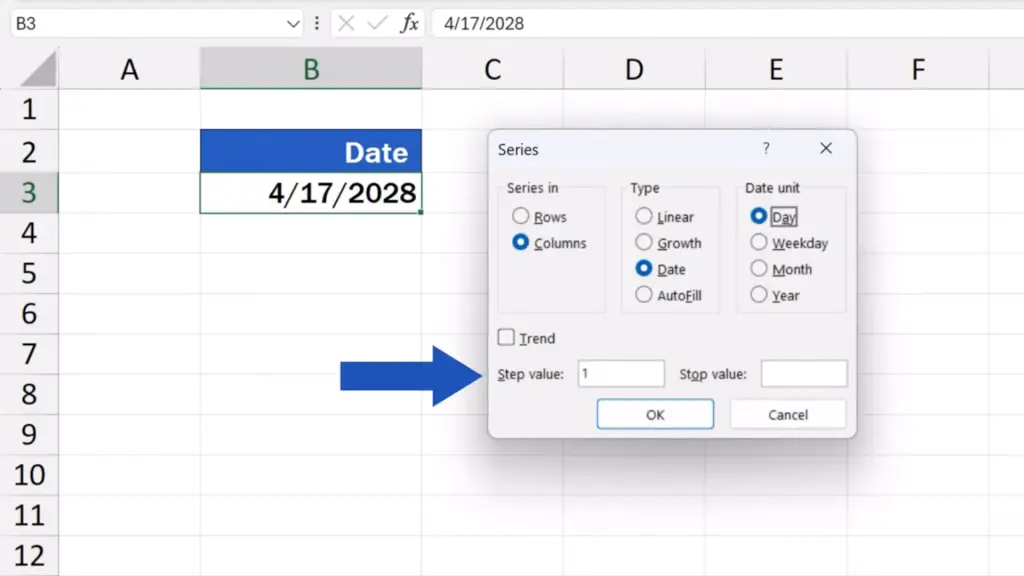
A window pops up where we can define specifically what the series of dates should look like.
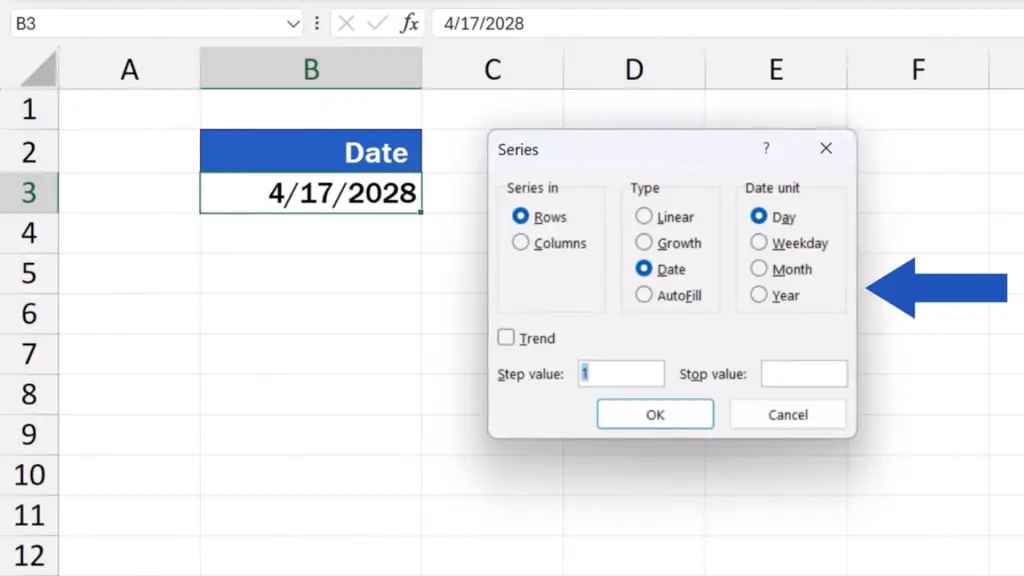
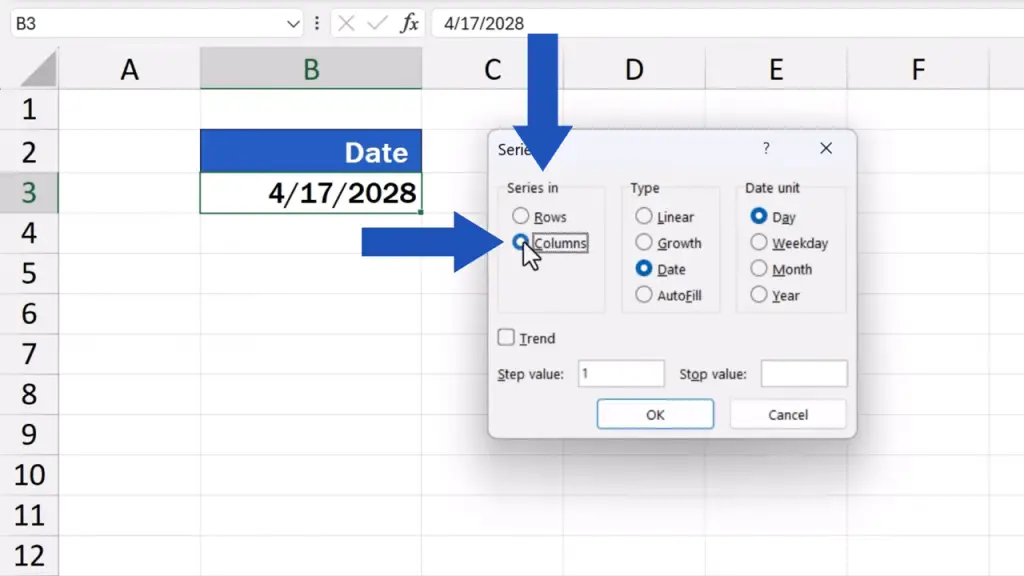
In the field ‘Series in’, we can specify whether we want the series to run in rows or columns. We want to have the dates running one below another, so we select ‘Columns’.
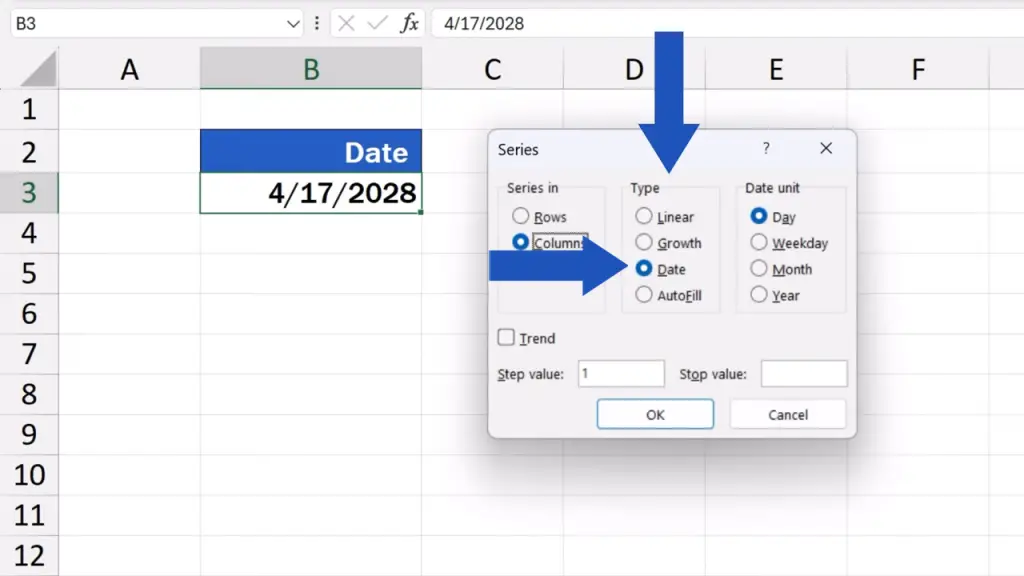
Since we want a series of dates, we need to select ‘Dates’ in the next field – ‘Type’. It’s important to make sure the correct type’s been chosen. If we don’t select ‘Date’, we won’t be able to set ‘Date unit’ in the field on the right.
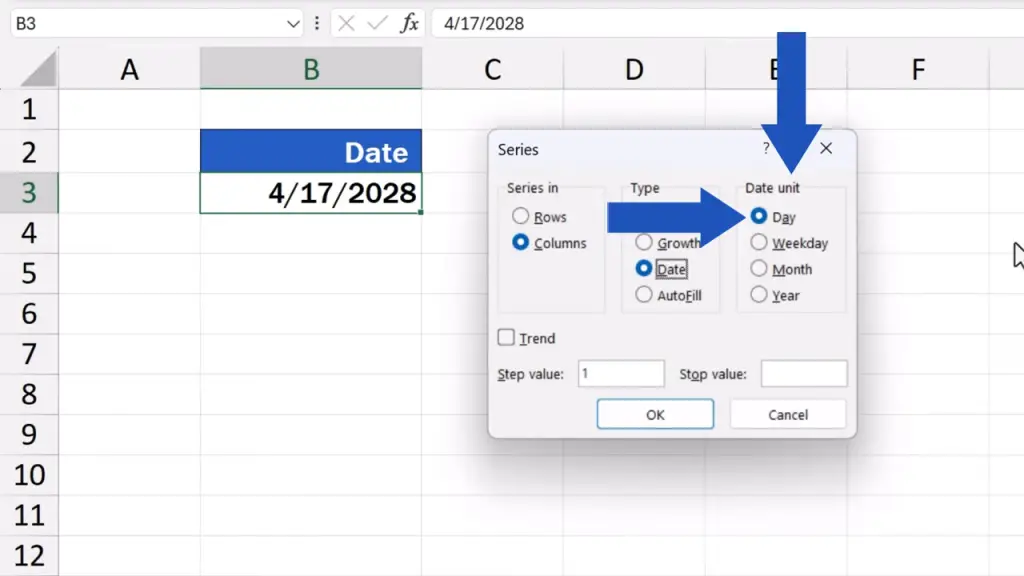
Once we’ve selected ‘Date’, we can move on to select ‘Date unit’. Through this option we can define whether we want the series to run by days, in which case we go for ‘Day’, or to show working days only, which is ‘Weekday’ here. We can also go by month or year.
Here, we want to have a series of dates showing day by day, so we keep the option ‘Day’ and move on.
How to Set the Step Value
Down here we can set the ‘Step value’. To show every day, we need to enter 1. To show every other day, there needs to be the value 2, every third day, we’ve got to type in 3.
Now, we keep the step value 1 and we’ll move on to have a look at the last option.
How to Define the Stop Value and Complete the Series
‘Stop value’ defines the limit of the series, which is the date when our series of dates will end. We need to enter the date format we’re using in the series.
So, here we’ll type in ‘4/25/2028’.
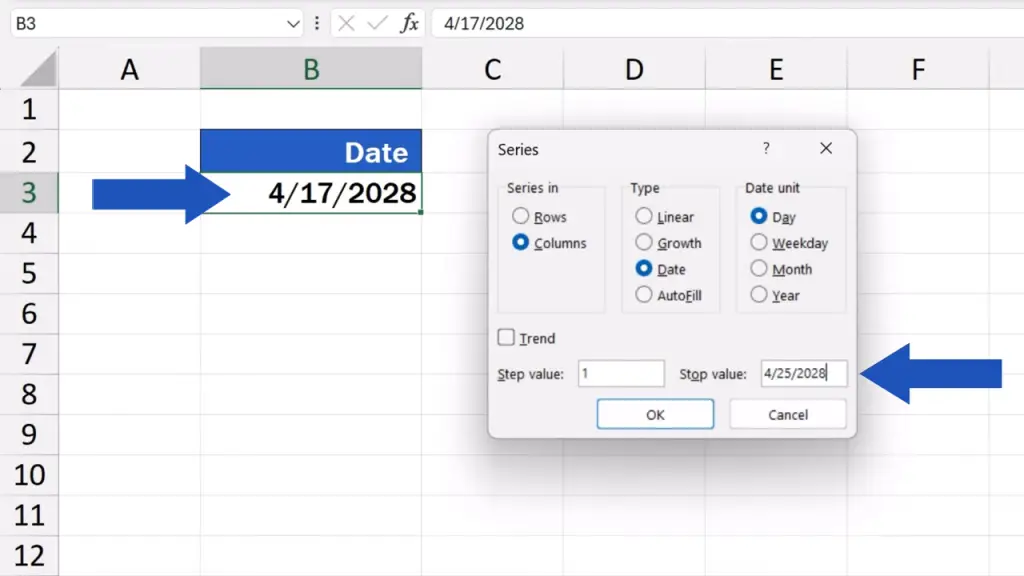
Now we just press ‘OK’ and that’s all it takes!
The series of dates appears in the column, day by day up to the 25th of April 2028. Just as we wanted.
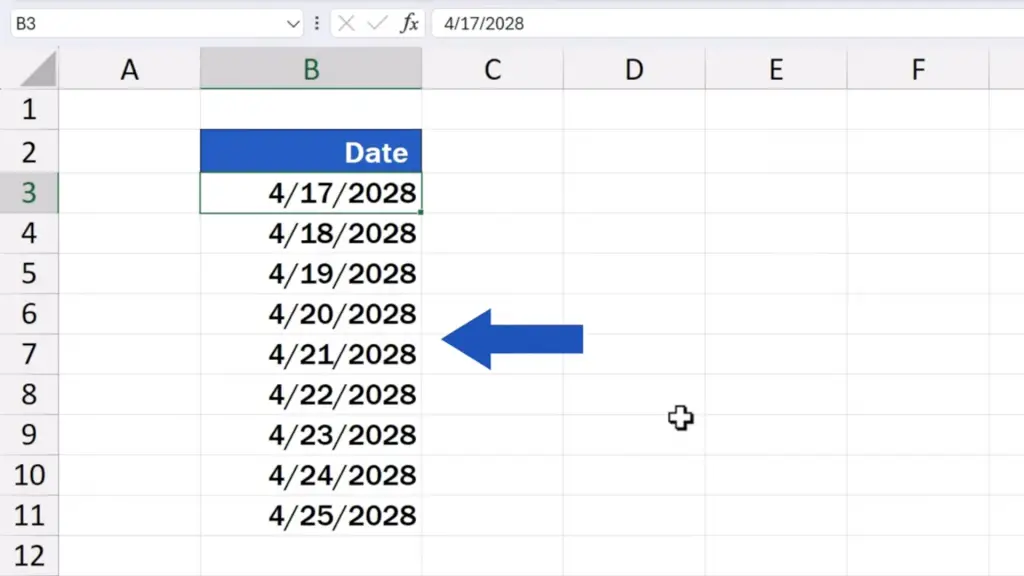
This way you can create a series of dates of any length with no need of tediously typing the dates out one by one.
Don’t miss out a great opportunity to learn:
If you found this tutorial helpful, give us a like and watch other tutorials by EasyClick Academy. Learn how to use Excel in a quick and easy way!
Is this your first time on EasyClick? We’ll be more than happy to welcome you in our online community. Hit that Subscribe button and join the EasyClickers!
Thanks for watching and I’ll see you in the next tutorial!


