How to Add Developer Tab in Excel
Today we’ll be talking about how to add the Developer tab in Excel, which is necessary if you want to create VBA applications, design forms, create macros, or import and export XML data.
Let’s get into it right away!
Would you rather watch this tutorial? Click the play button below!
How to Add Developer Tab in Excel
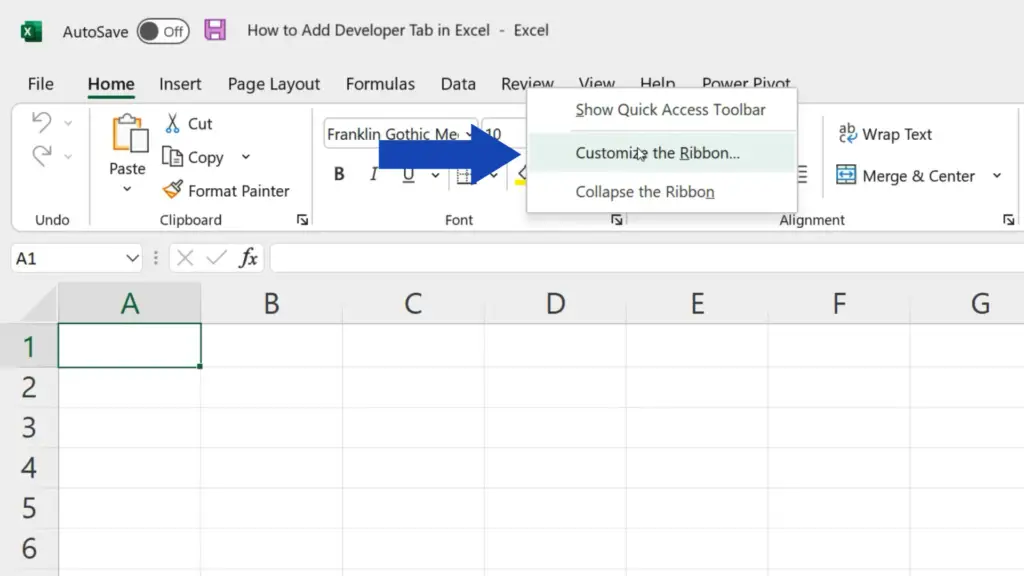
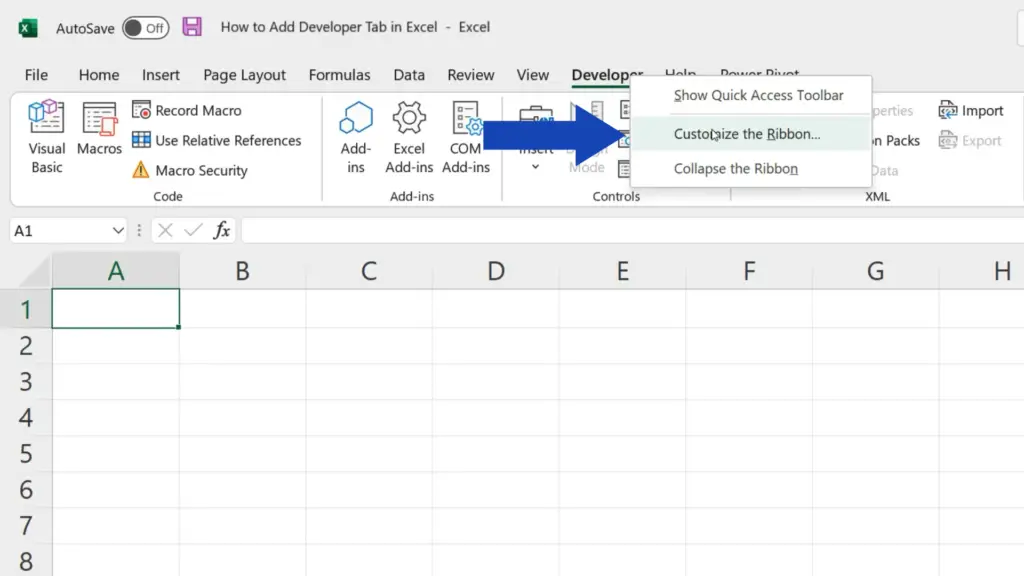
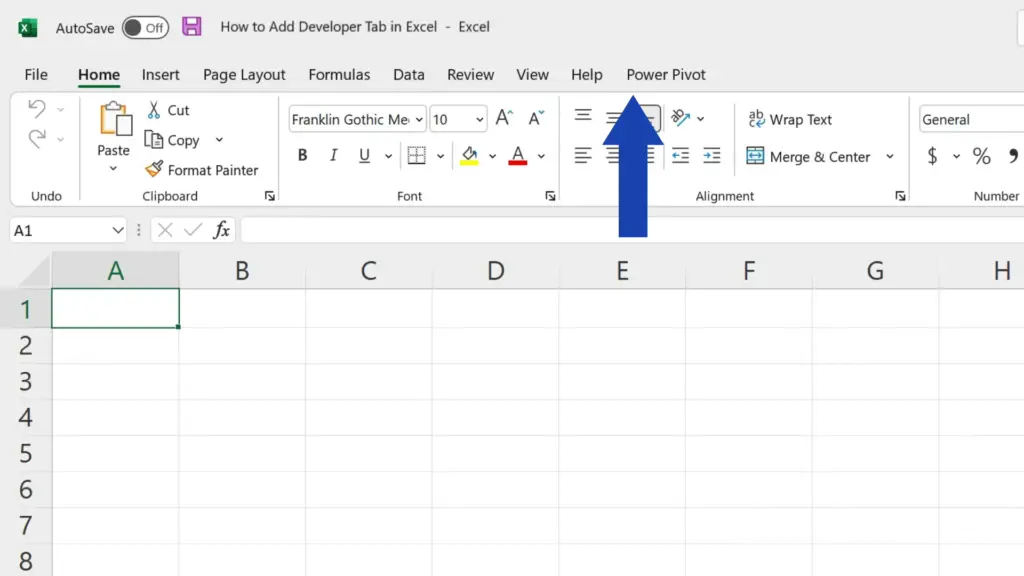
To add the Developer tab, right-click on any tab name up here, then click on the option ‘Customize the Ribbon’ to see this pop-up window.

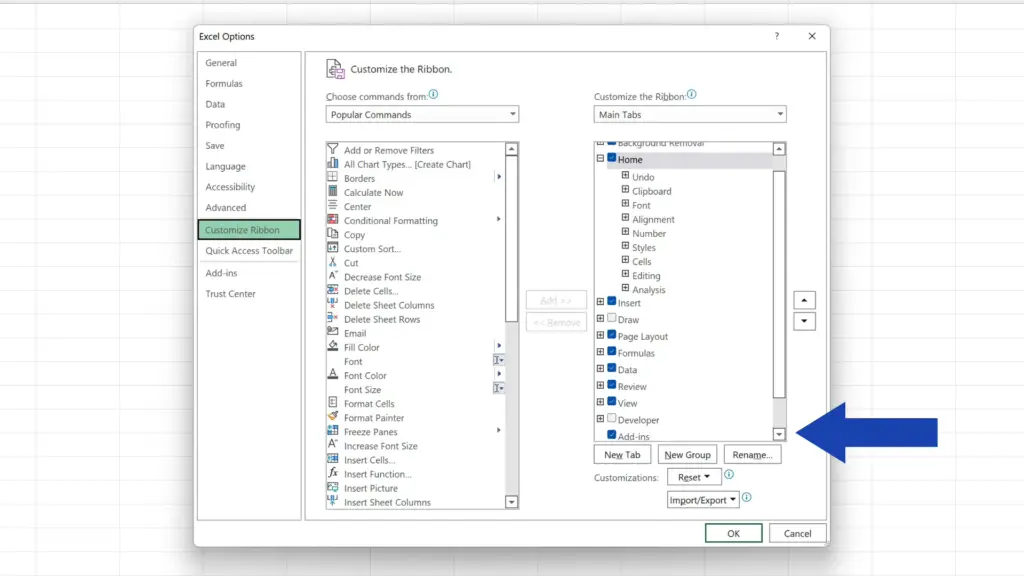
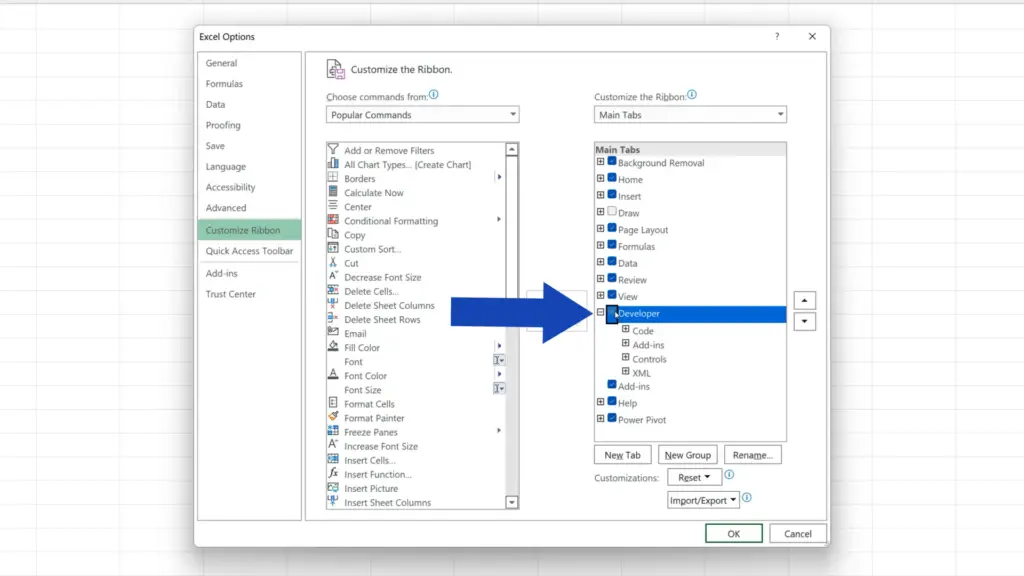
Look on the right-hand side where you can find a list of tab names and you’ll see all the tabs you can add.
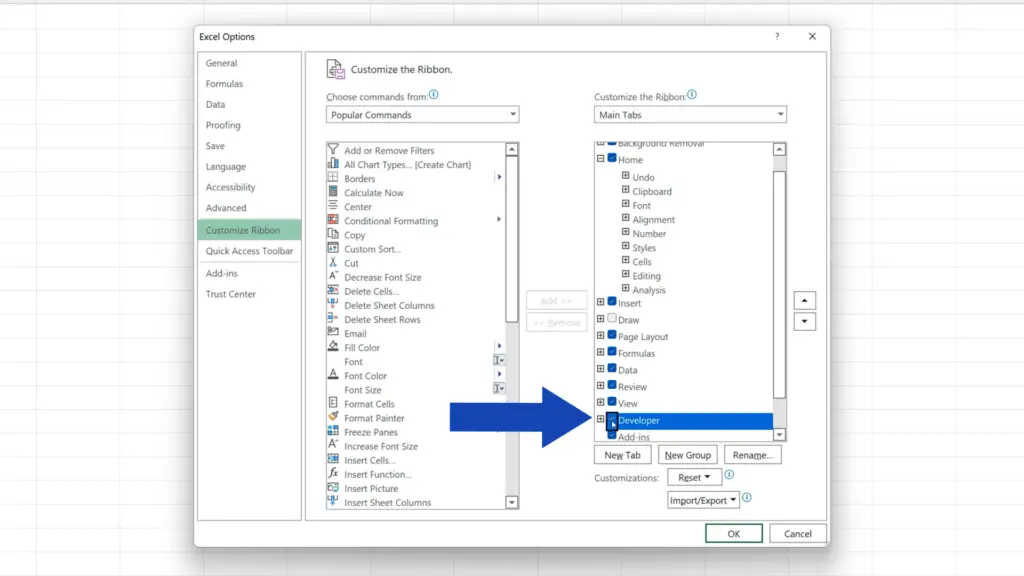
We want to add the Developer tab, so we’ll select that one, click on OK and that’s it!
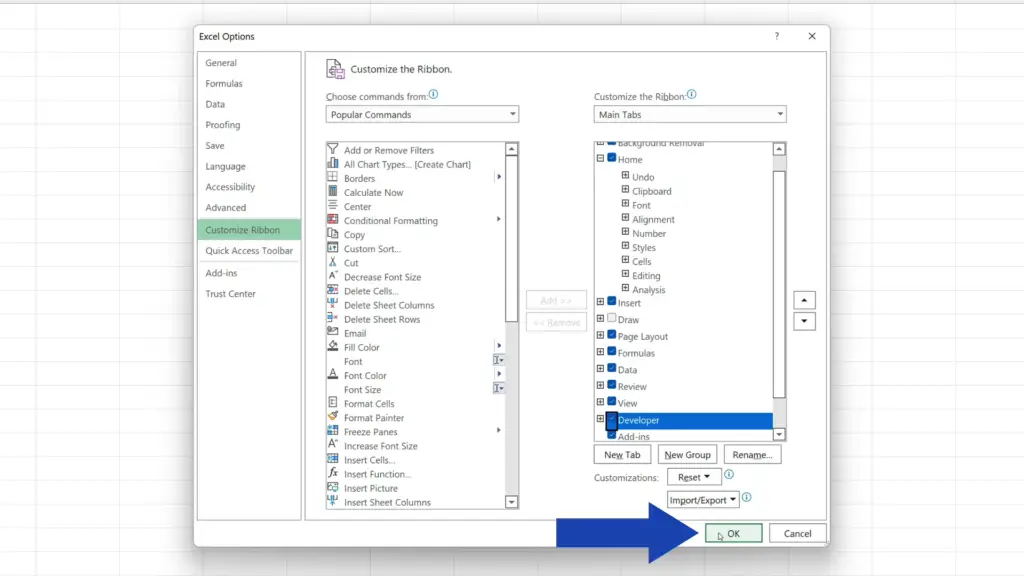
The tab’s there and we can start using everything it offers. To have a closer look at it, we’ll be discussing its contents in the upcoming tutorials.
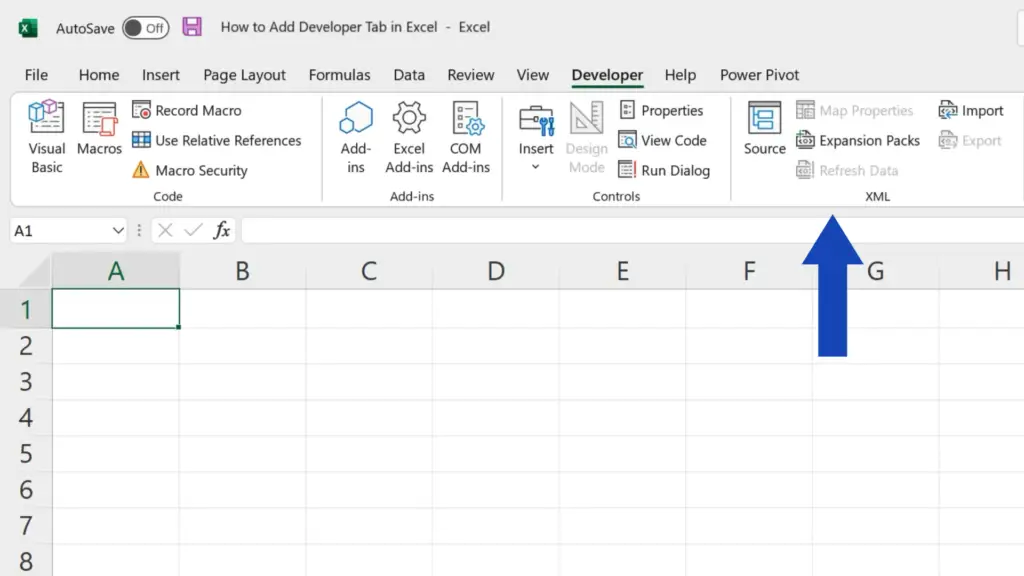
If you use these steps to add the Developer tab, it’ll always be at your disposal even if you restart Excel application.
How to Remove the Developer Tab from the Ribbon
And before we wrap it up, we’ll have a look at how to remove the Developer tab from the Ribbon in case you don’t need to show it among the tabs anymore.
We basically do the same as before – right-click on a tab name, click on ‘Customize the Ribbon’, now unselect the Developer tab and click on OK.
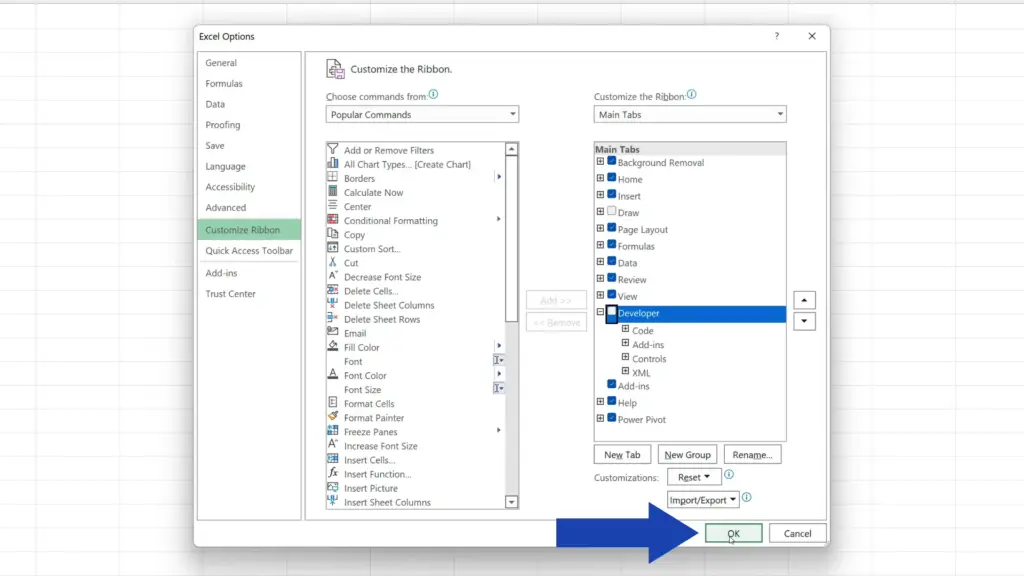
Done! The tab’s been removed from the Ribbon.
Don’t miss out a great opportunity to learn:
- How to Show or Hide the Ribbon in Excel (Quick and Easy)
- How to Show or Hide the Formula Bar in Excel (Quick and Easy)
- How to Hide Gridlines in Excel (the Easy Way)
If you found this tutorial helpful, give us a like and watch other tutorials by EasyClick Academy. Learn how to use Excel in a quick and easy way!
Is this your first time on EasyClick? We’ll be more than happy to welcome you in our online community. Hit that Subscribe button and join the EasyClickers!
Thanks for watching and I’ll see you in the next tutorial!


